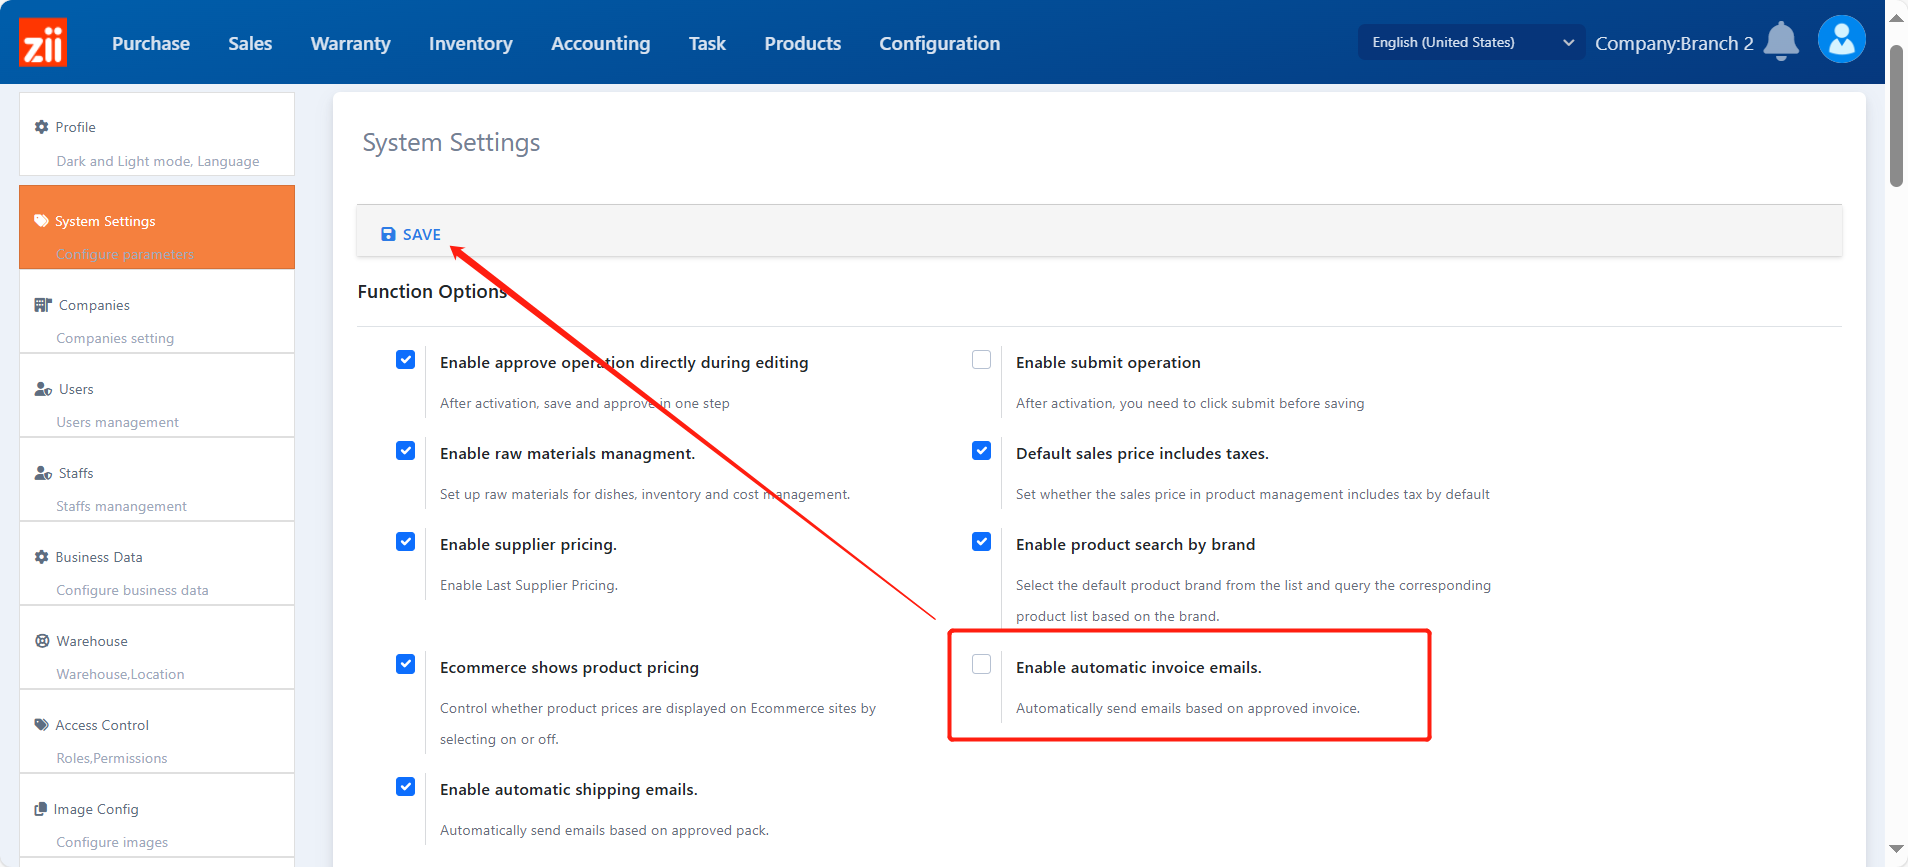
Enable auto-email invoices
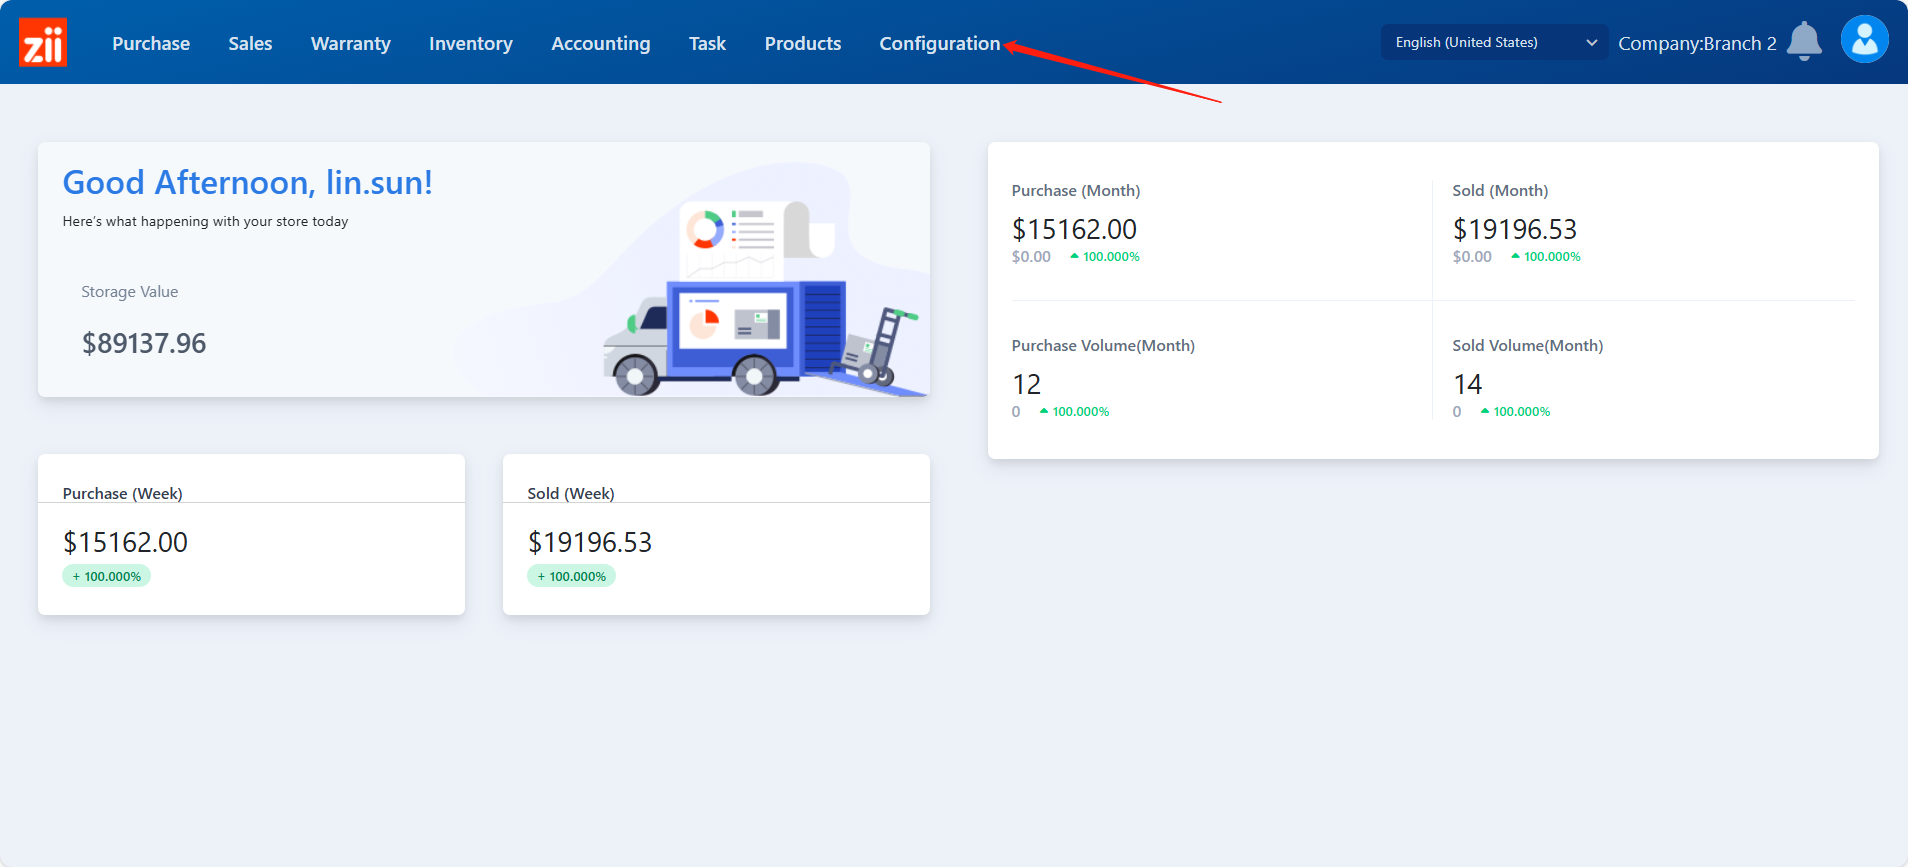
Go to “Configuration”.
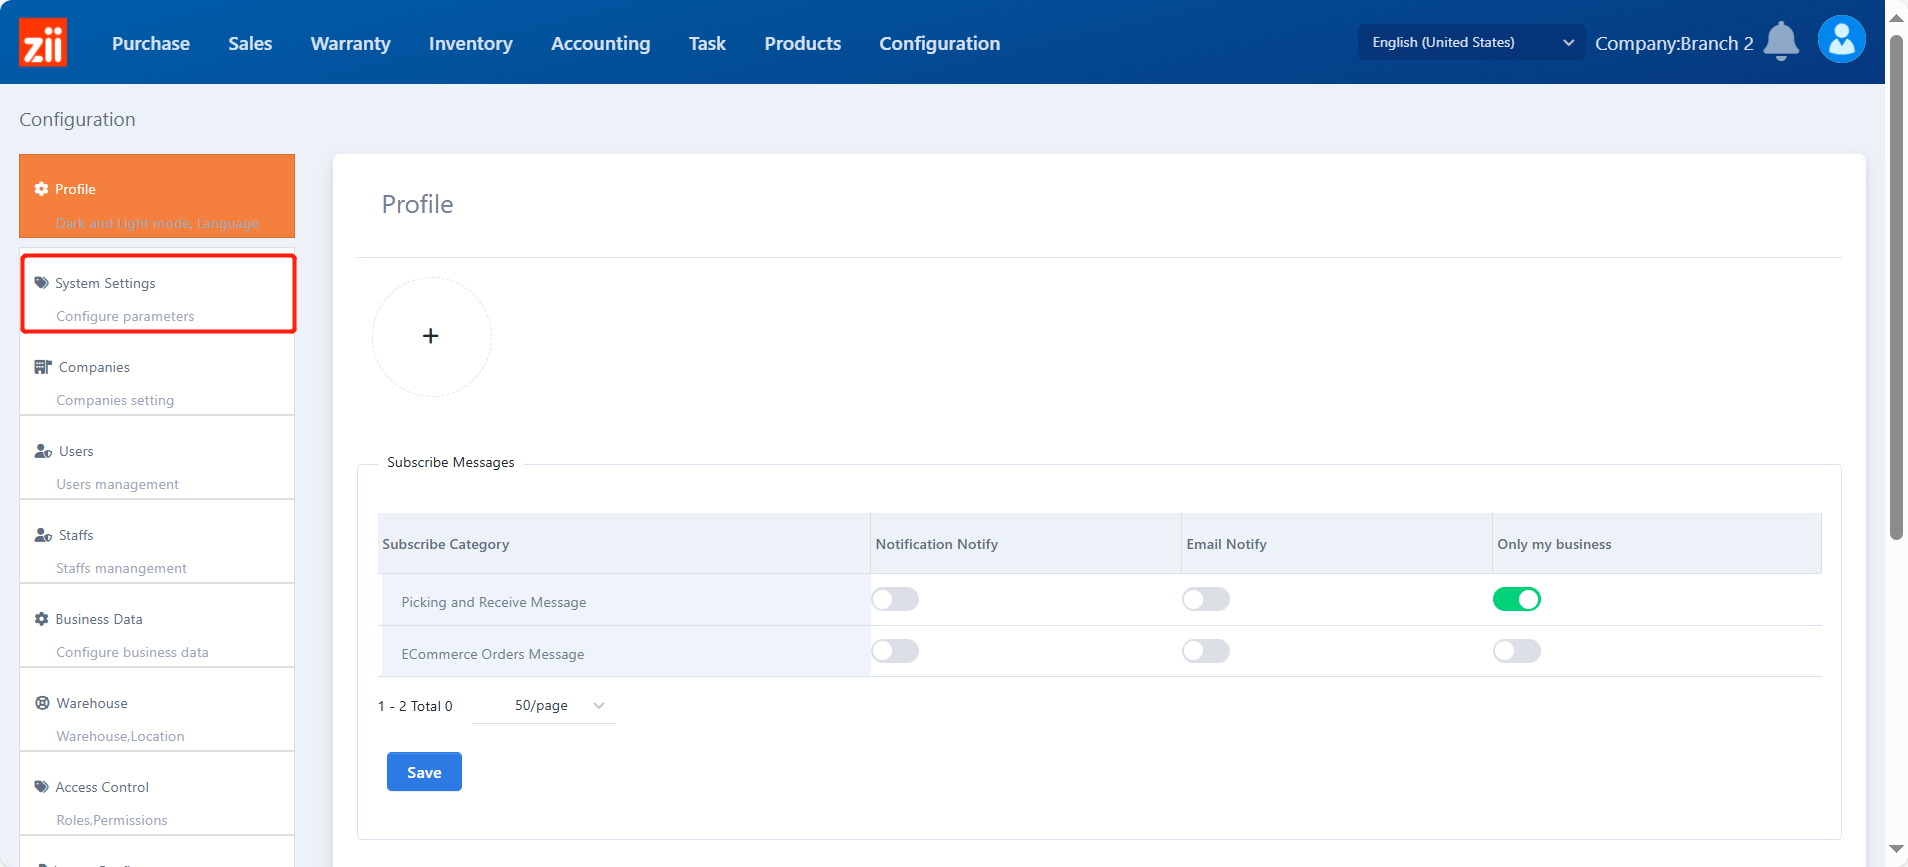
Go to “System Settings”.
Tick “Enable automatic invoice emails” and click “Save”.
Configure the email address
Go to “Customers” under “Sales”.

Click “Edit” of the customer.

Enter an email address under “Contact info” and click “SAVE”.
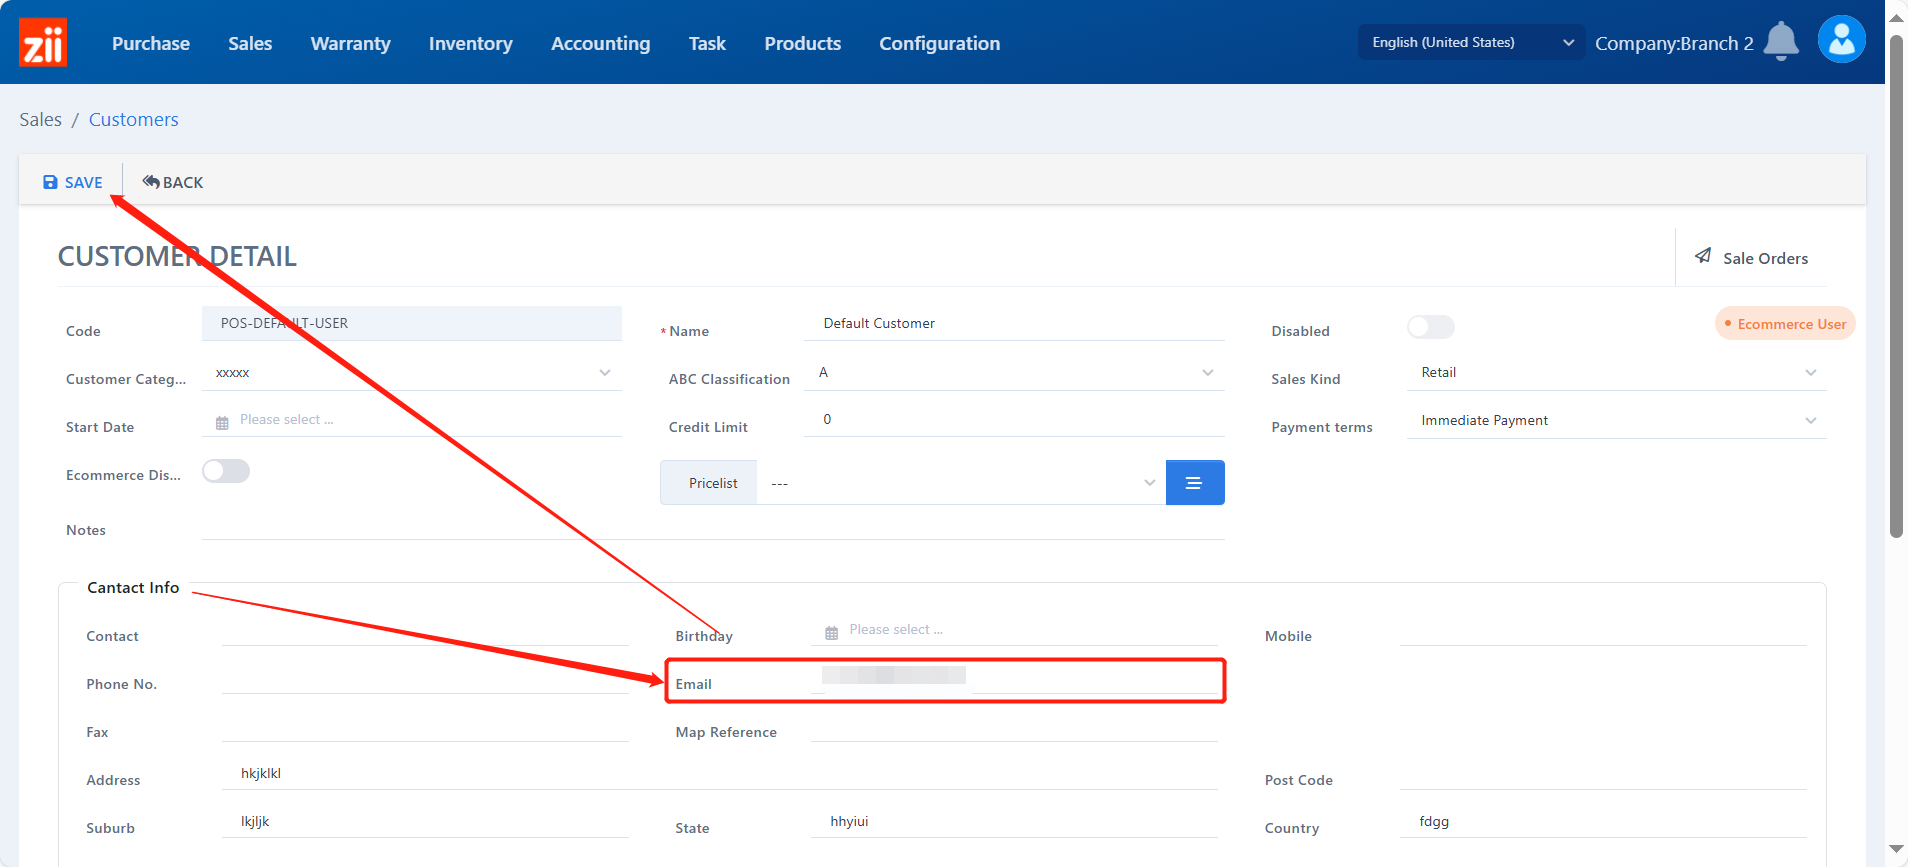
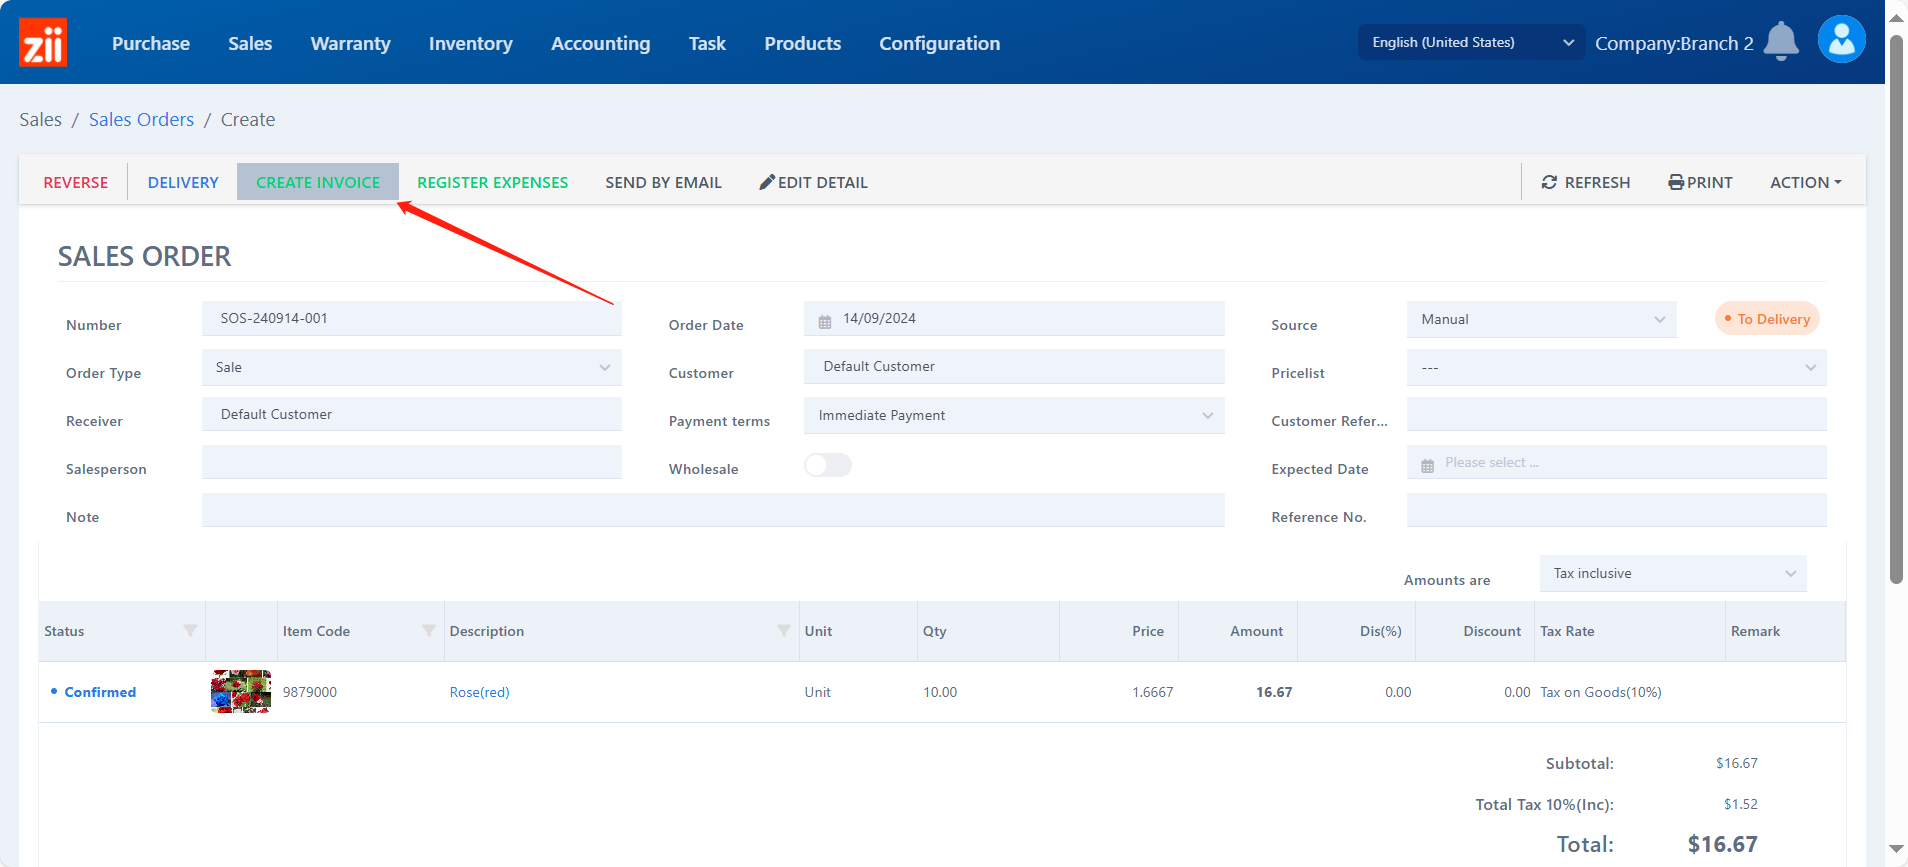
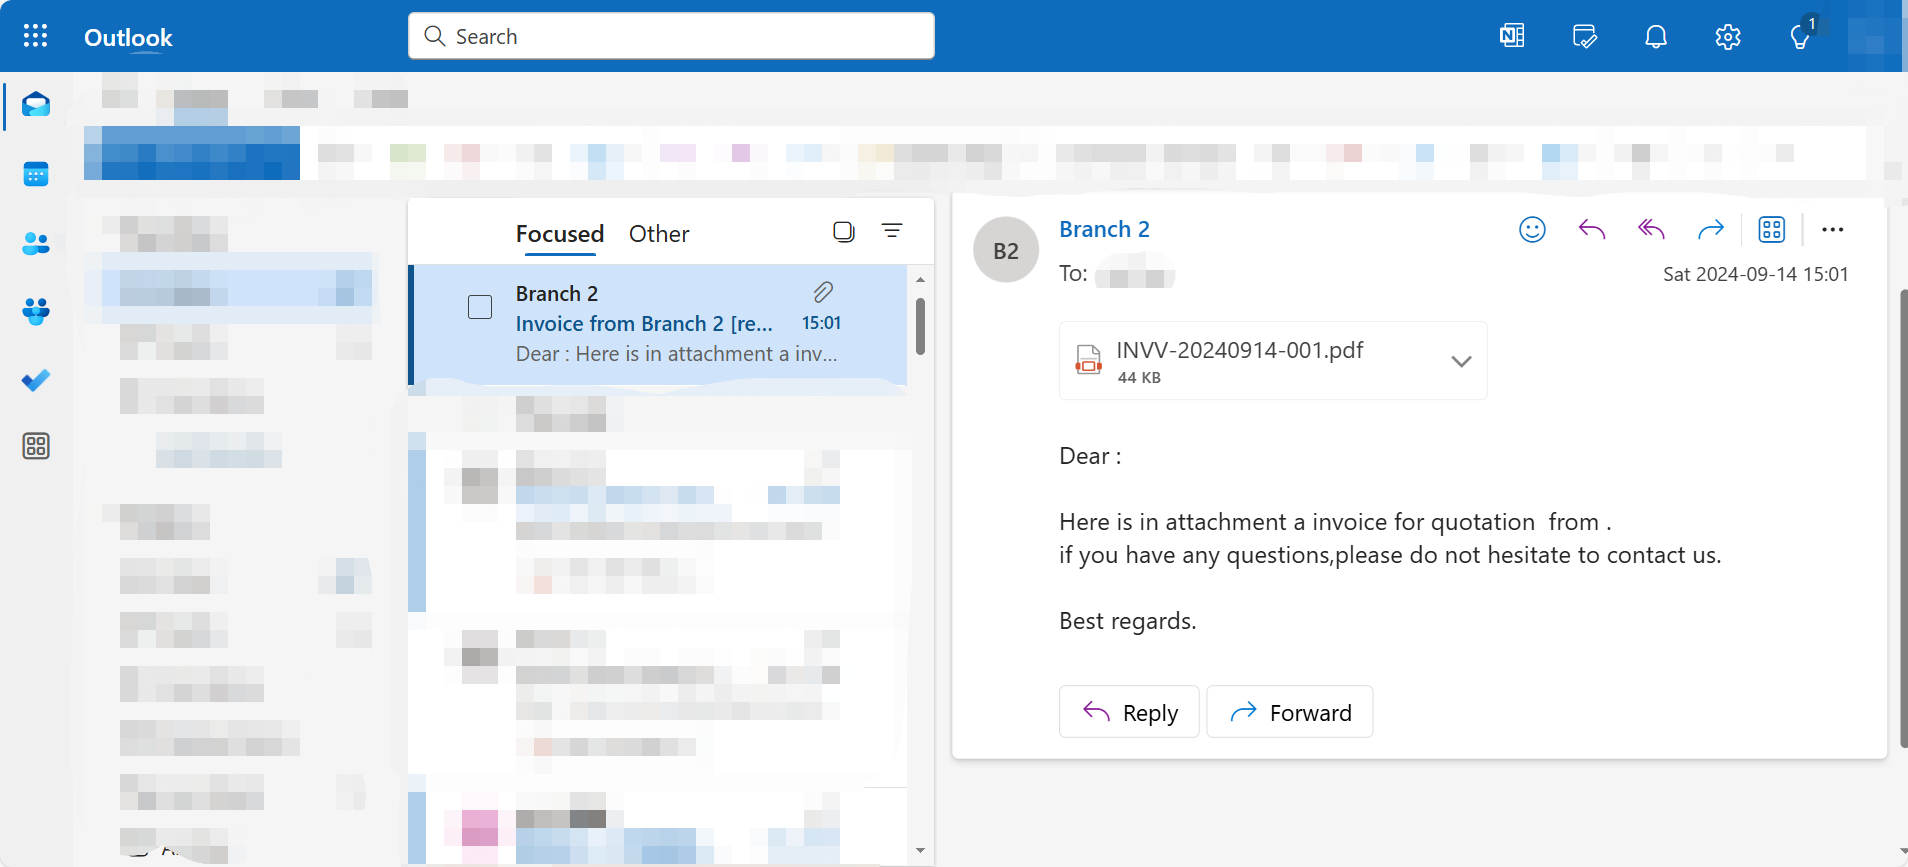
Then an email attached with the invoice PDF file will be sent to this email after an invoice is created.