Choosing Integrated Platform
Log in to Web Inventory (ziicloud.com)
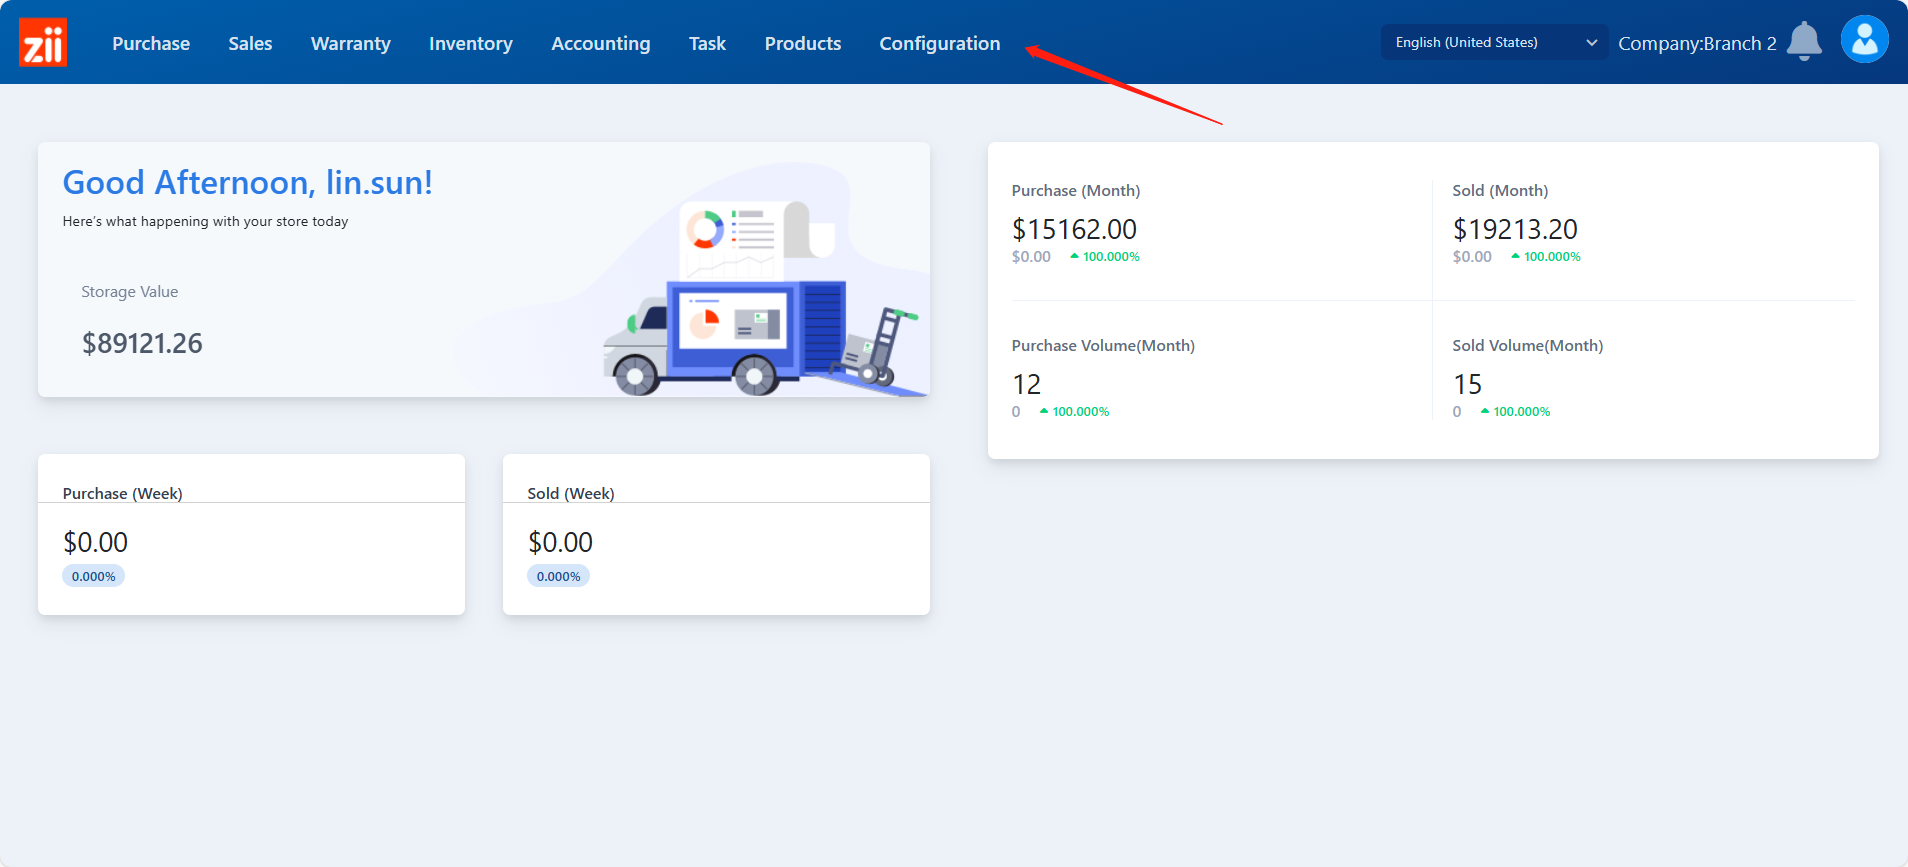
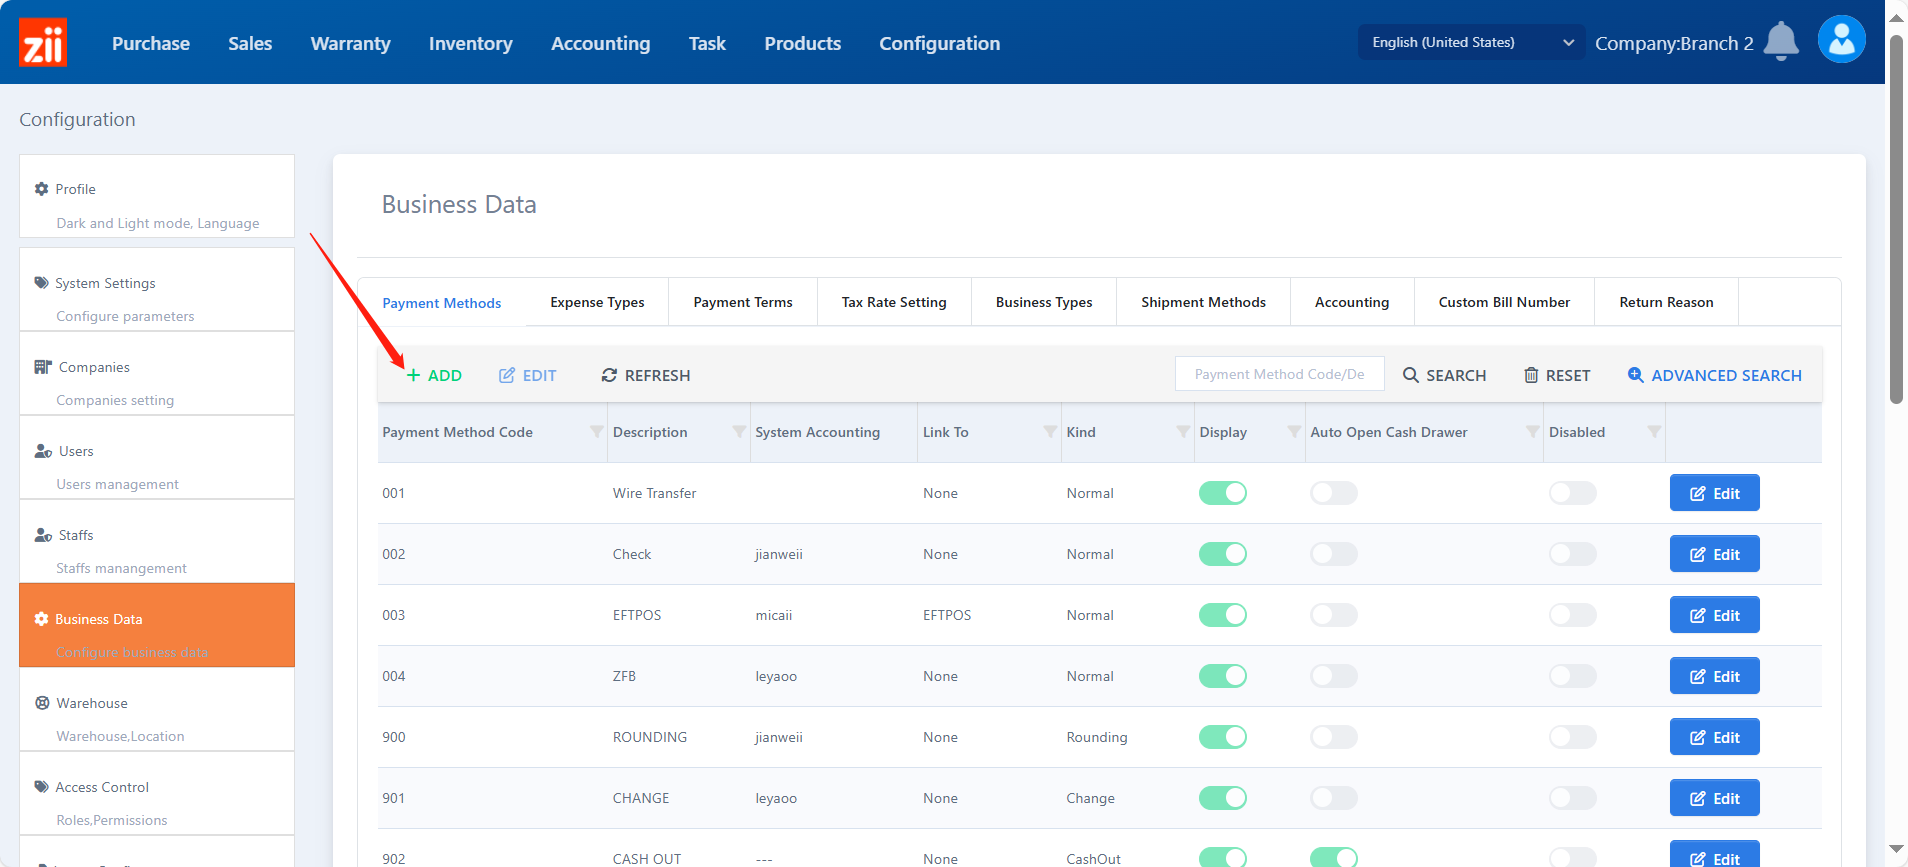
Go to “Configuration”.
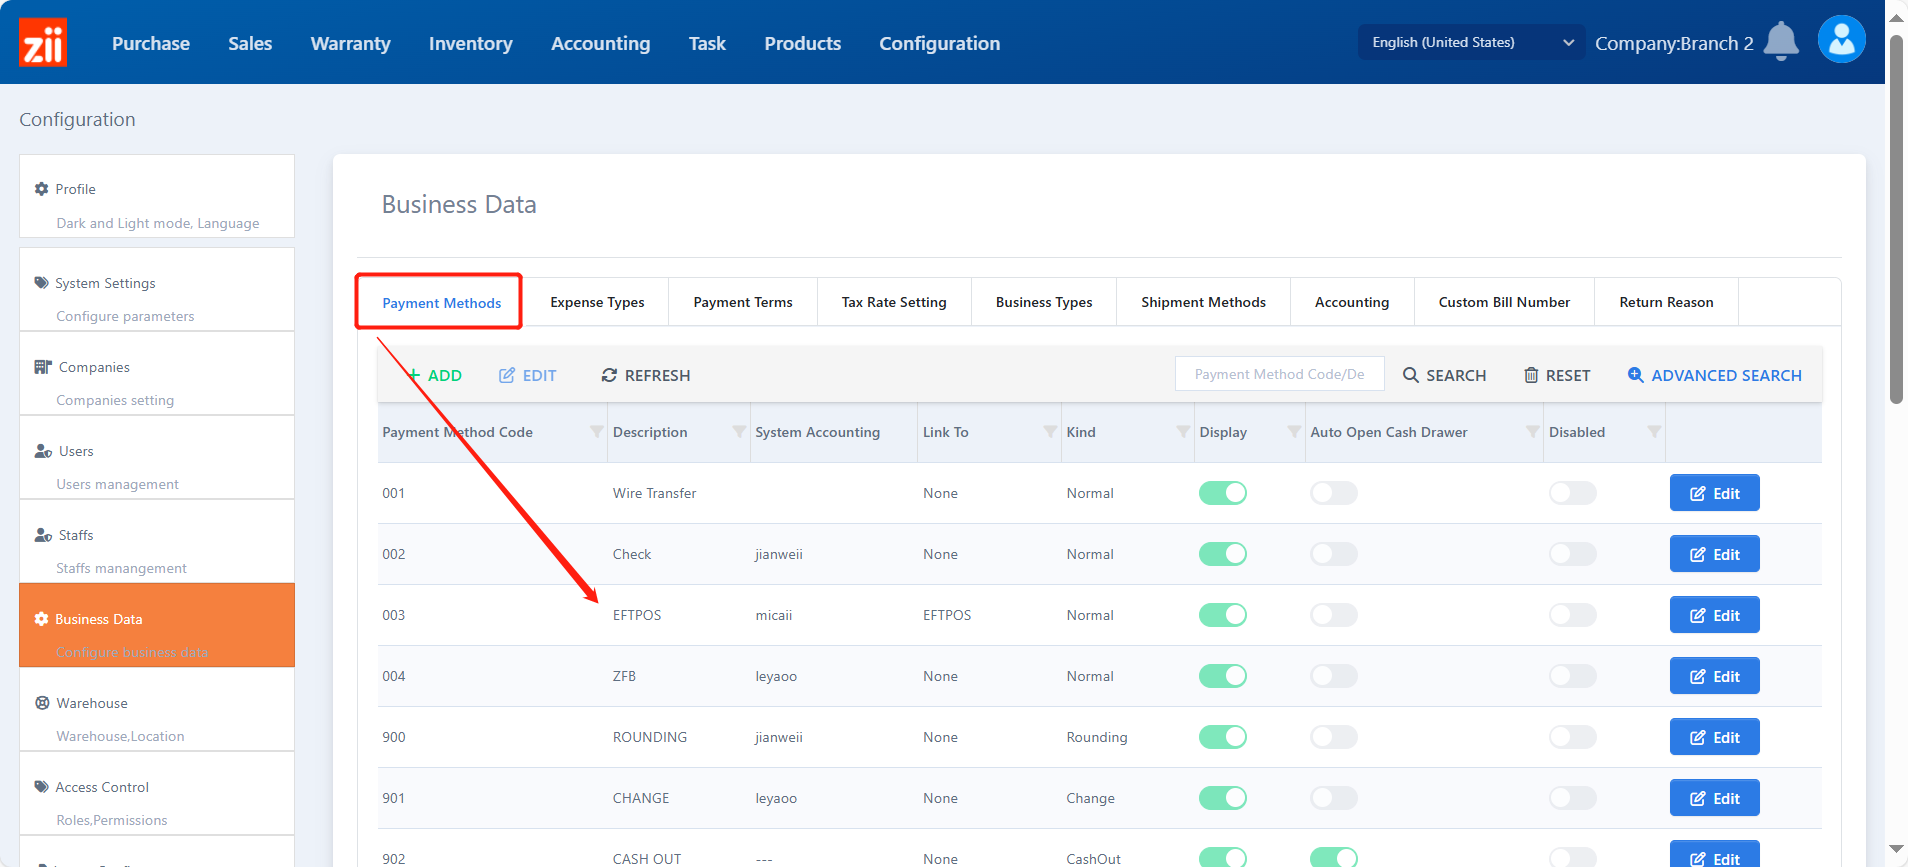
Go to “Business data”.
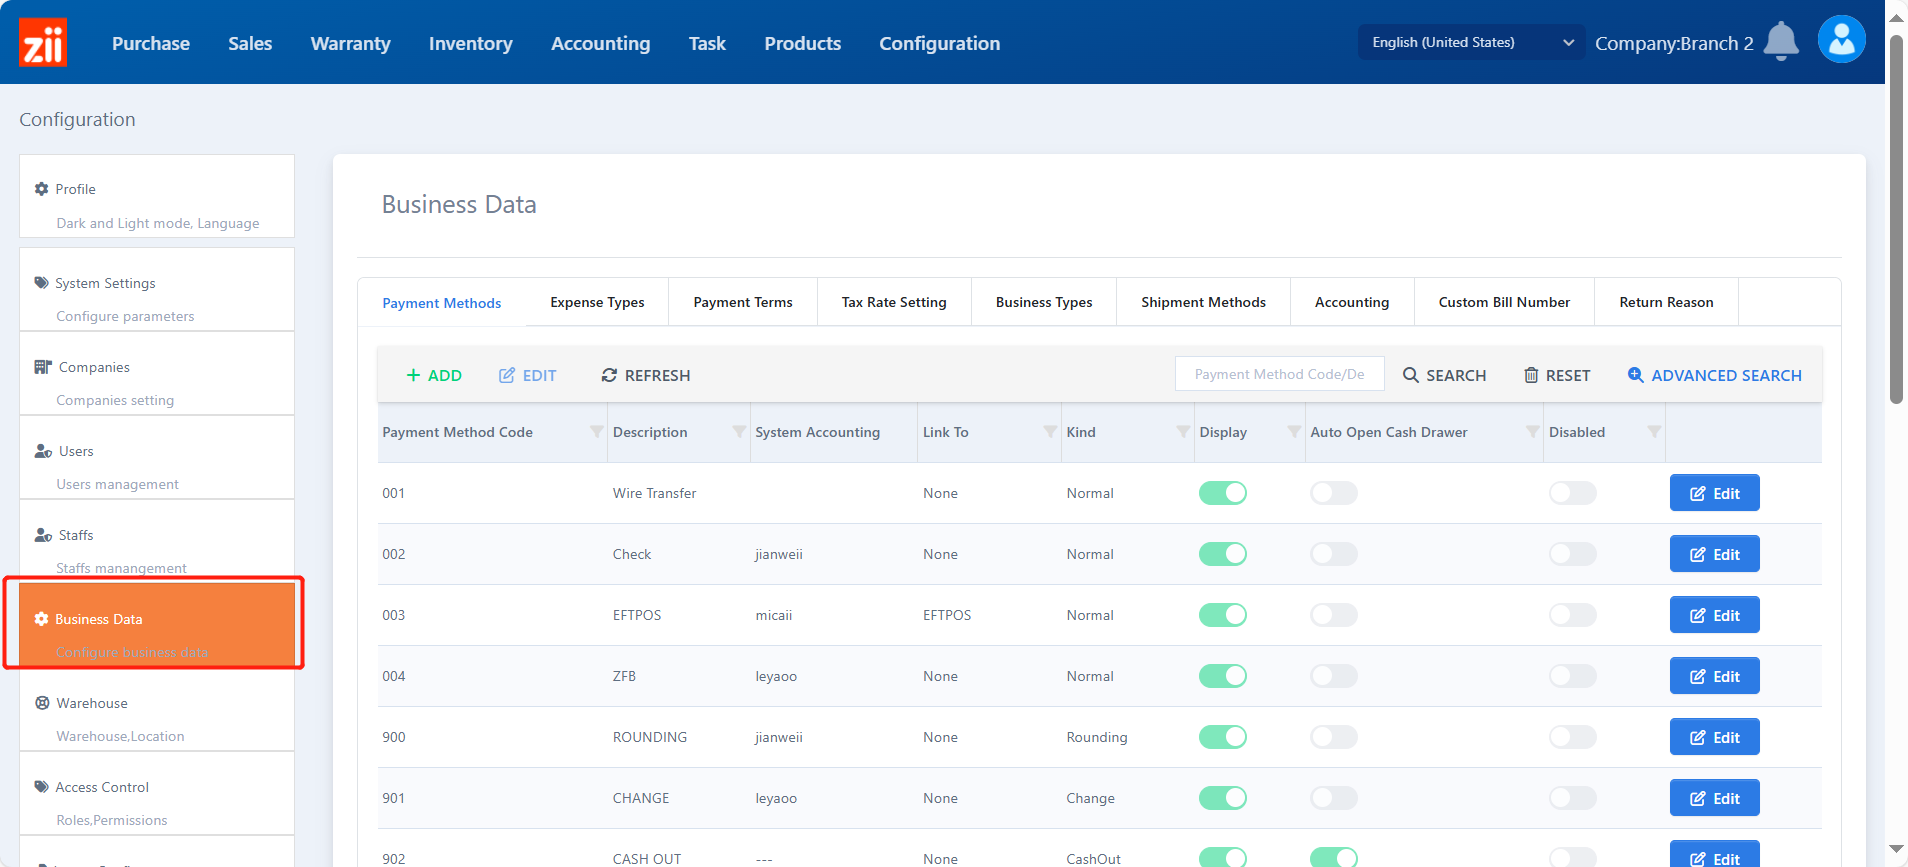
Click EFTPOS payment method.
- Or you may add a payment method by clicking “+ADD”.
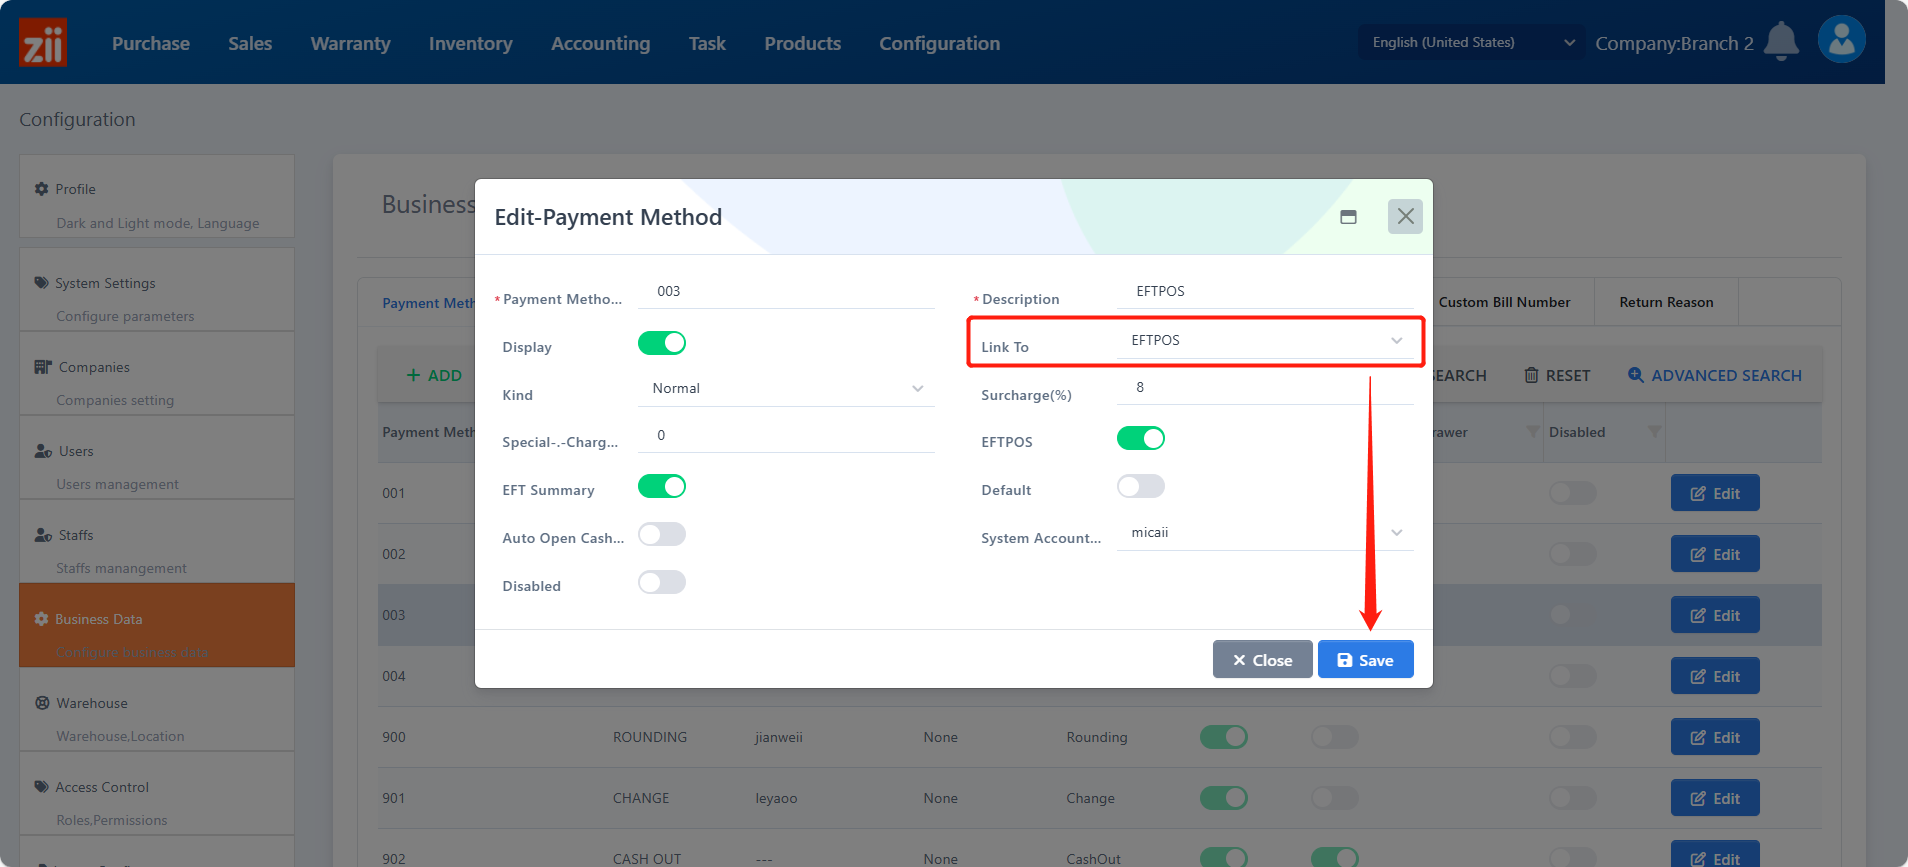
Make it link to EFTPOS and click “Save”.
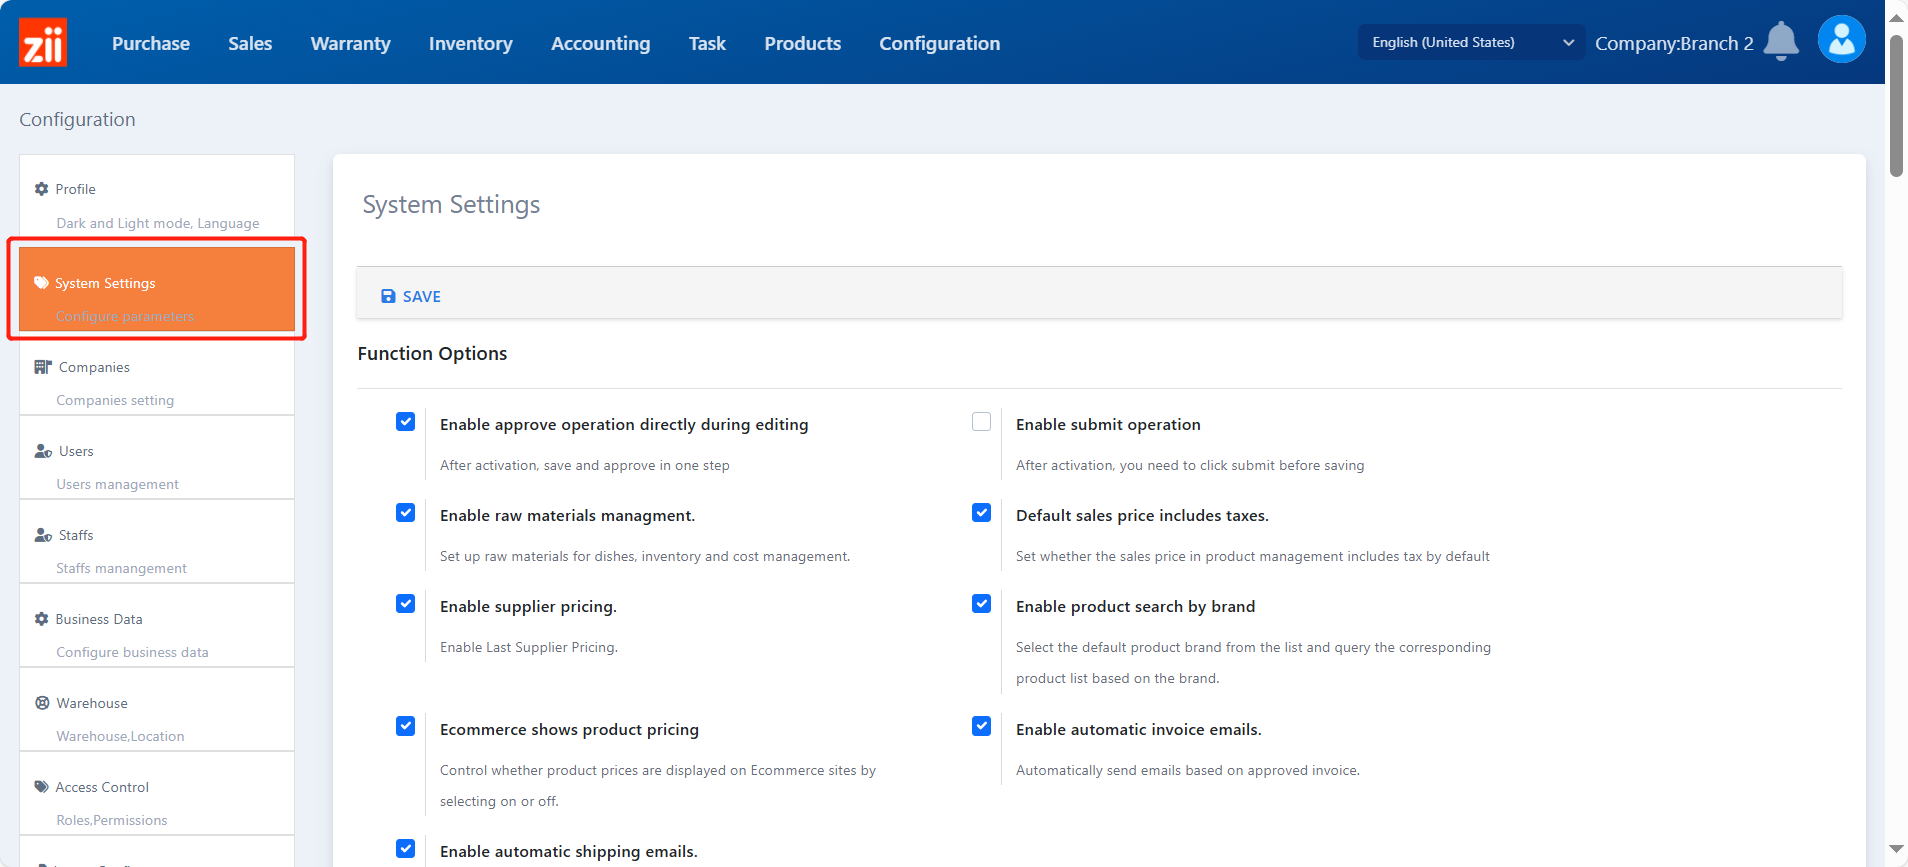
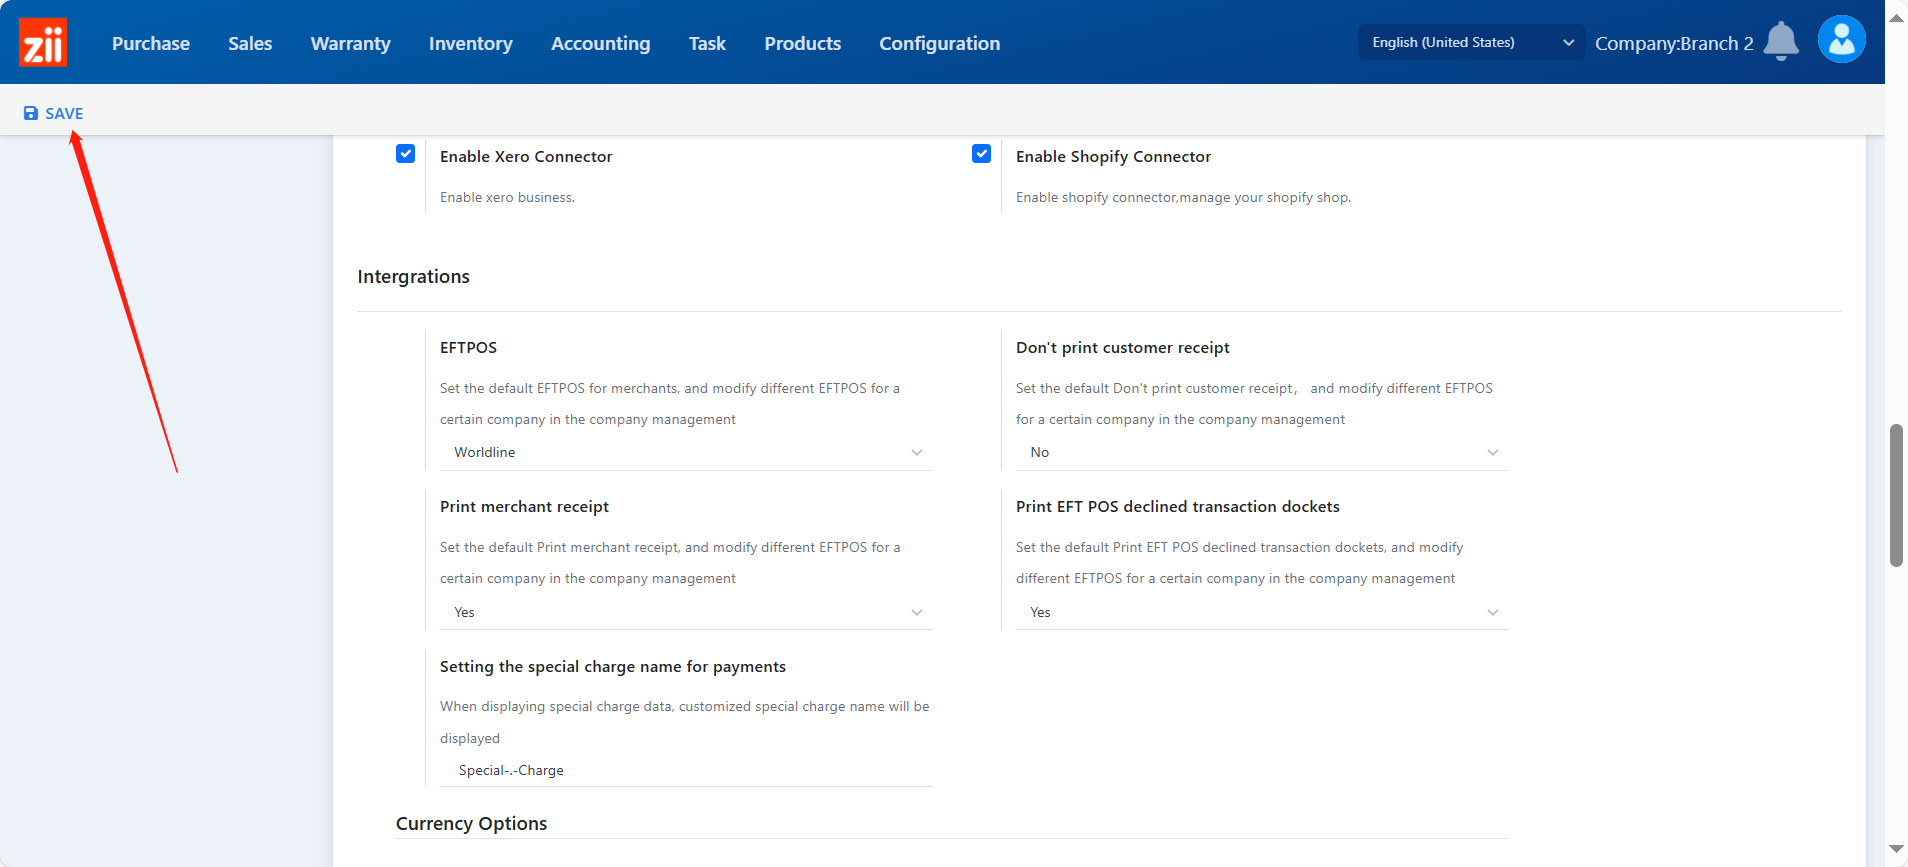
Go to “System Settings”.
Scroll down to “Integrations” and select the EFTPOS to be “Worldline”.
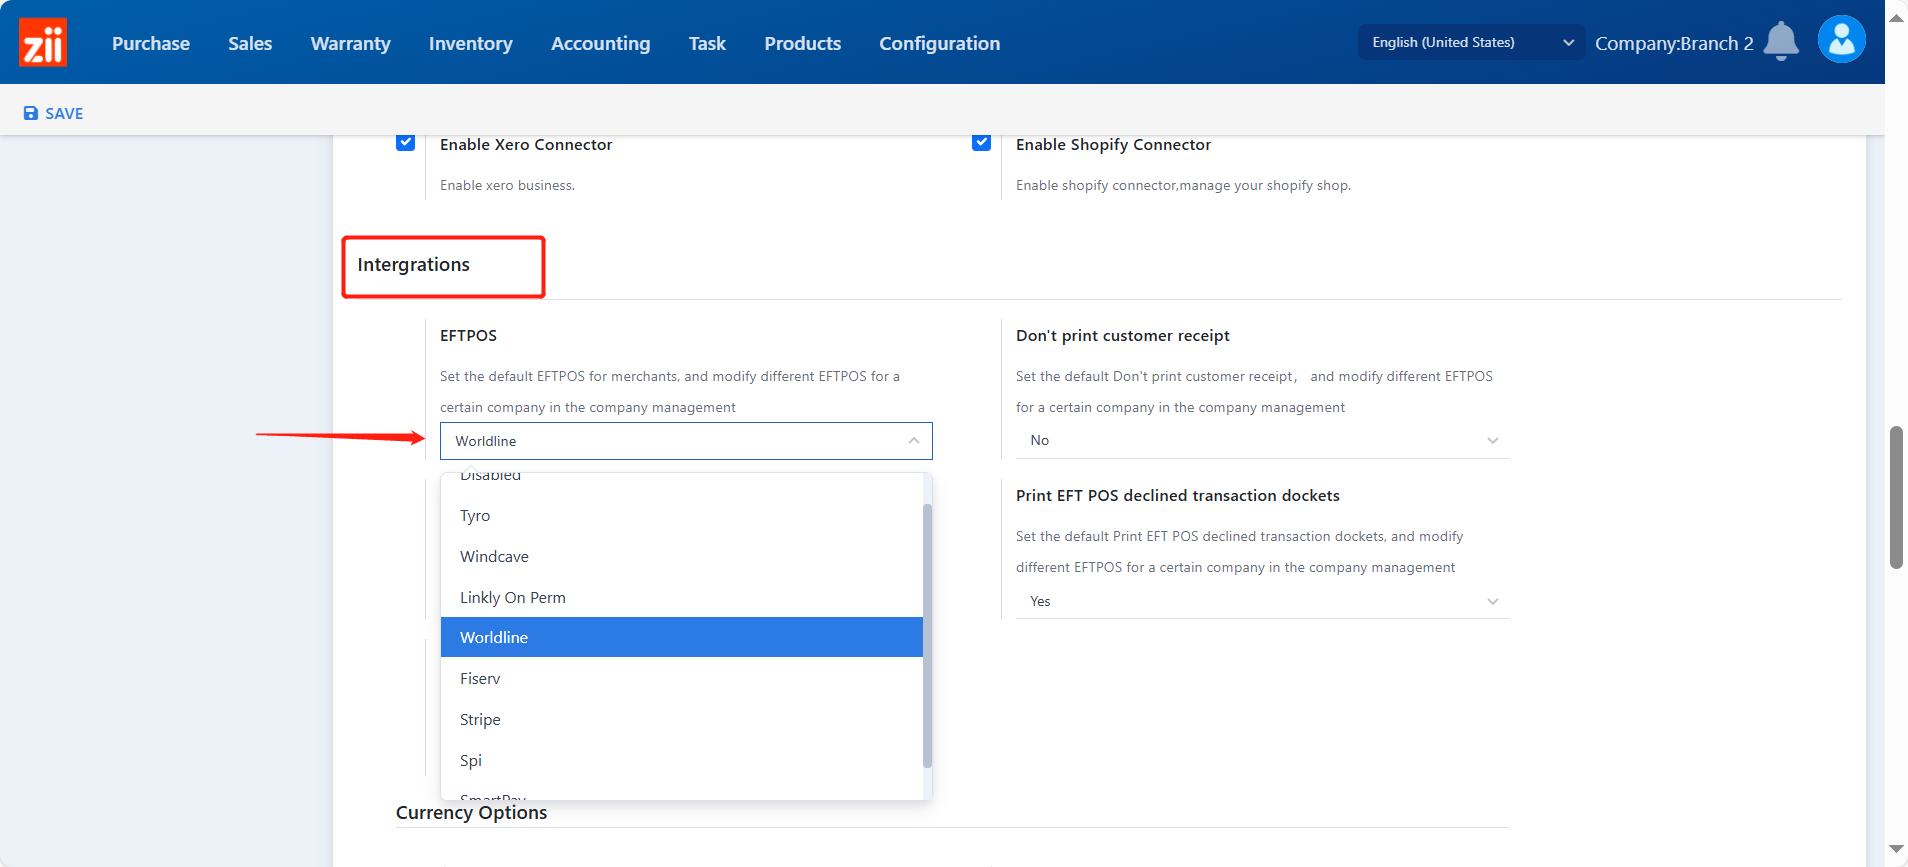
Click “Save”.
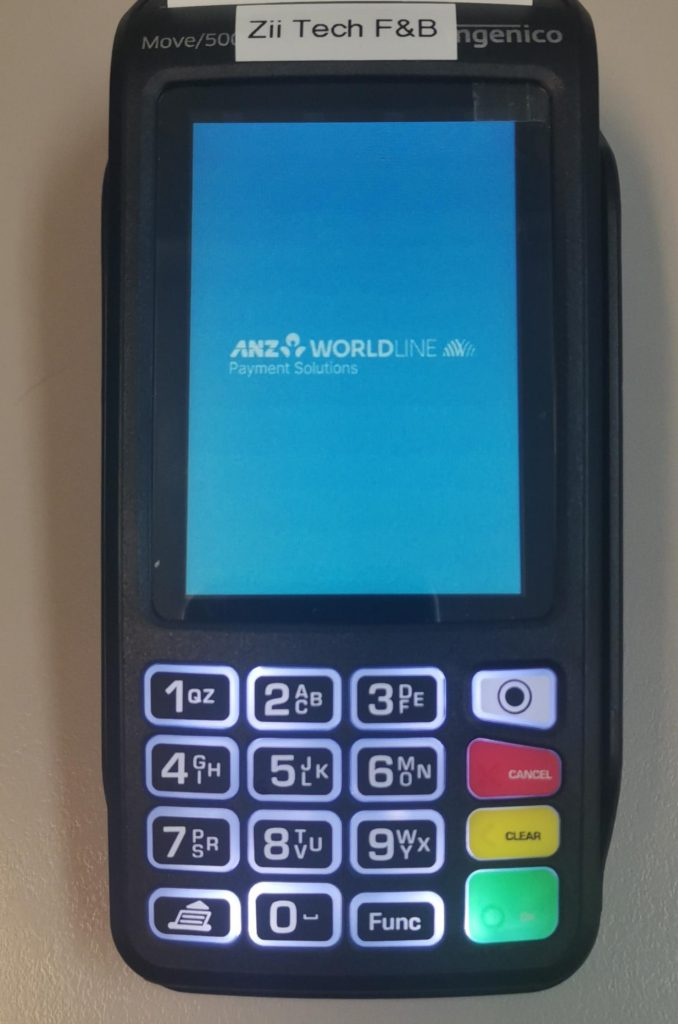
Switch the EFTPOS Terminal’s Mode
Before we start:
Press and hold Cancel + Func button to resboot terminal
Then please follow the rest steps to switch the pinpad to integrated mode:
===========Reset termain==================
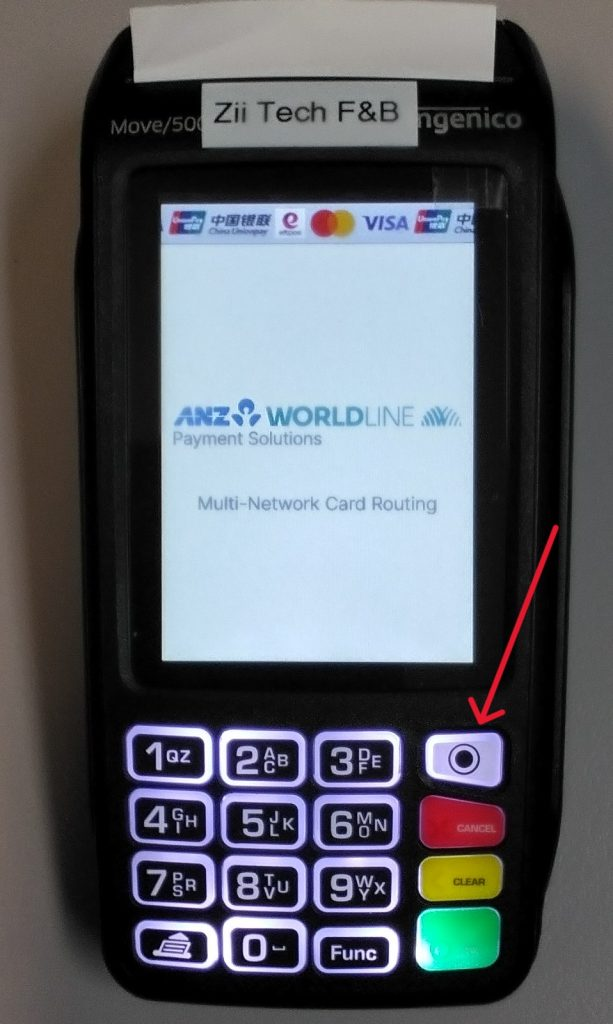
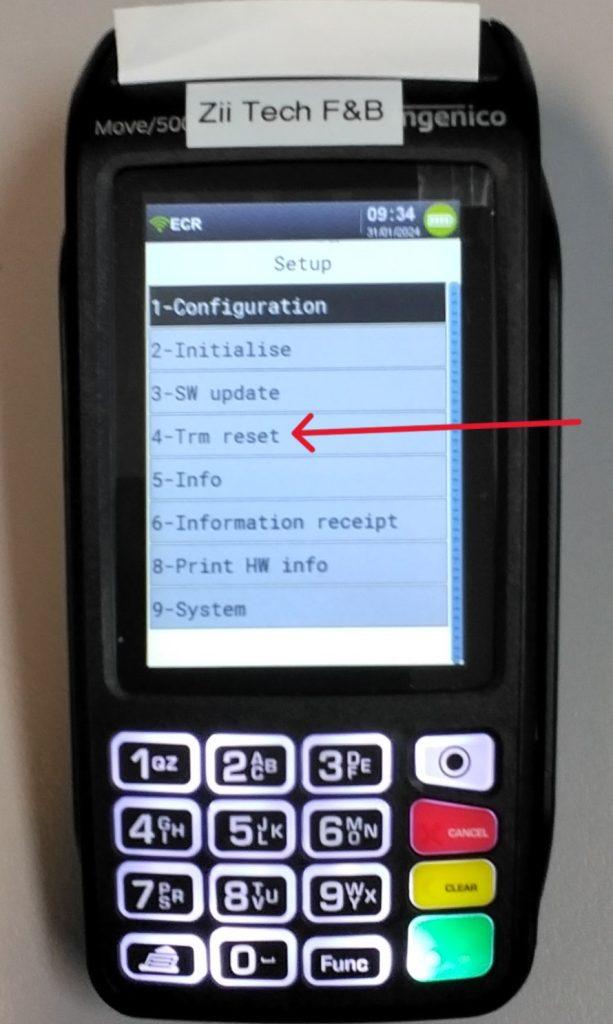
STEP 1:Press the <MENU> button on pinpad
STEP 2:Go to Setup “5”
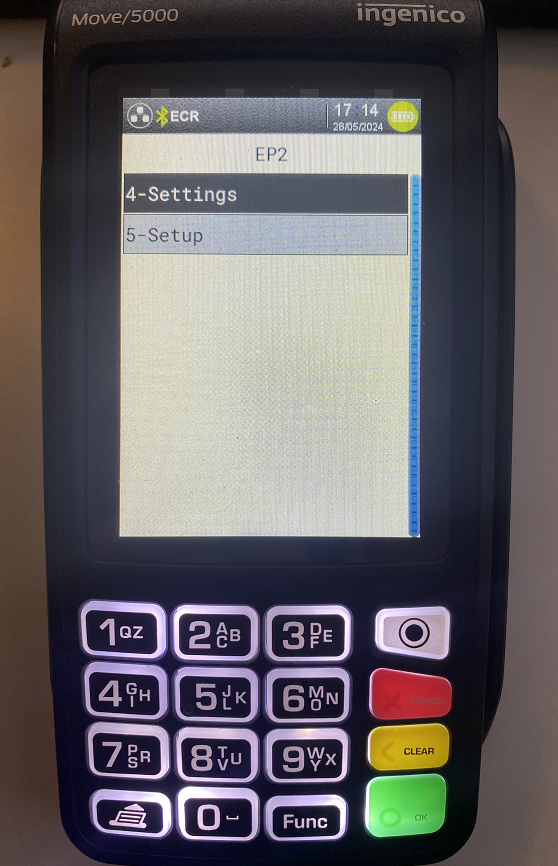
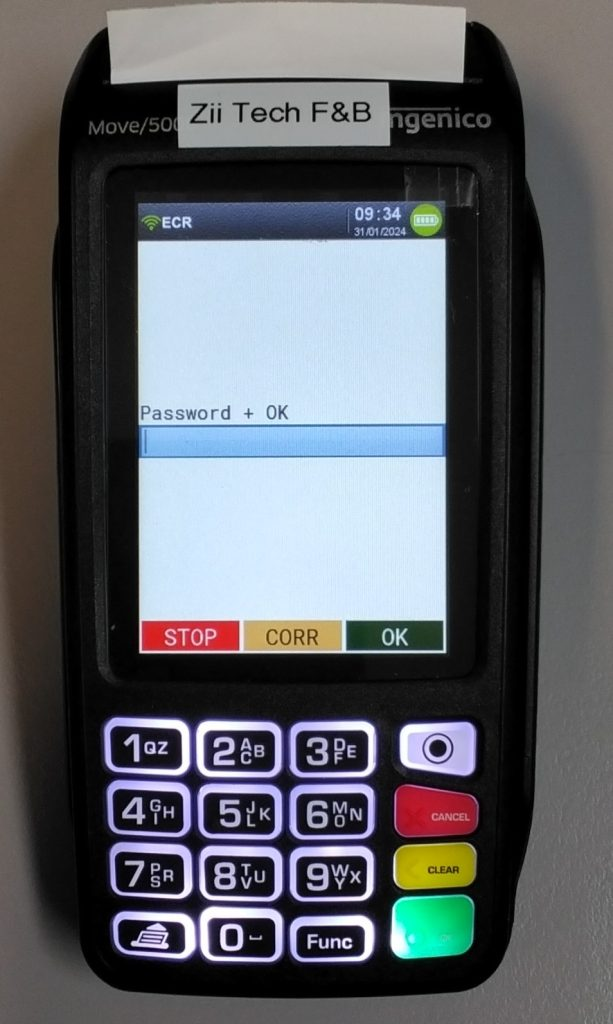
STEP 3:Enter Password (your terminal password – unique for each device)
STEP 4:Trm Reset
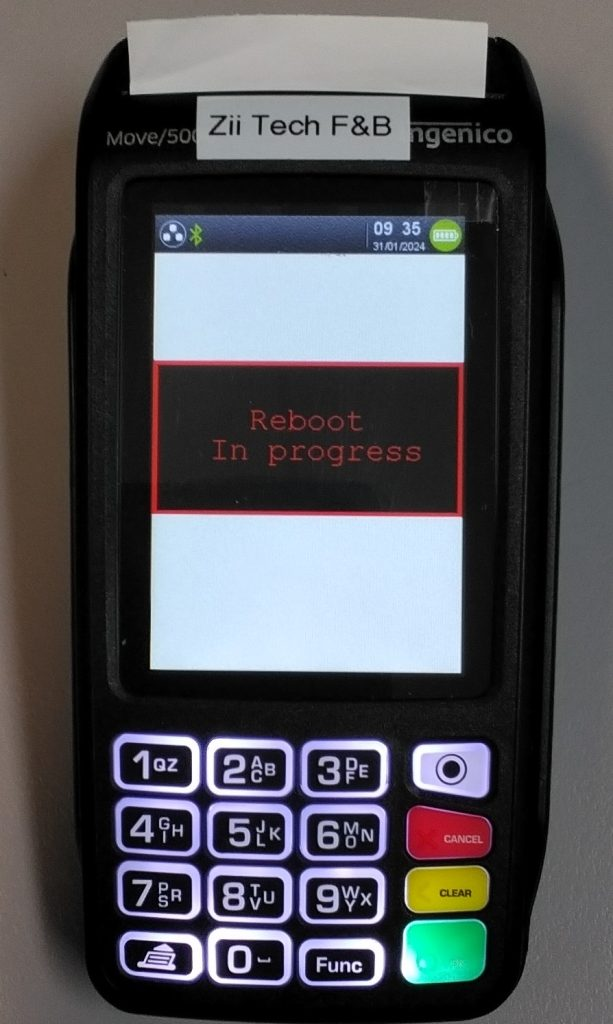
STEP 5:Enter Pwd 1235789 (universal password)

STEP 6:wait for a while for it to reset, it come back to the world line logo screen
=========== Terminal initialization Setting====================
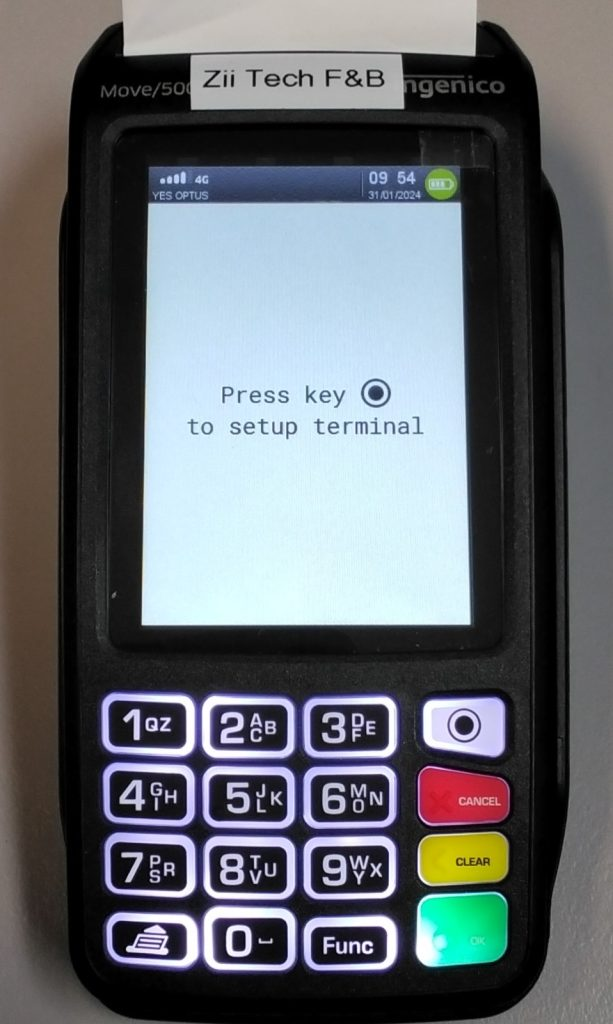
STEP 7: Press circle button and press Pre-configure
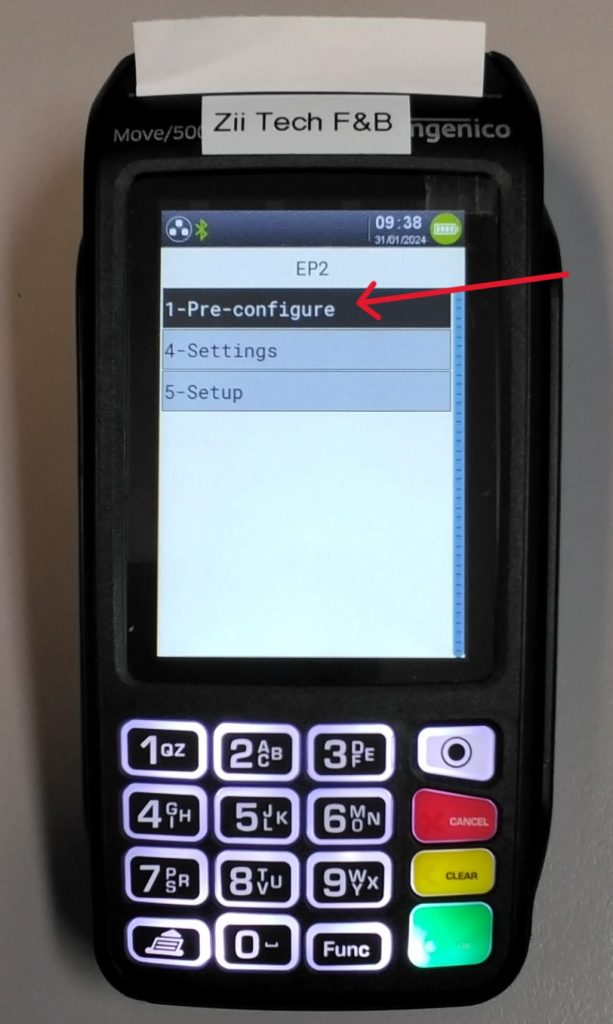
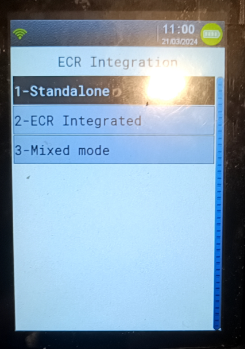
STEP 8: Press ECR Integrated
STEP 9: choose WLAN
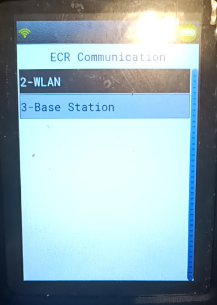
STEP 10: Choose WLAN Automatic

STEP 11: Choose your Wi-Fi name
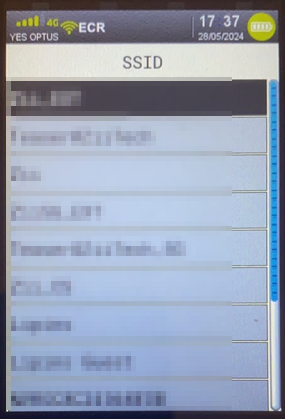
select WPA/WPA2

and enter WIFI password
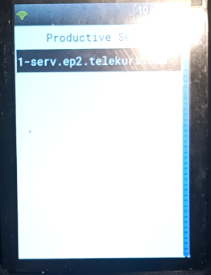
STEP 12:At Productive server page Choose 1
STEP 13: wait for a while for reboot, it come back to the world line logo screen
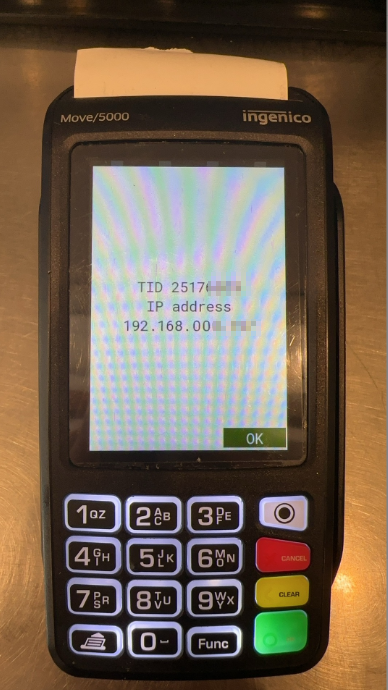
==============Pair with ZiiPOS==============================
STEP 14: Press Yellow Button (Clear Button), it will show Terminal ID and IP address
Pair with POS
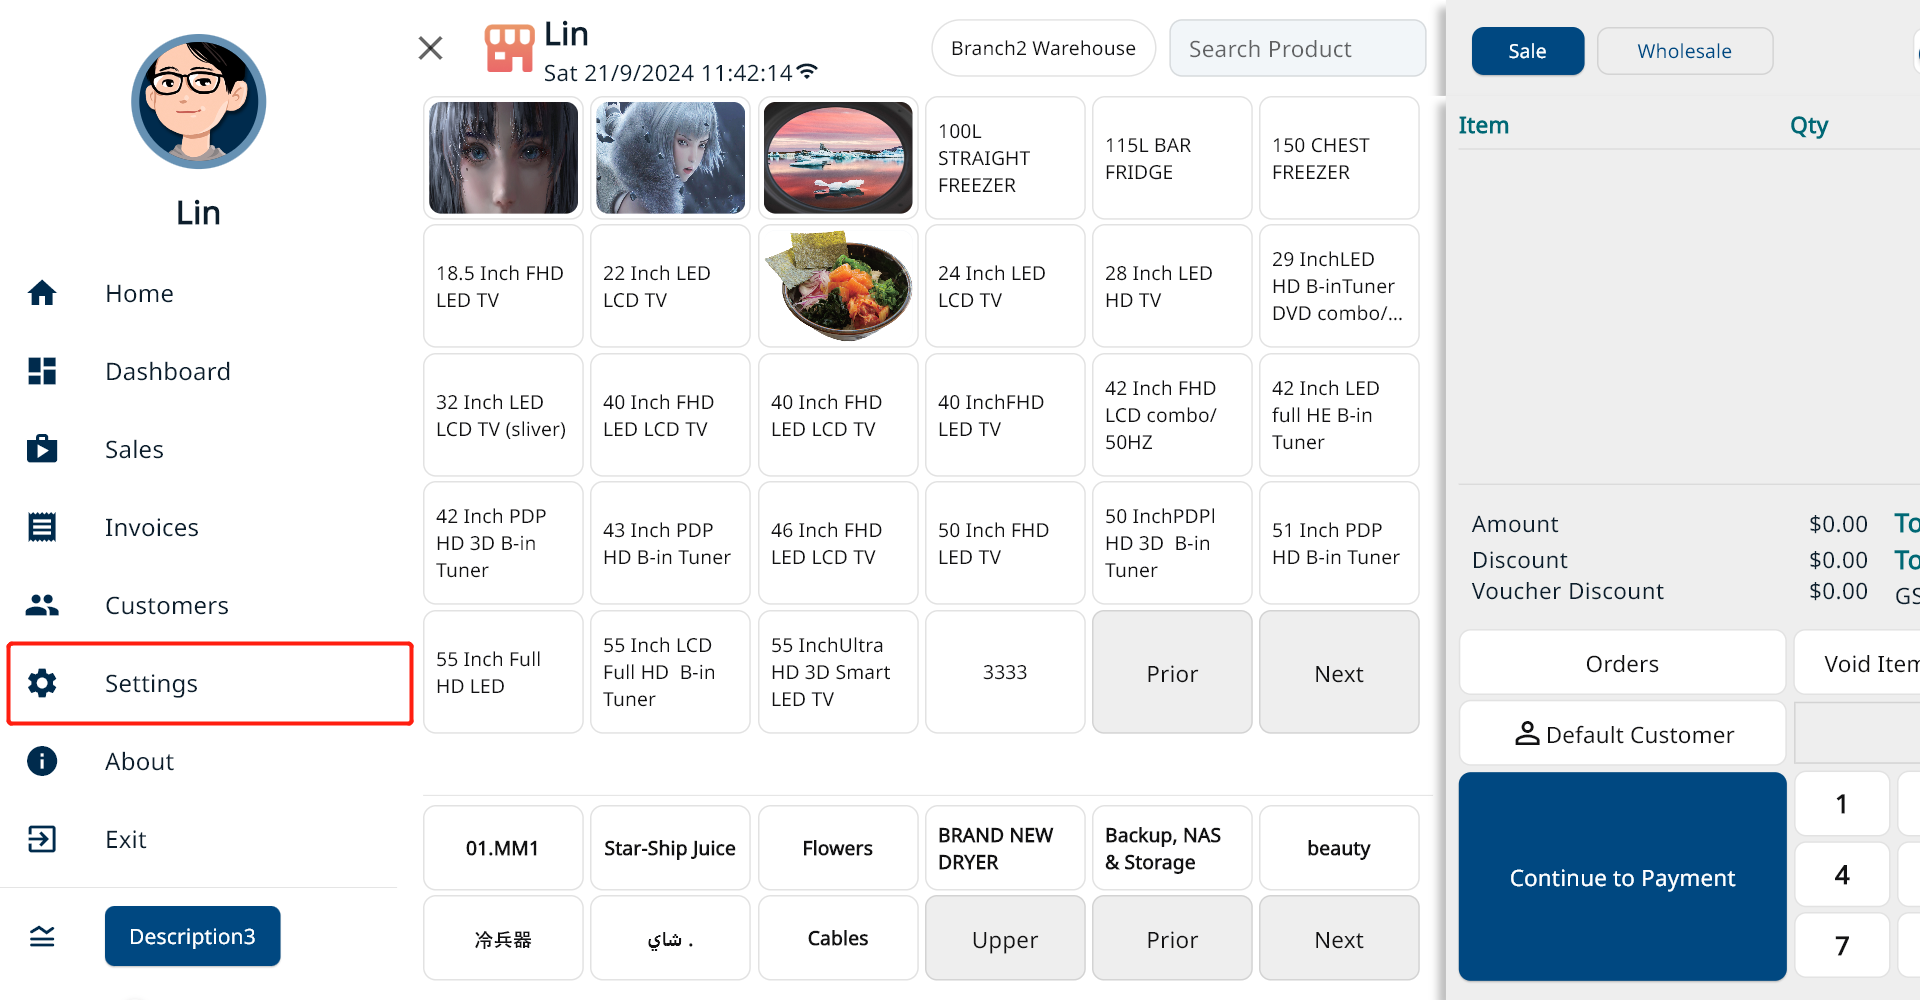
Sign in your ZiiPOS Retail POS.
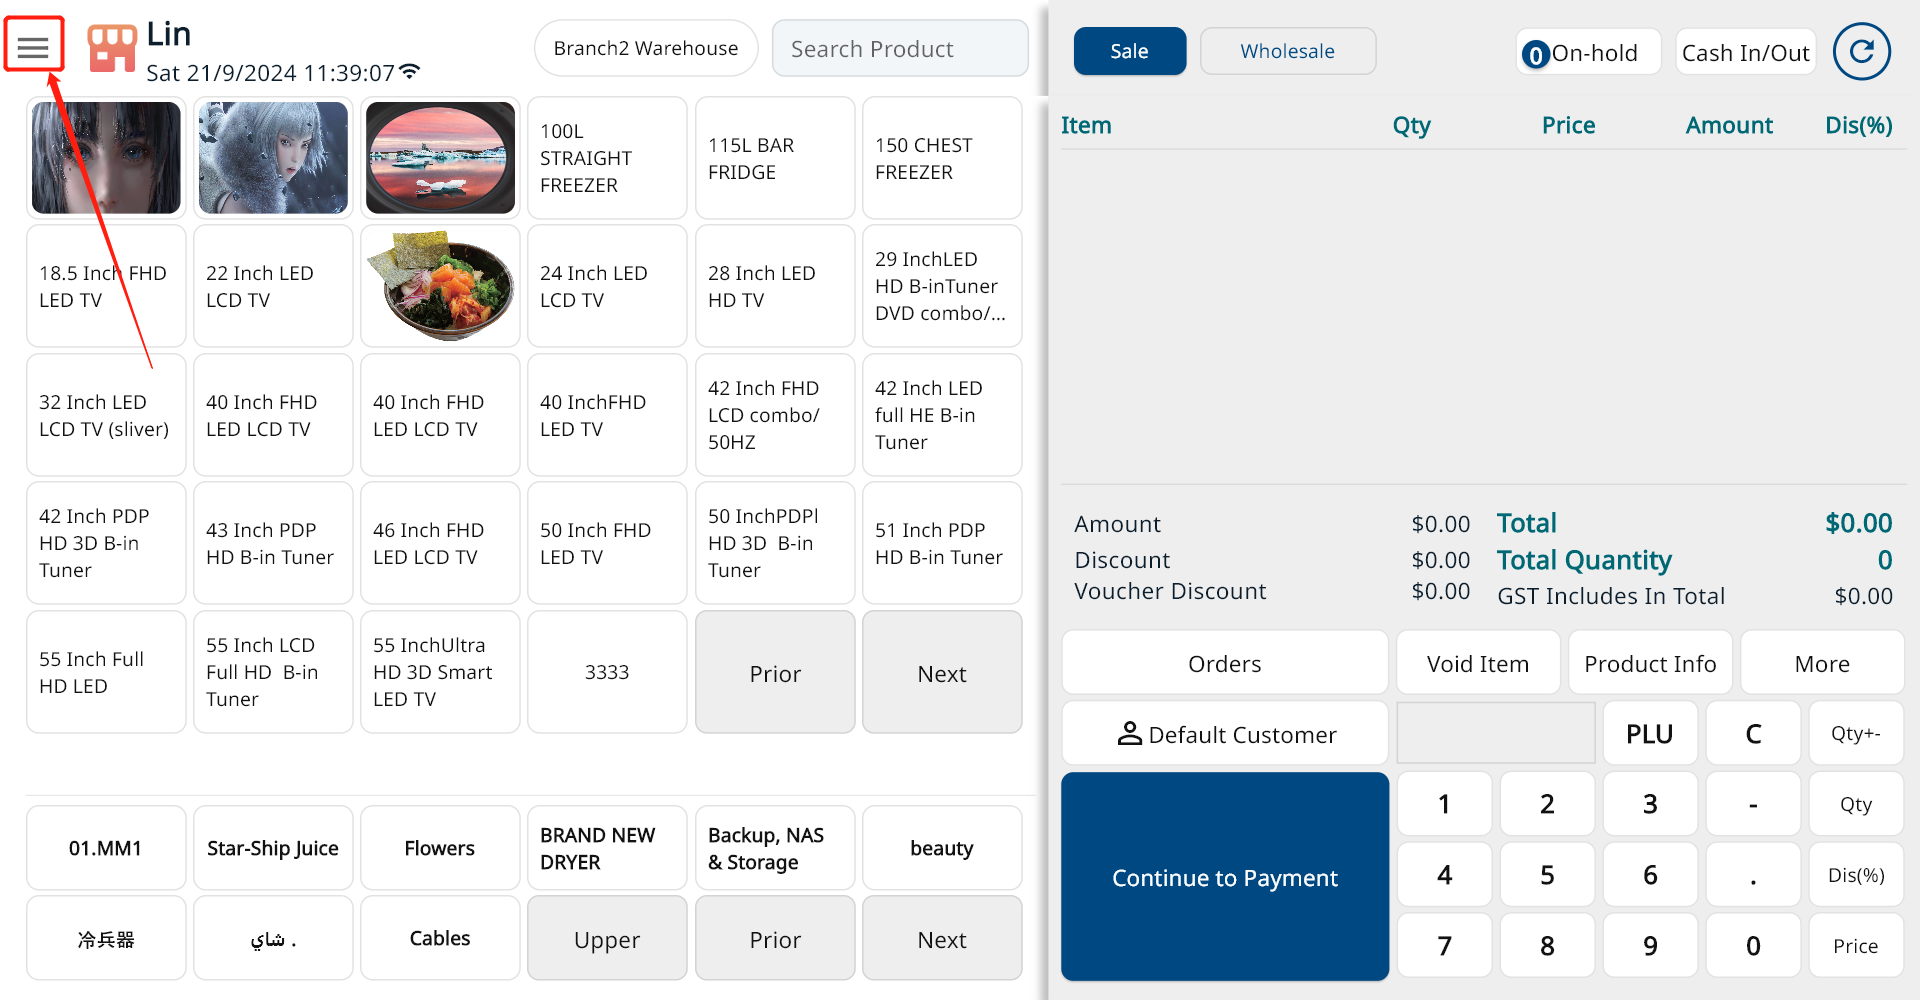
Tap the button in the top left corner.
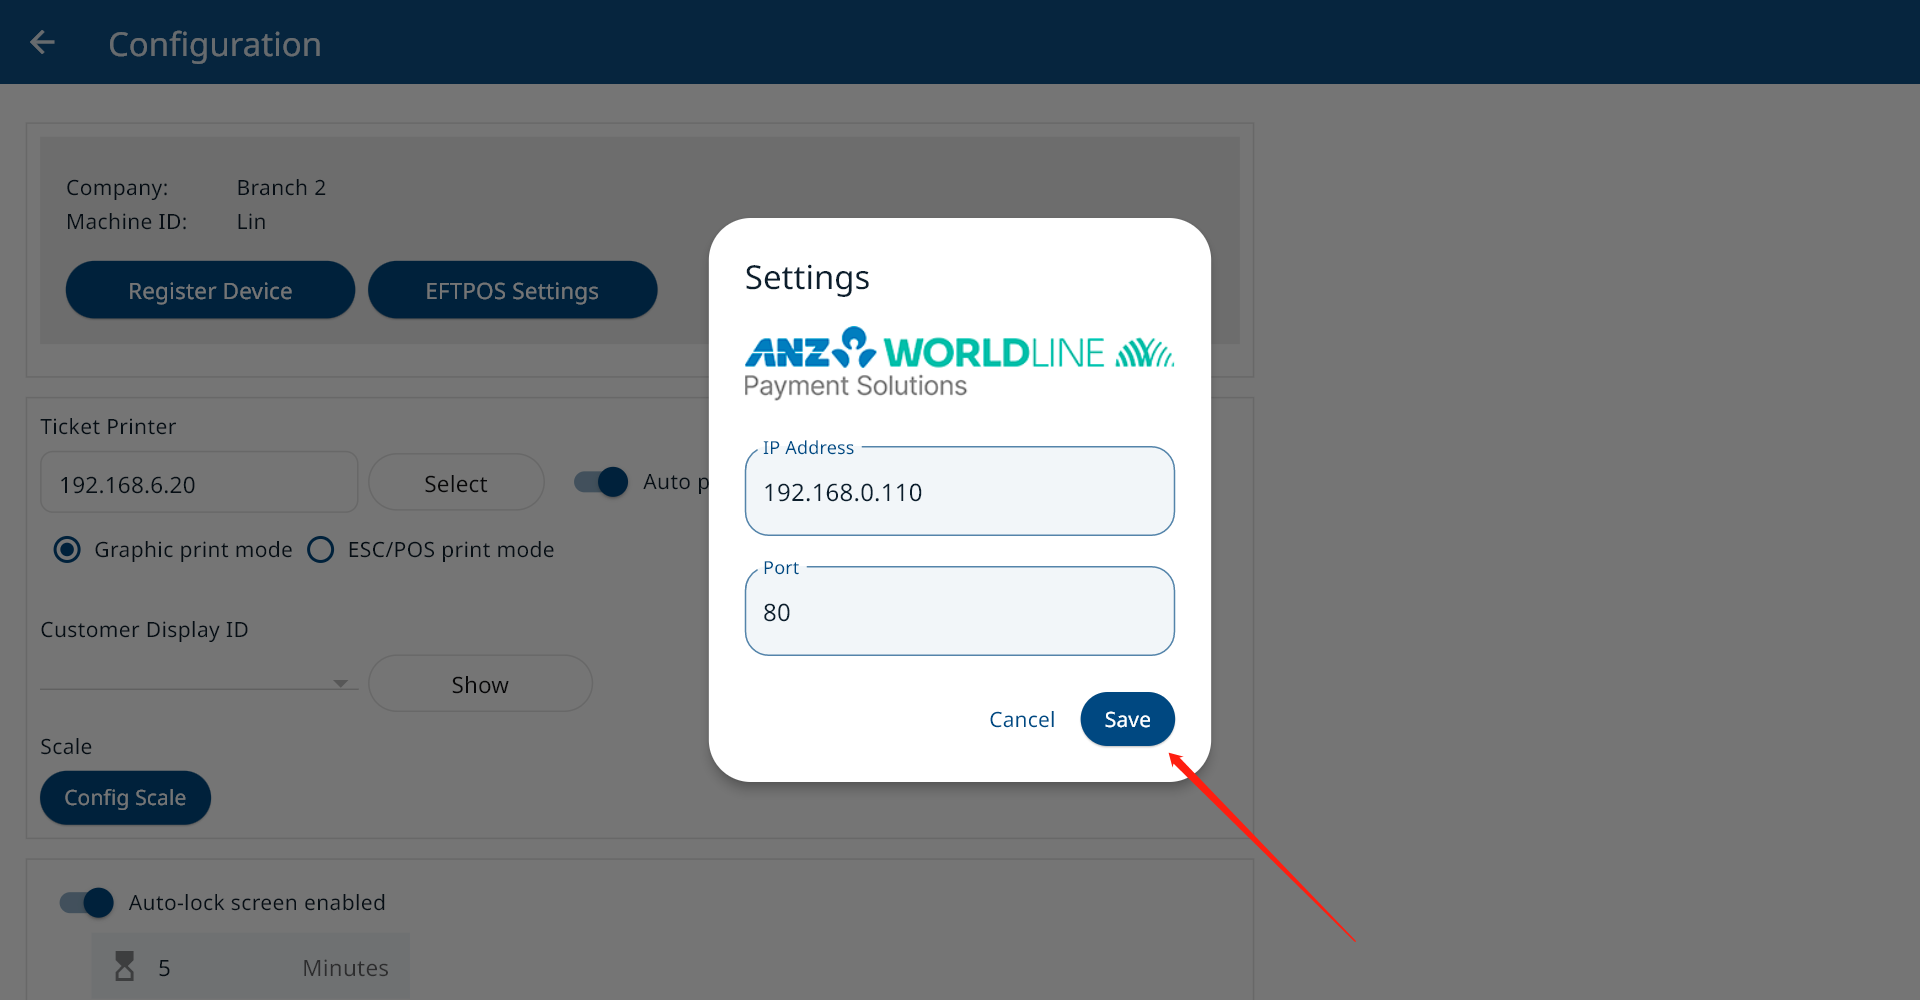
Go to “Settings”.
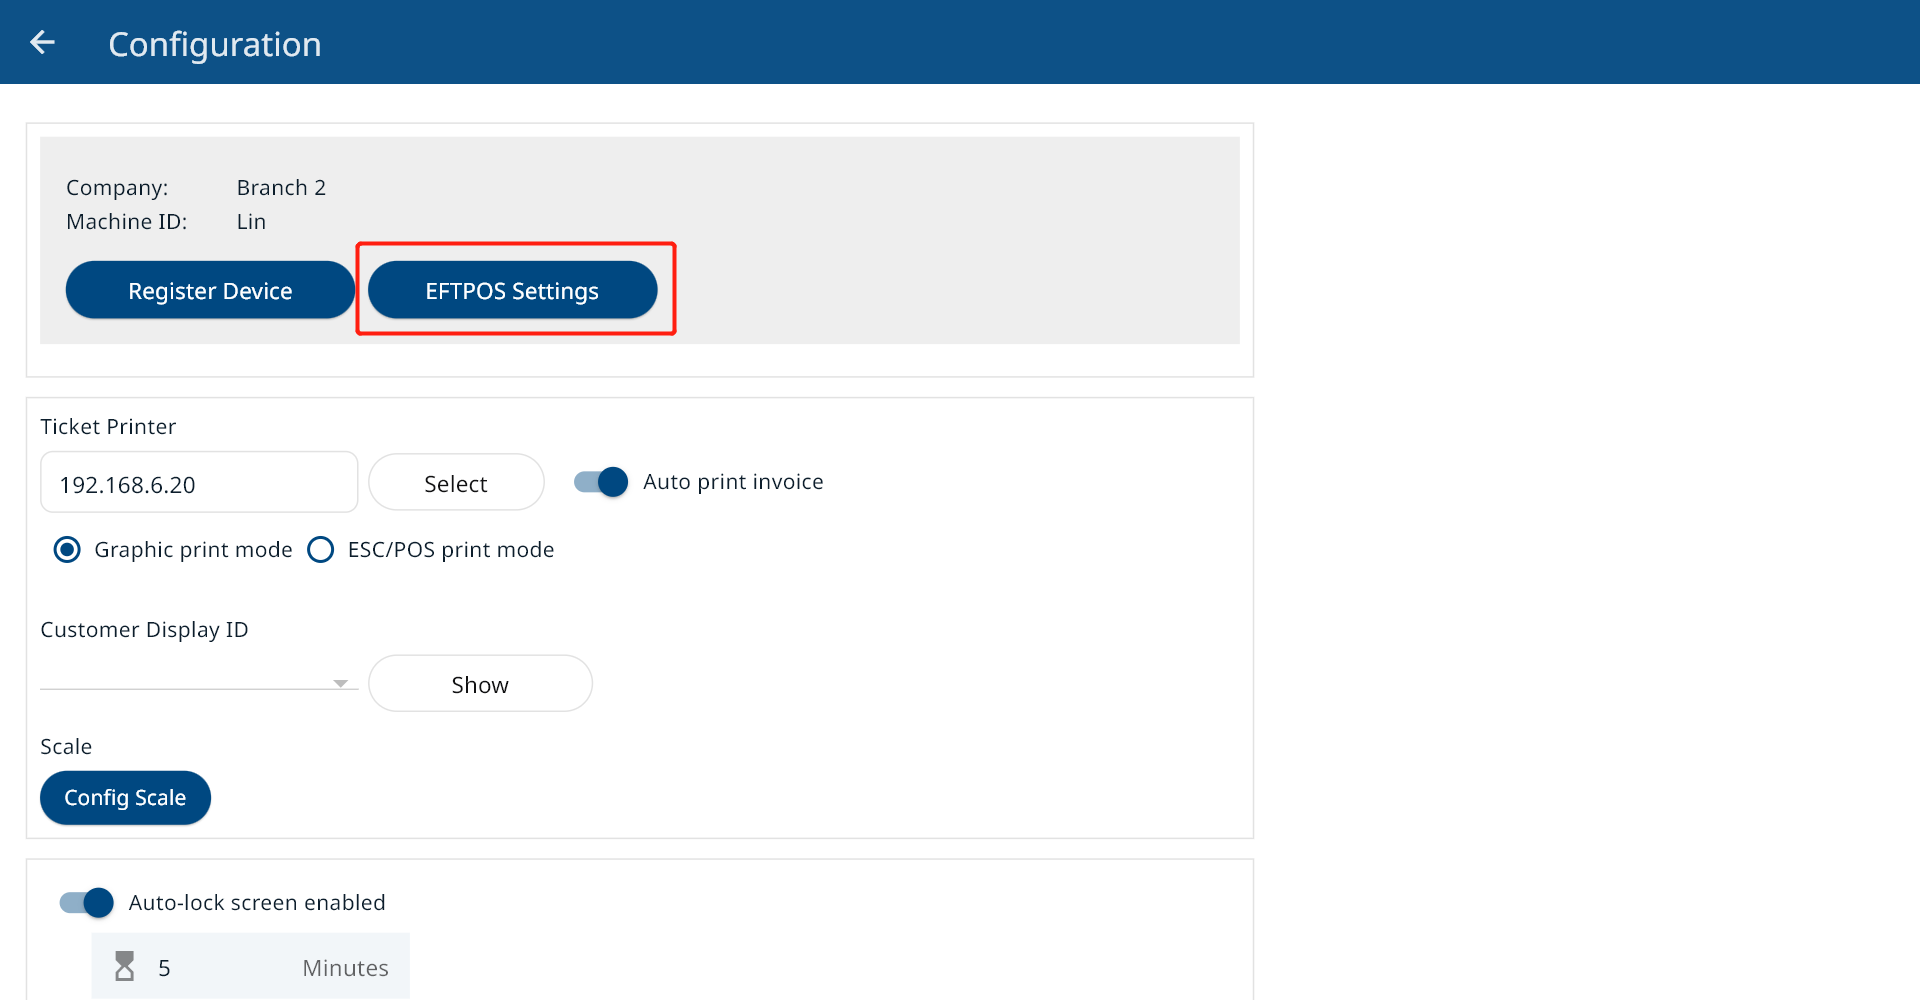
Click “EFTPOS Settings”.
Enter the IP address on the EFTPOS terminal into the blank, and the “Port” is 80.
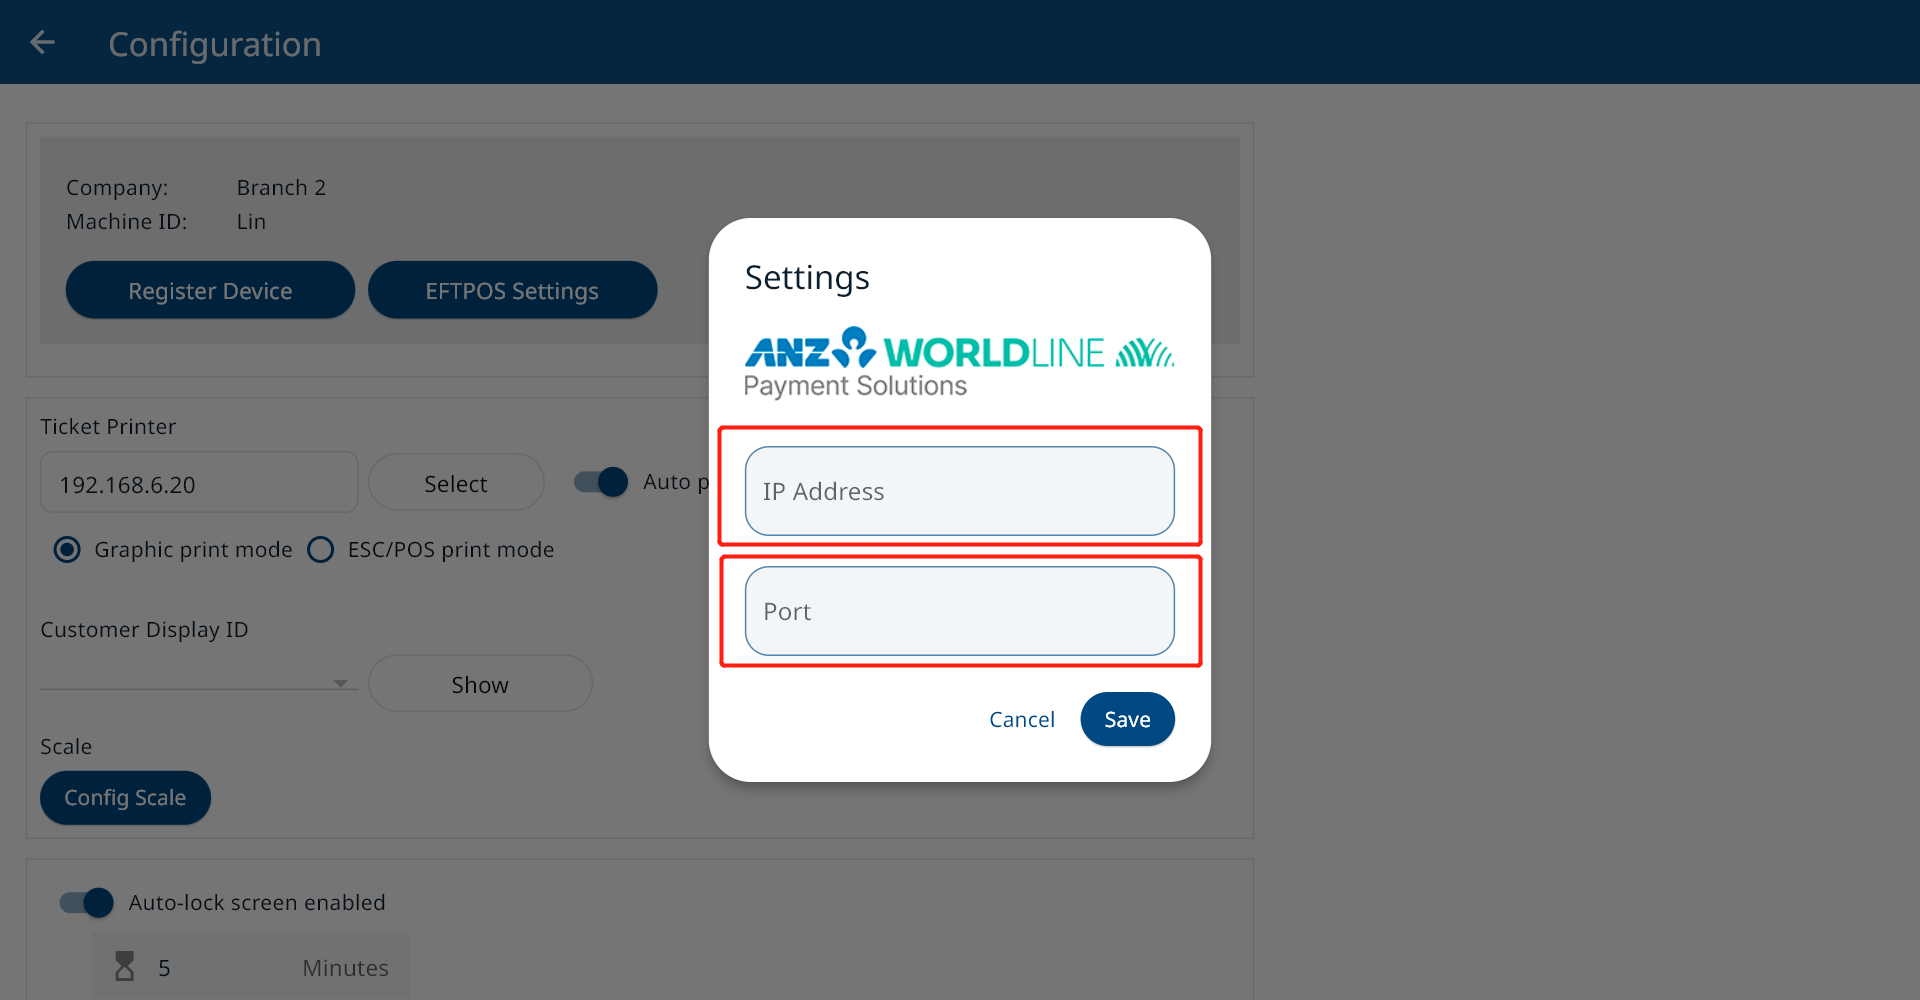
Click “Save”.