
Please log in to web inventory to process.
Click on “Configuration”.

Click on “Staff”.

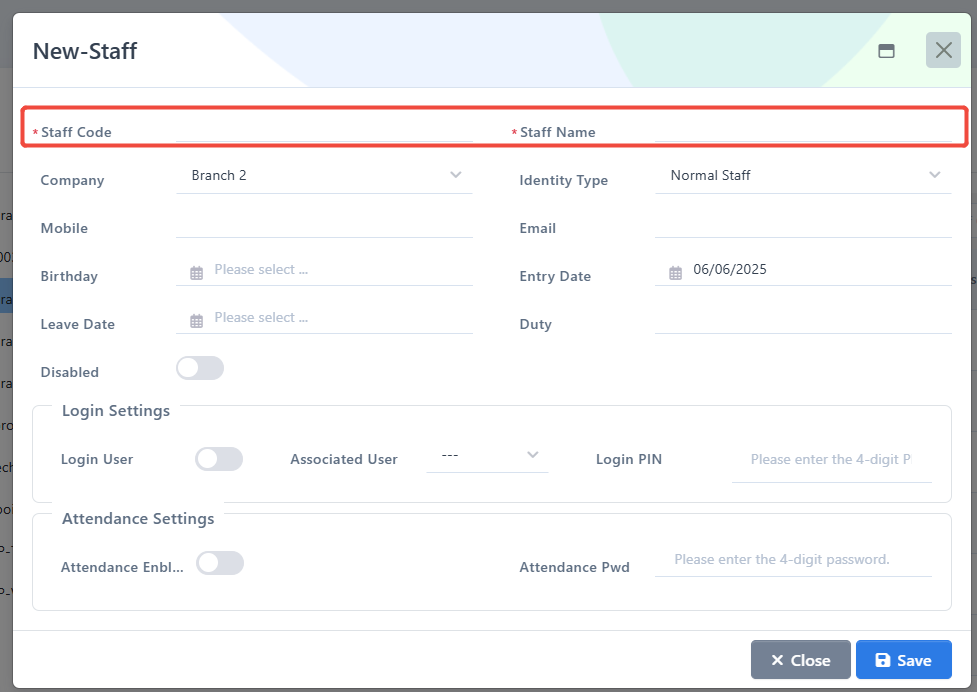
Select a branch and click on “Add”.

Enter the code and name.
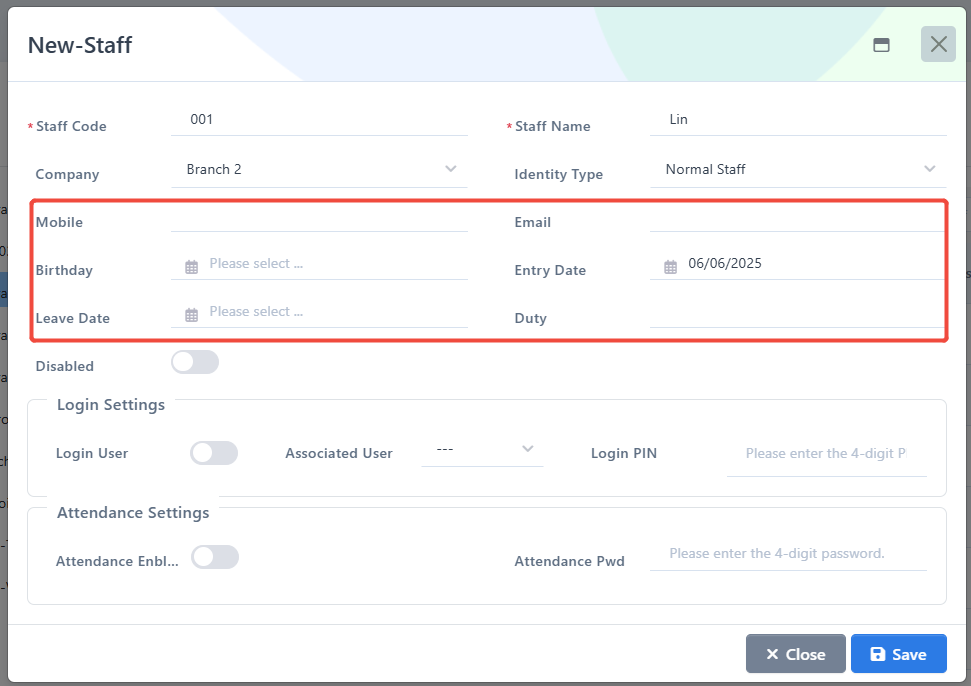
Finish other info as needed.
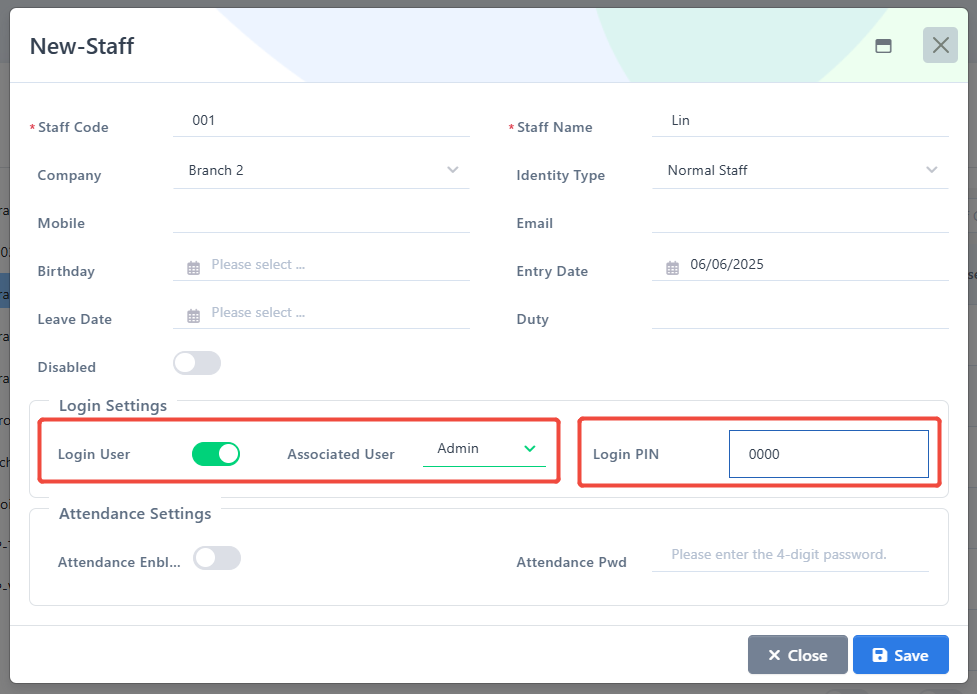
Toggle on “Login User”, and select a user to bind to this staff account. Then setup a POS login password.
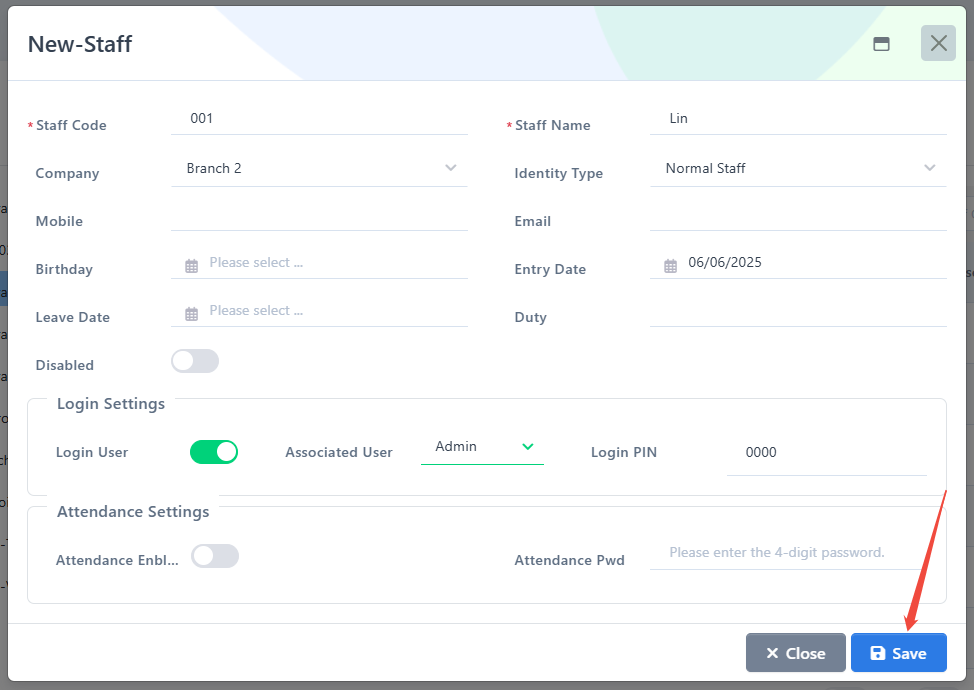
Click “Save” to save.
Then the account will show up on the accounts panel.

This is how you add a POS staff.