It is recommended that set up locations like the example below, in this way, an item will be located by “Zone-Rack-Level-Column”. Please follow the steps to set up.
Set Up Locations
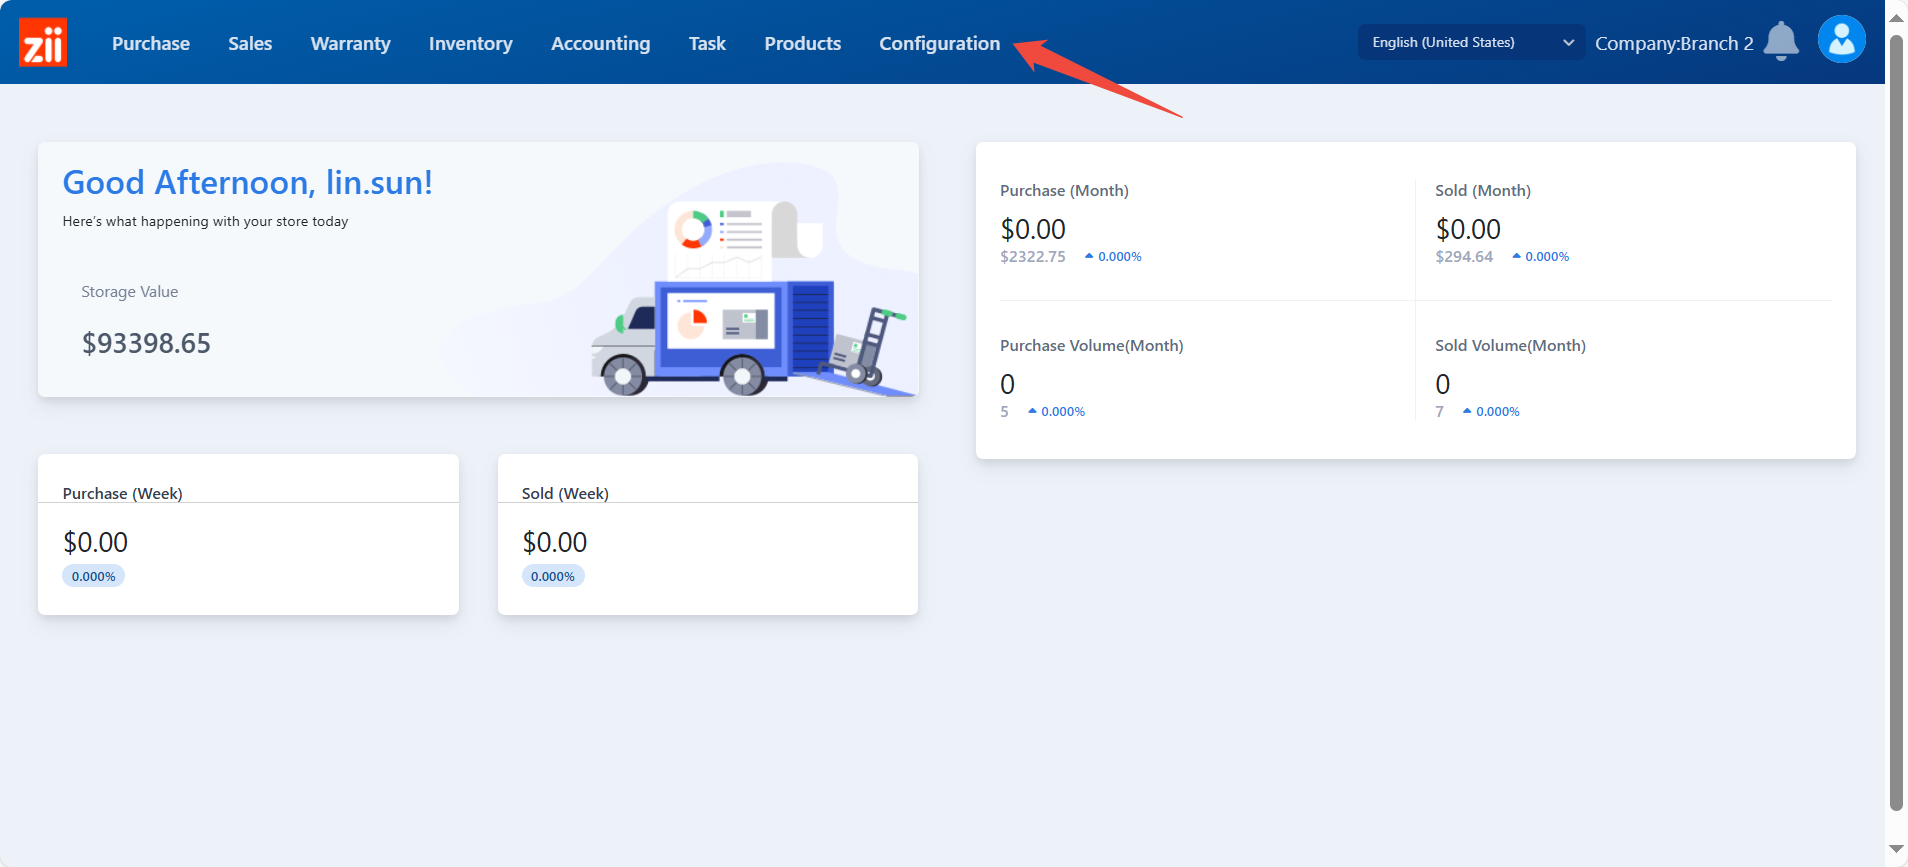
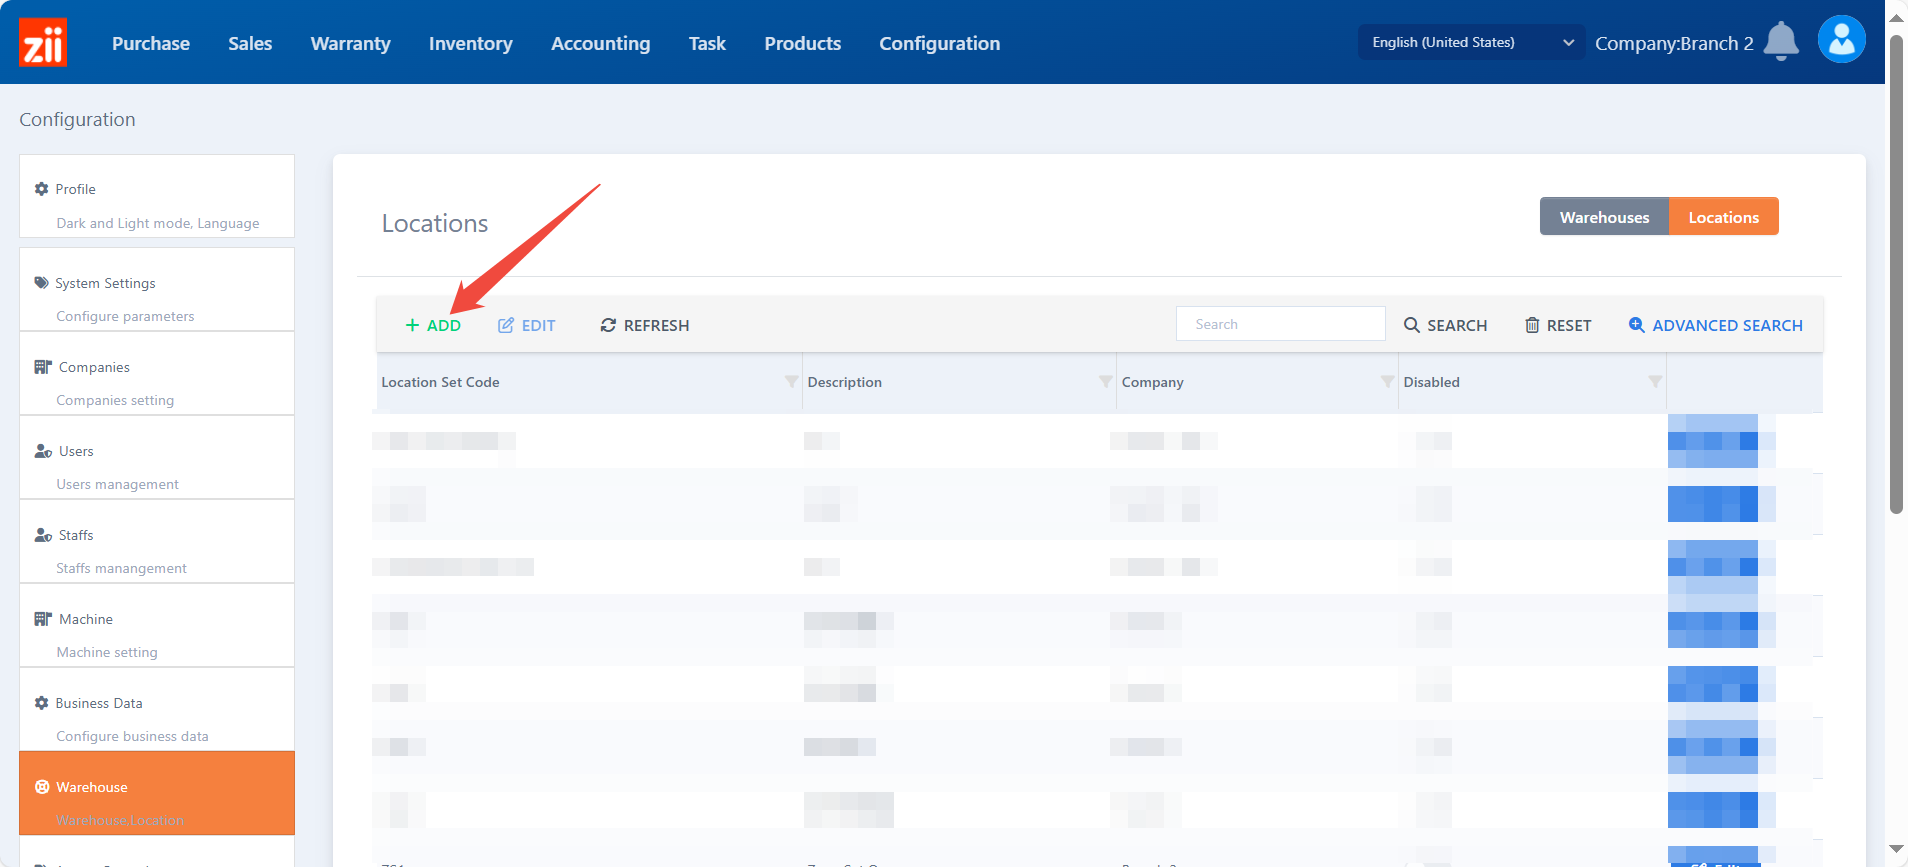
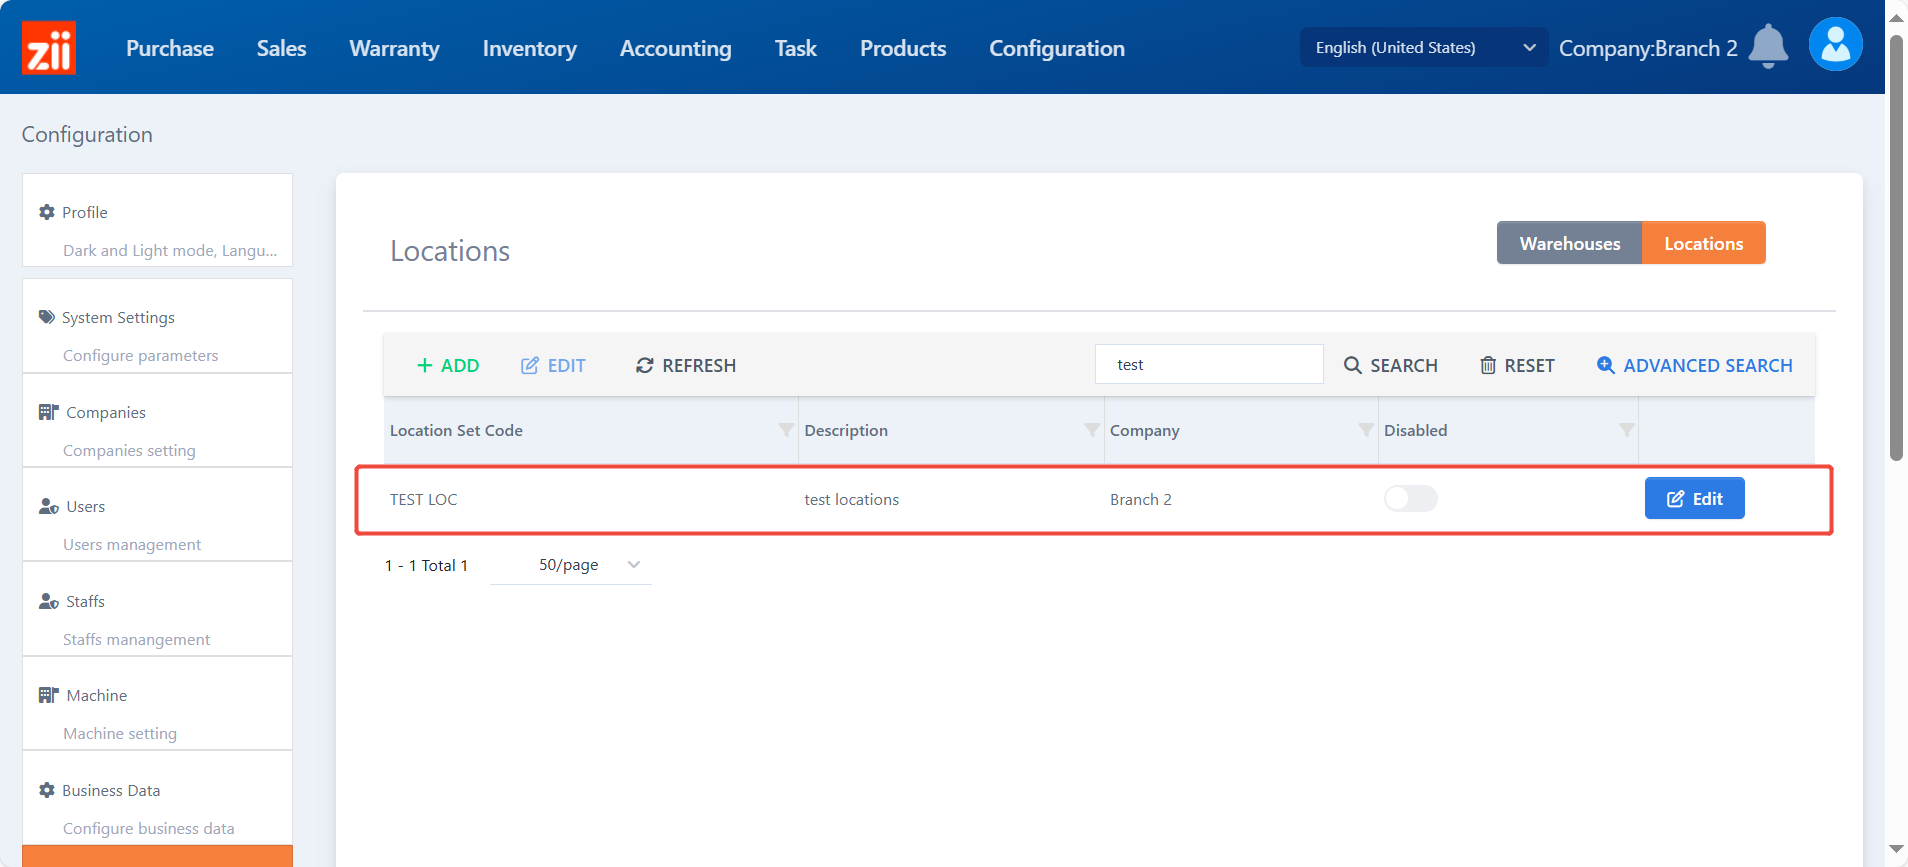
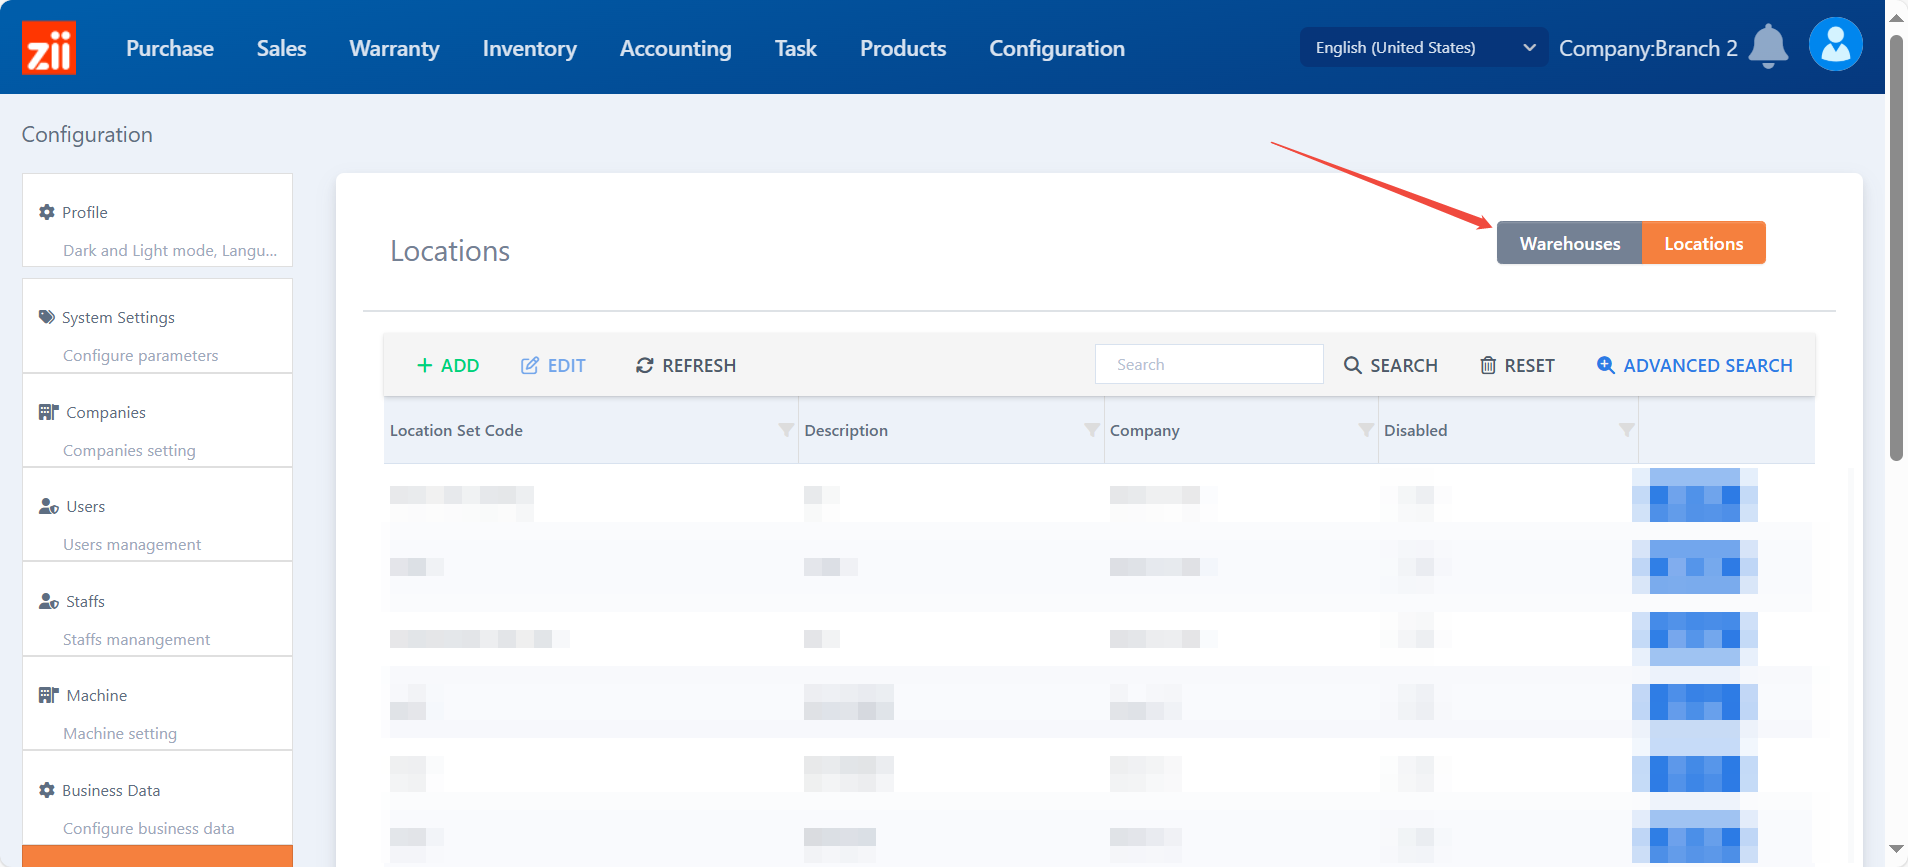
Go to “Configuration”.
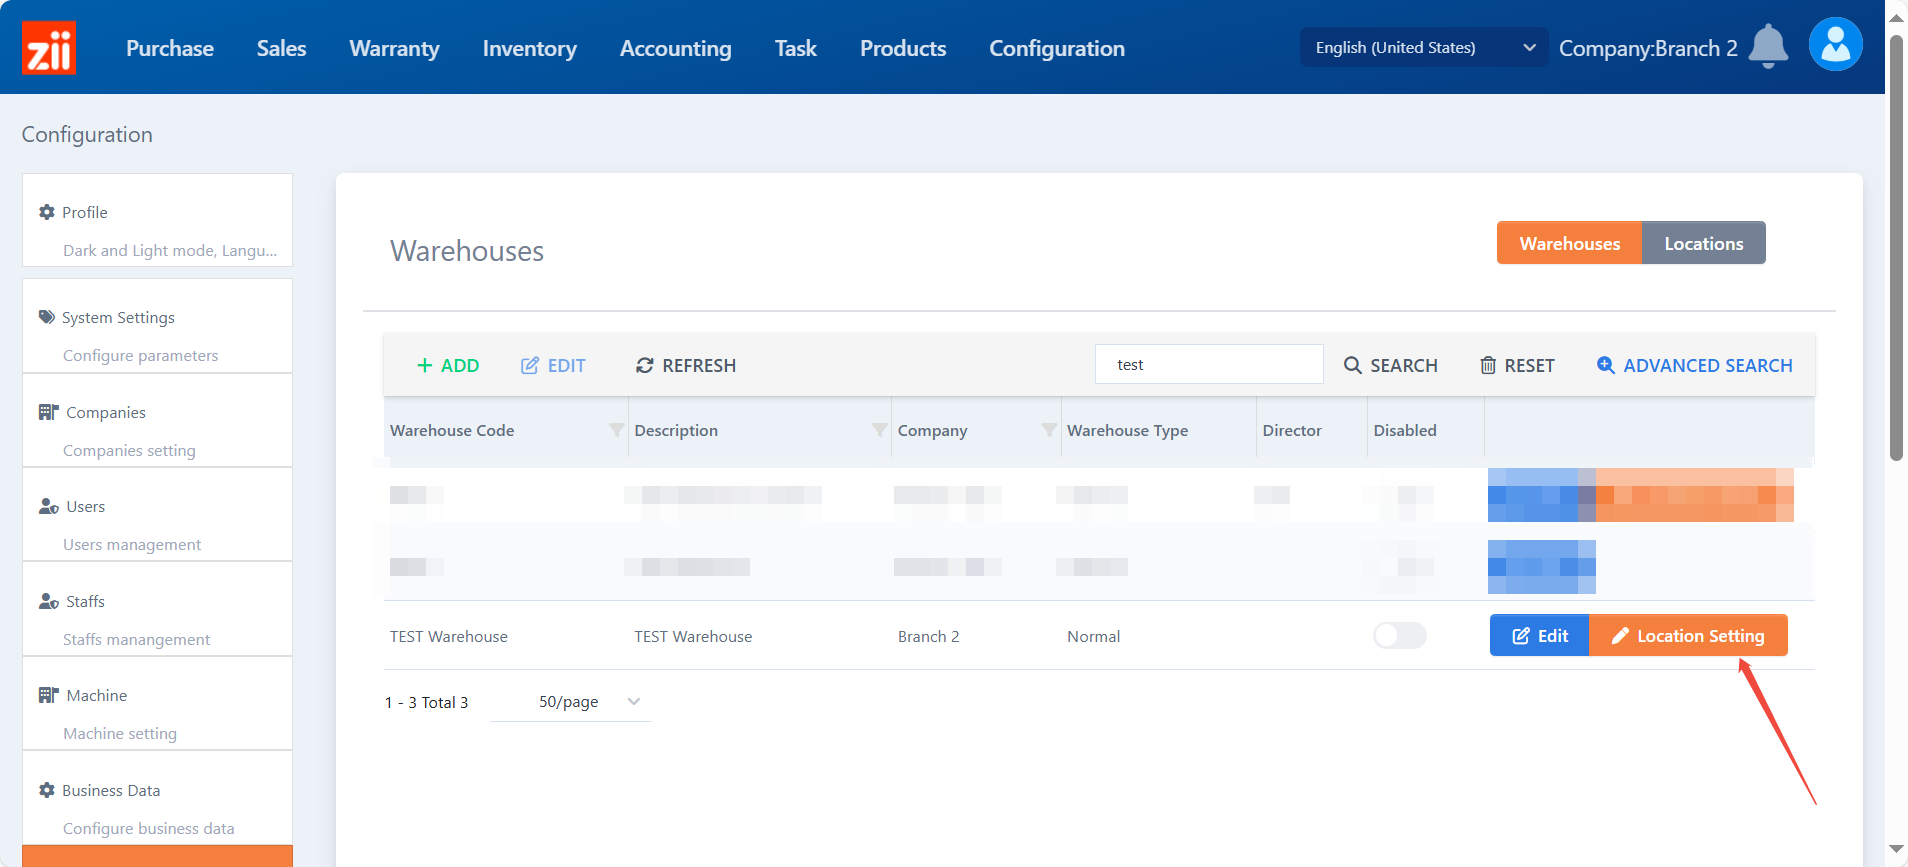
Go to “Warehouse”.
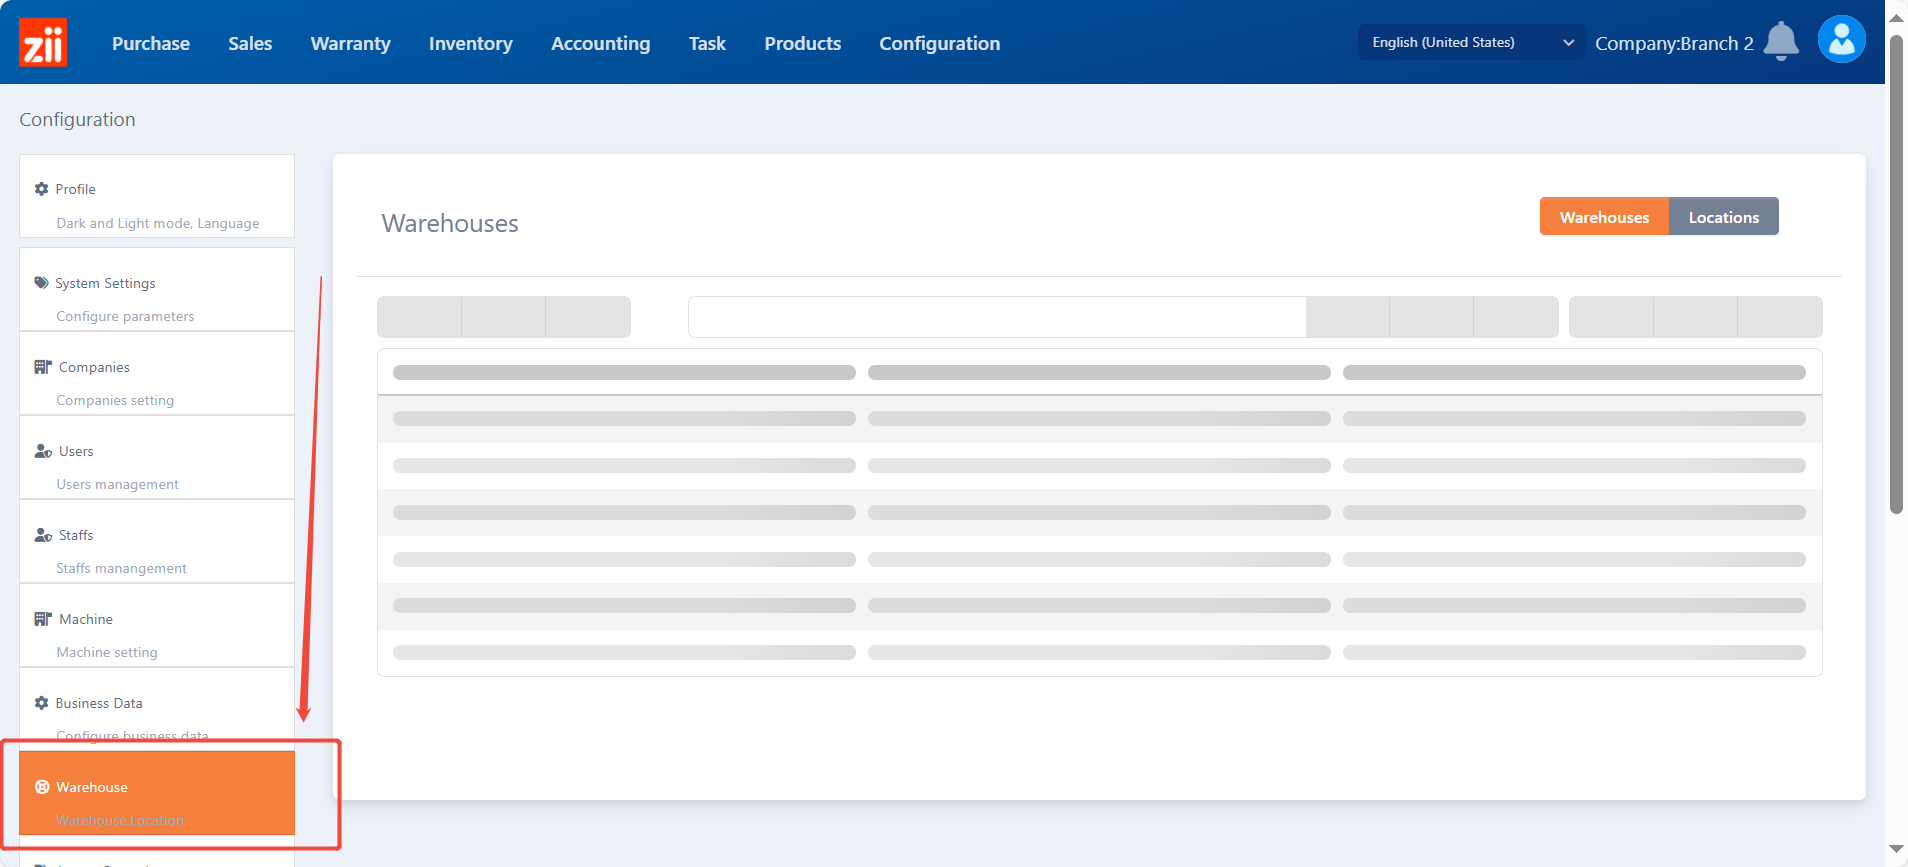
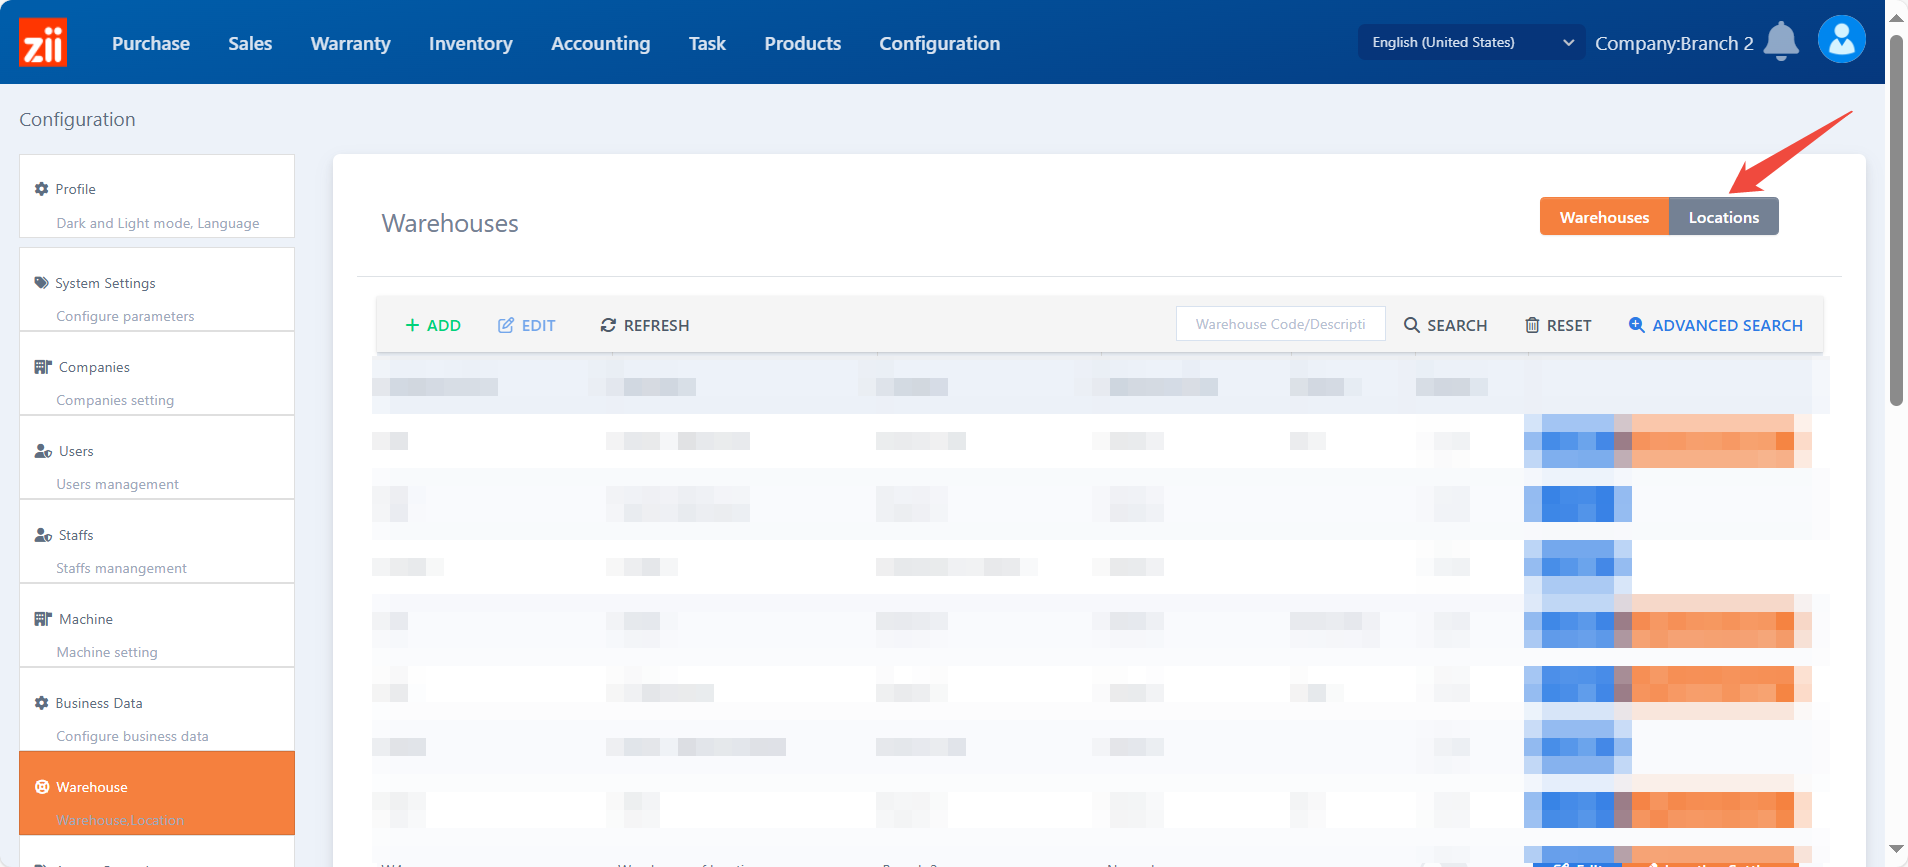
Click on “Locations”.
Click on “Add”.
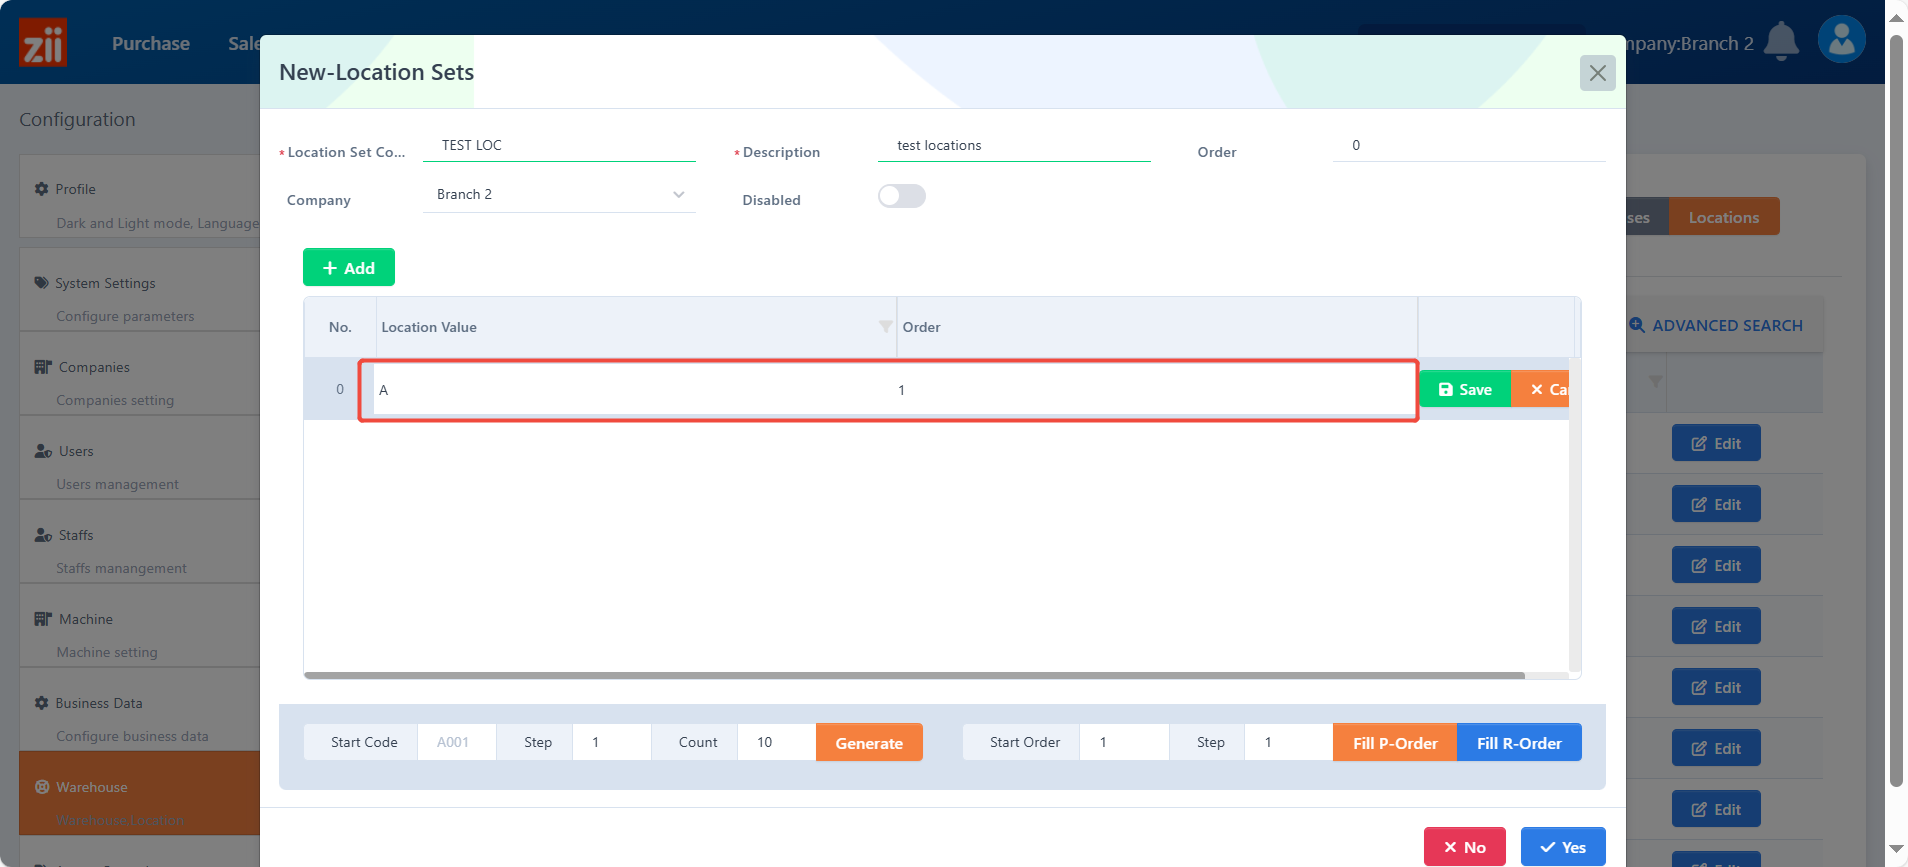
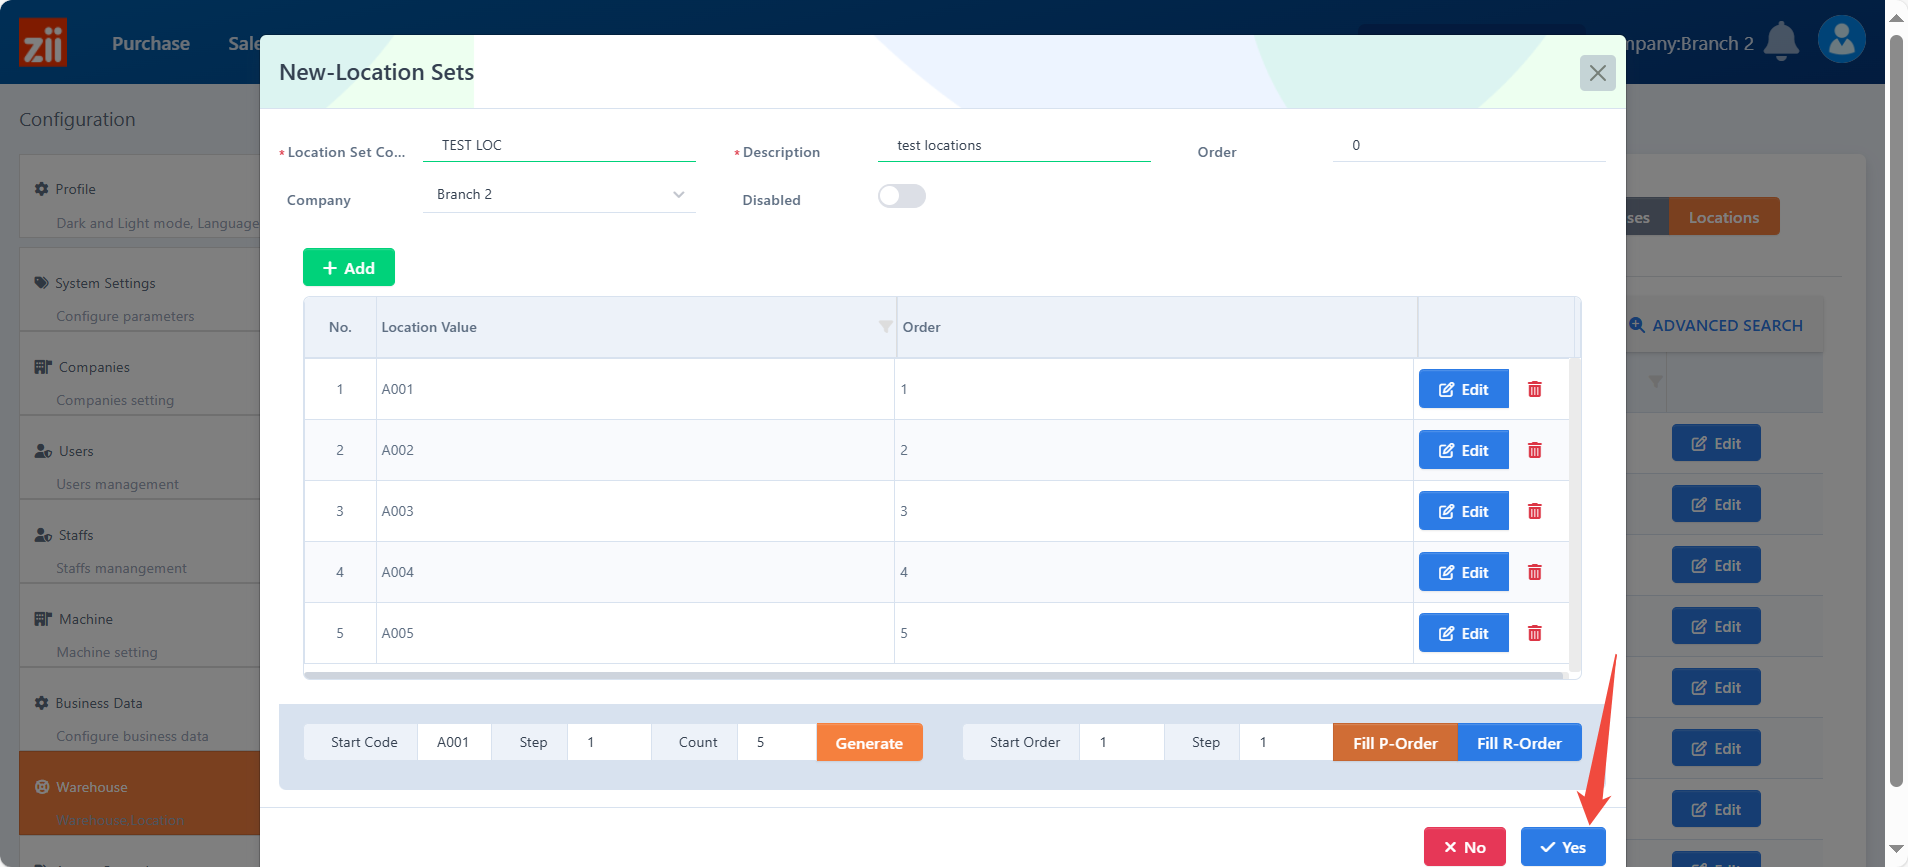
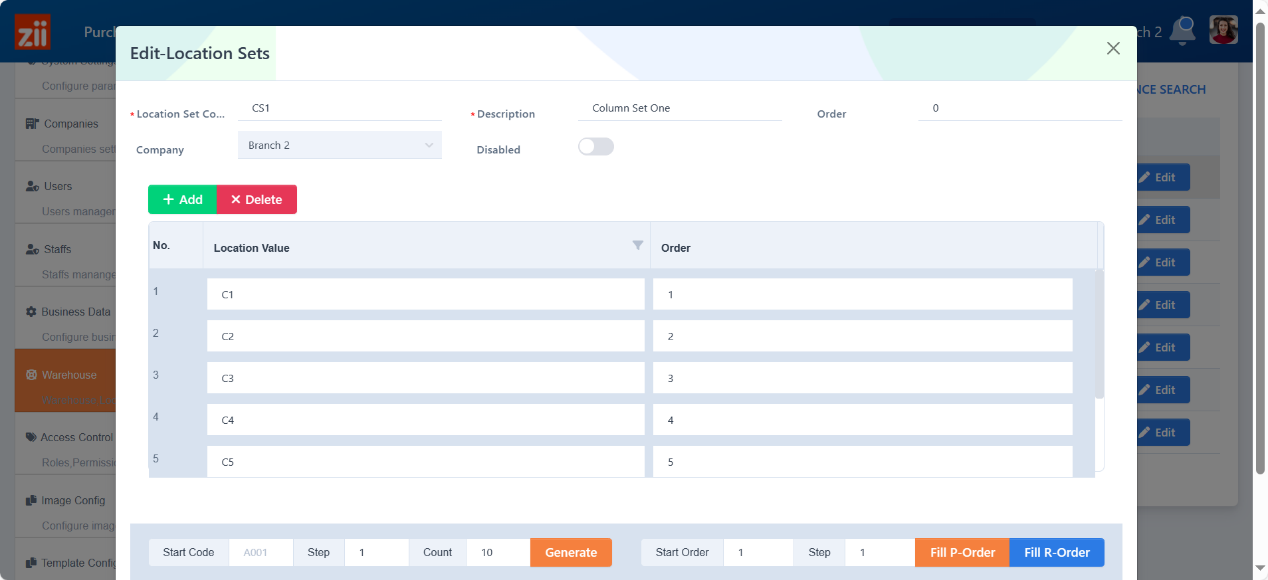
Here is an example of setting up a zone location set.
Set a code and name.
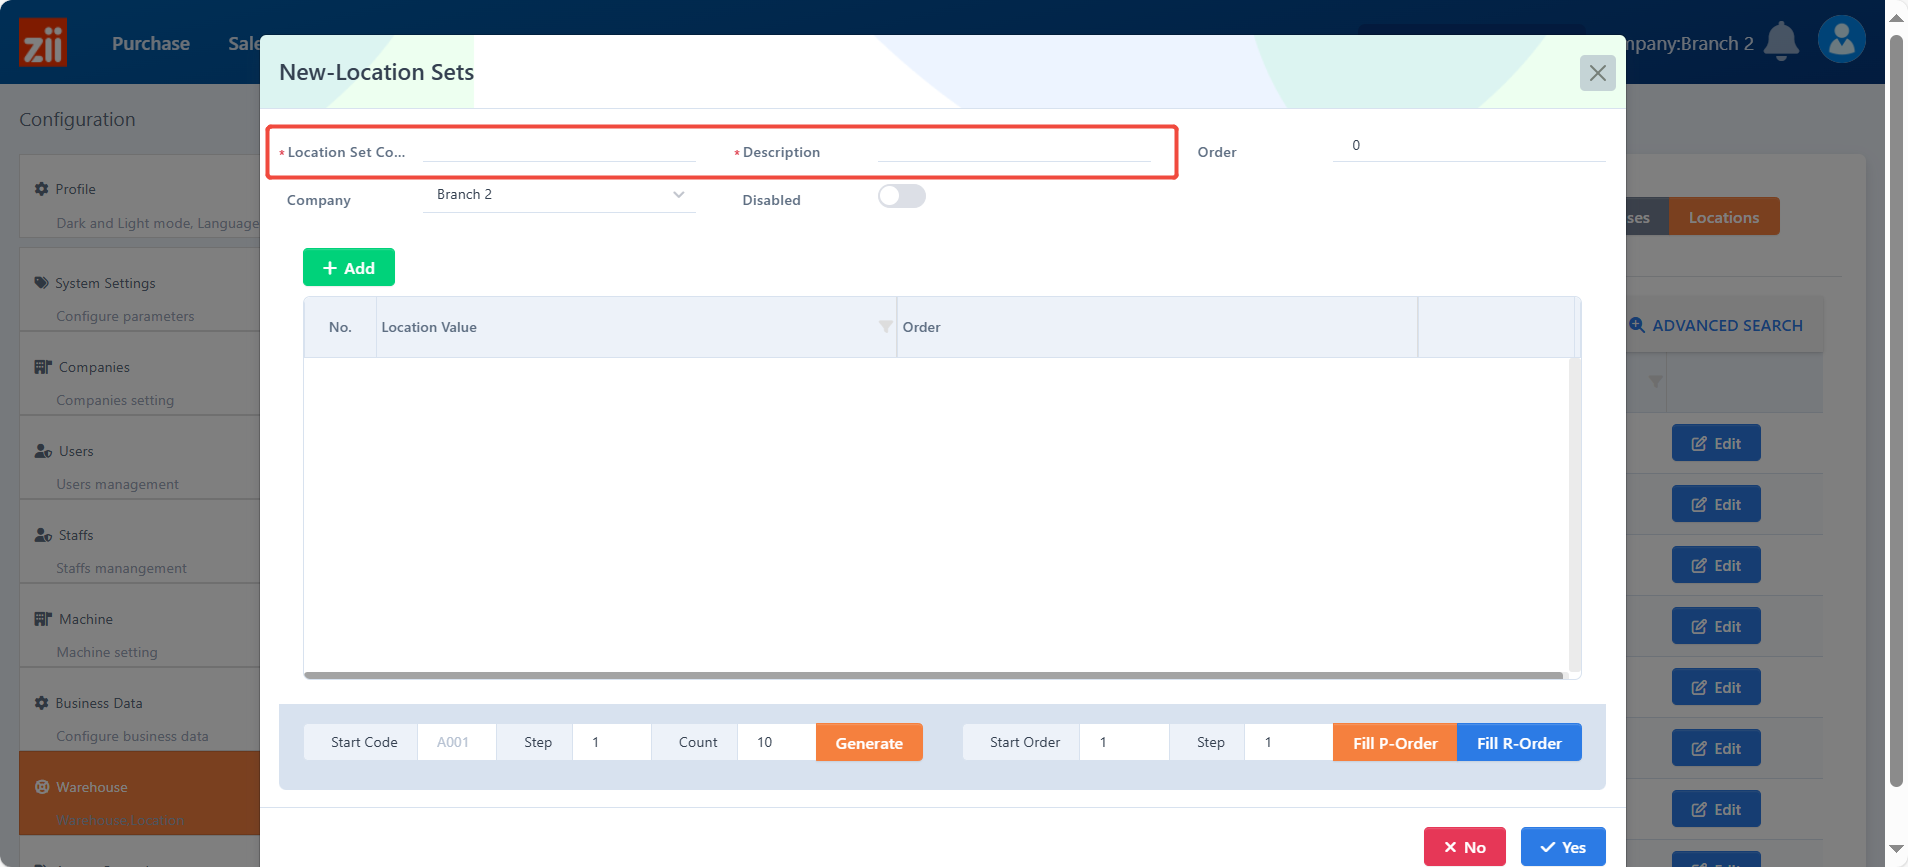
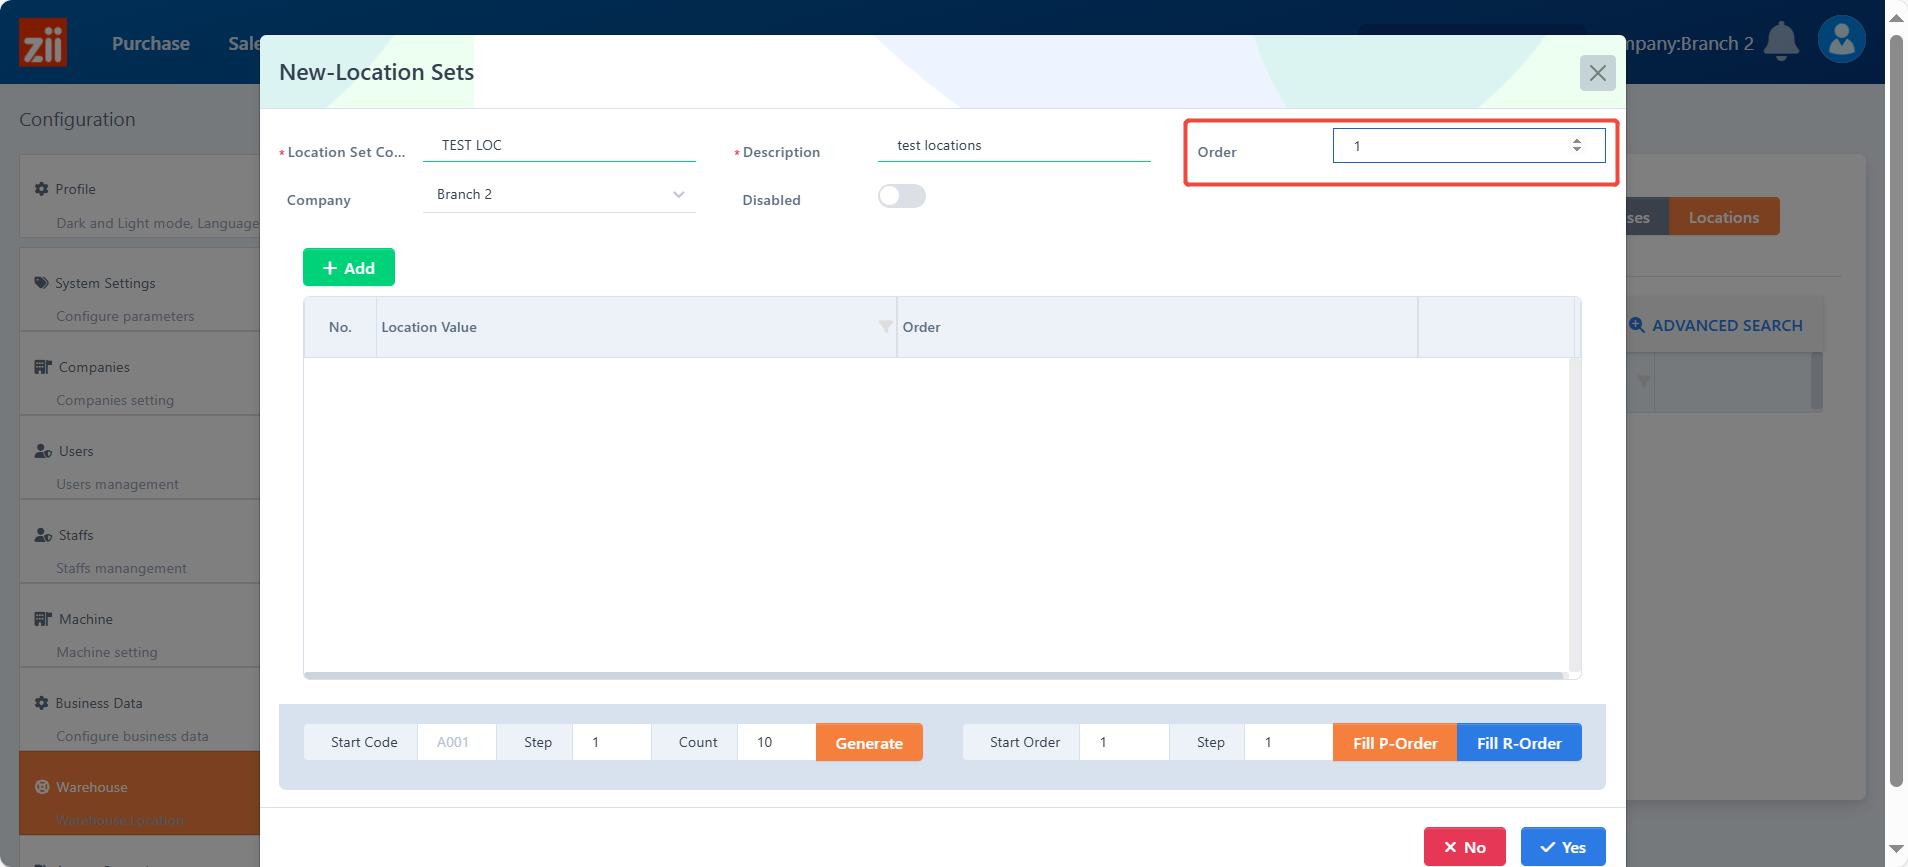
Enter the order of this location set.
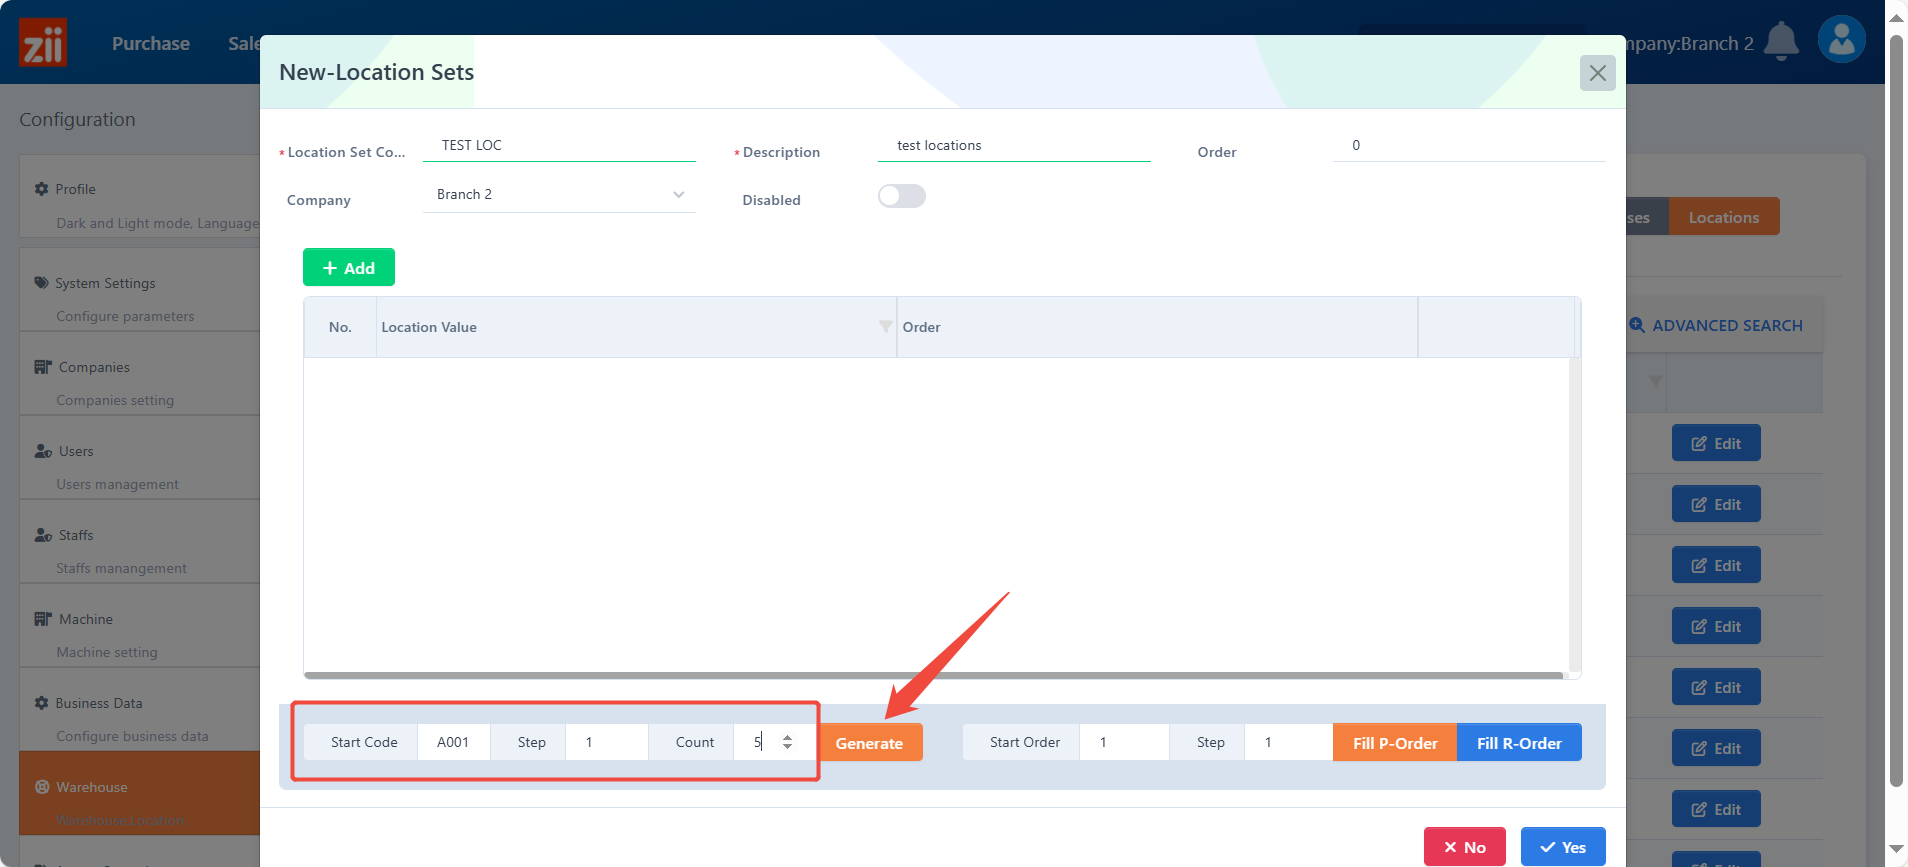
Generate locations manually or automatically.
- You can set up zones manually by clicking on “Add”.
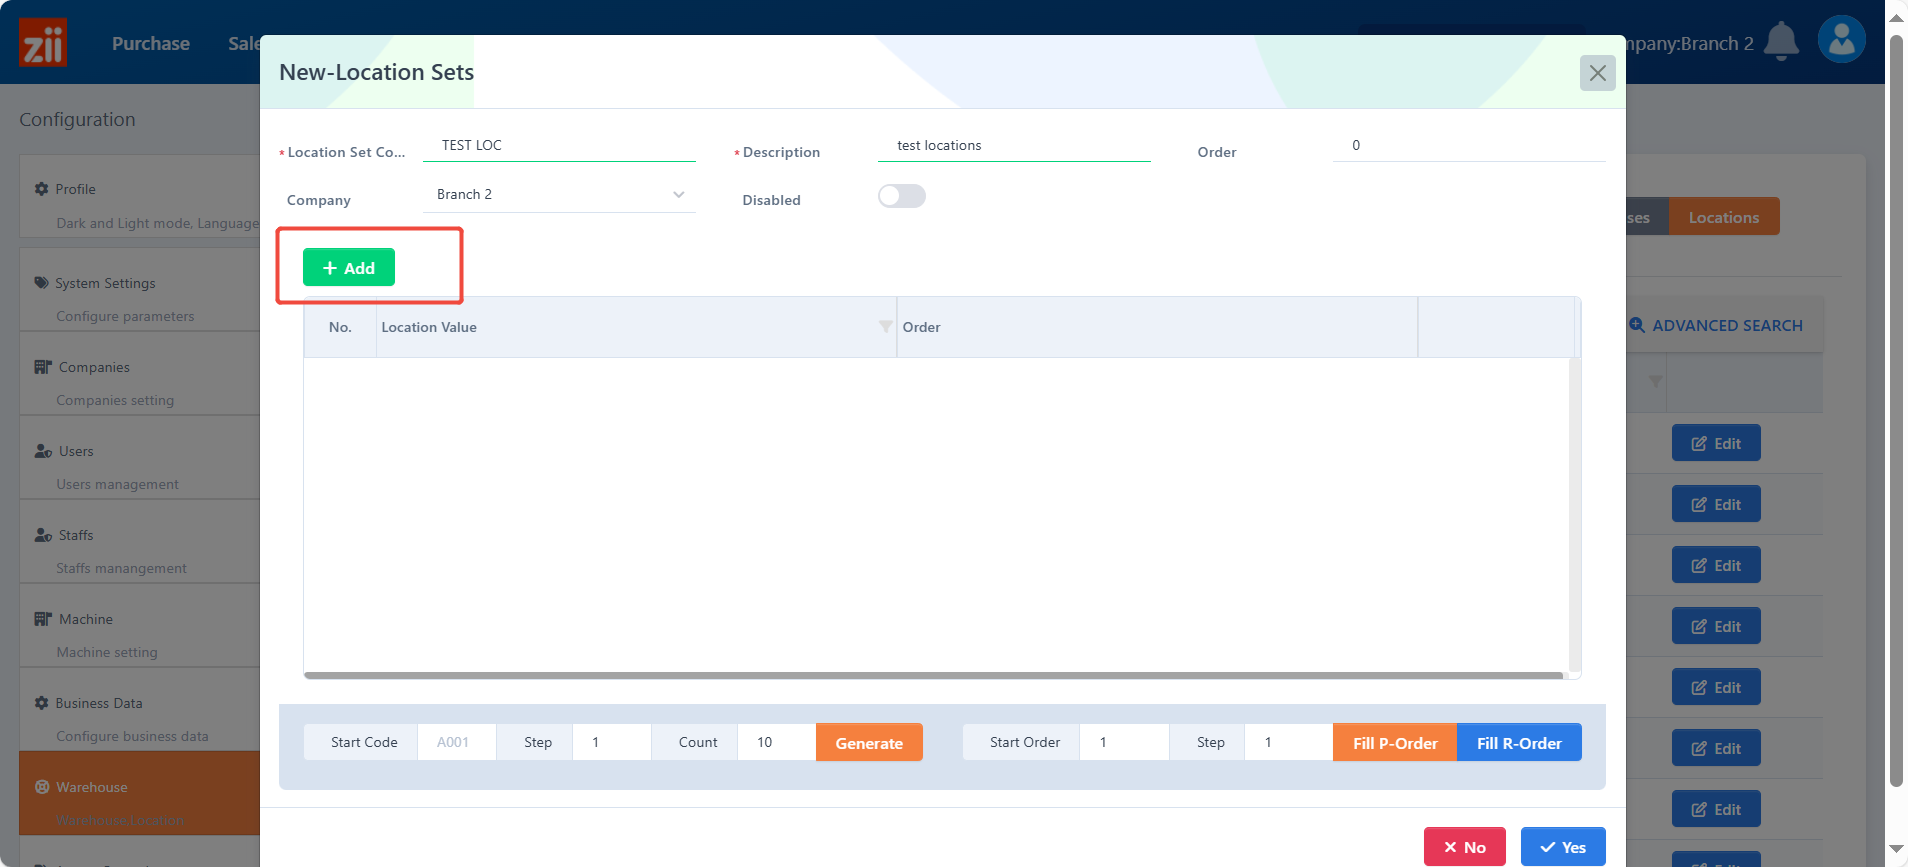
- Enter the location value and its order.
- Or you can make it generate automatically by setting a start code and its quantity and clicking on “Generate”
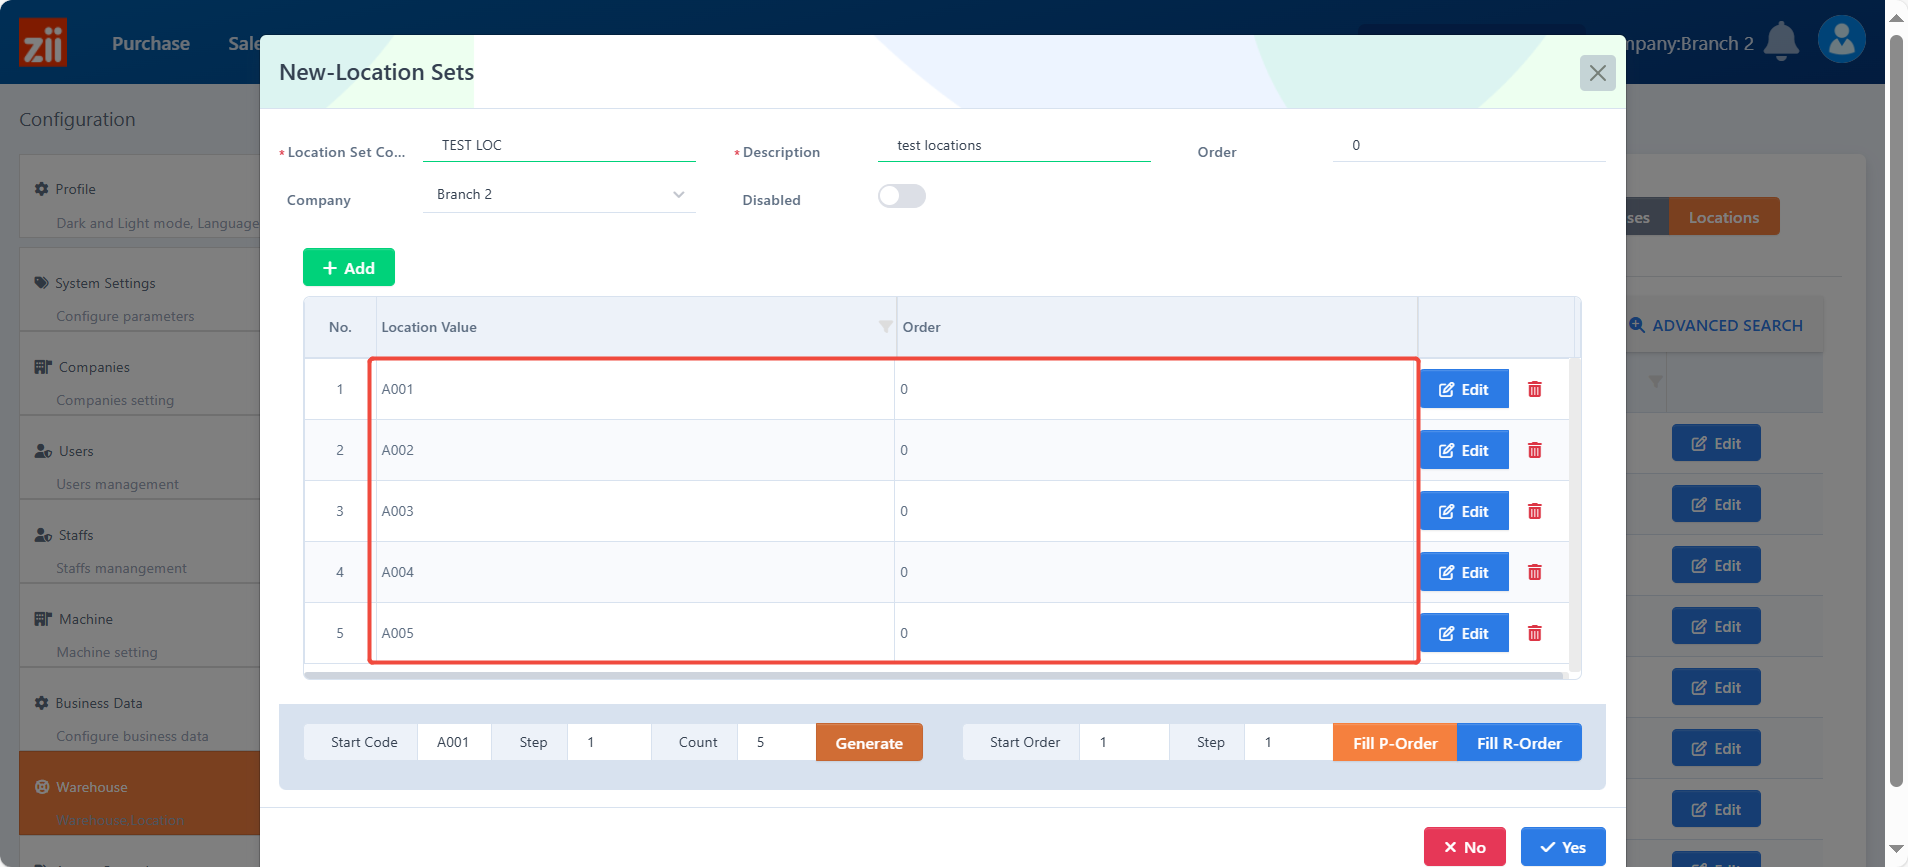
Set up the order. Click on “Fill P-Order” to sequentially generate the order or click on “Fill R-Order” to do it reverse.

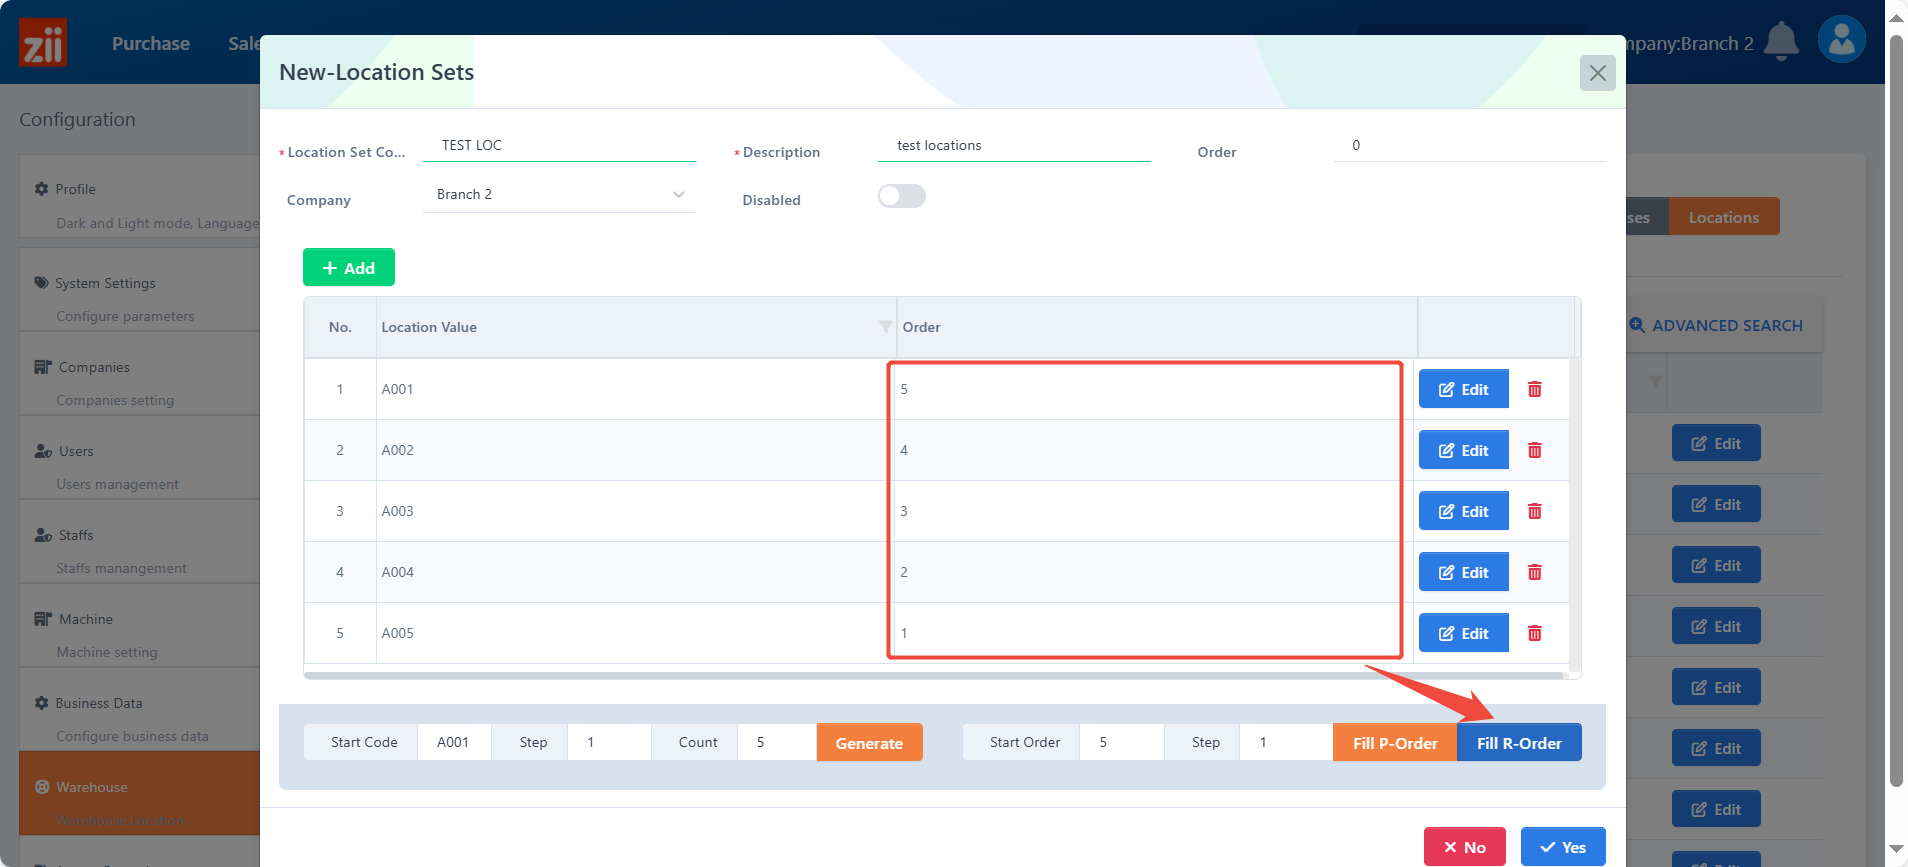
Click on “Yes” to save.
Then the location is done.
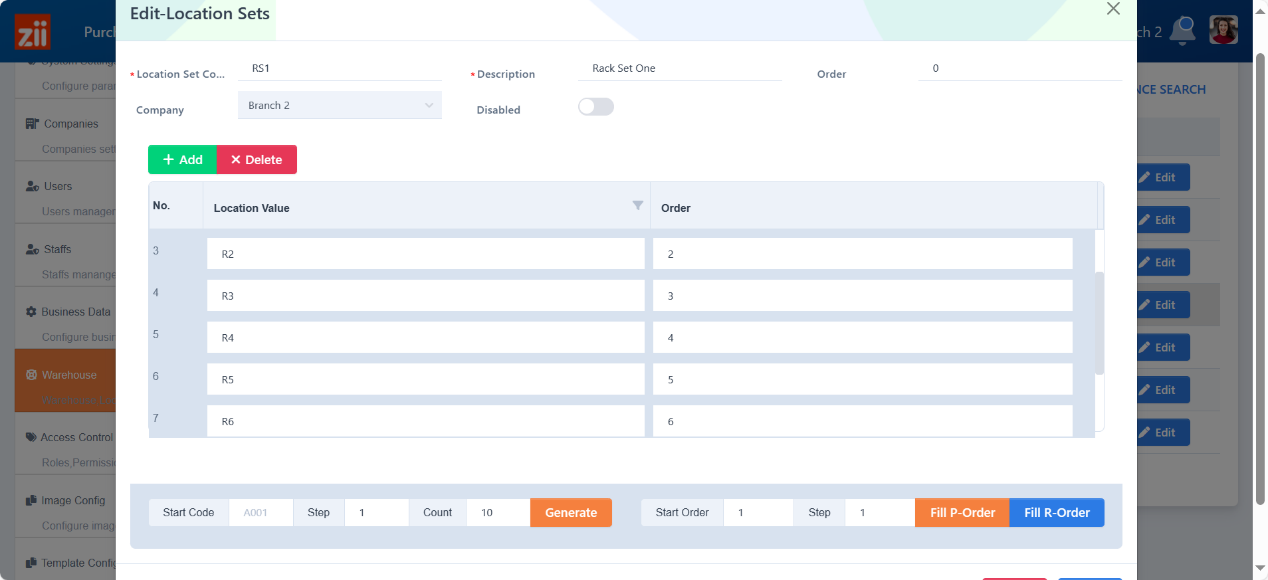
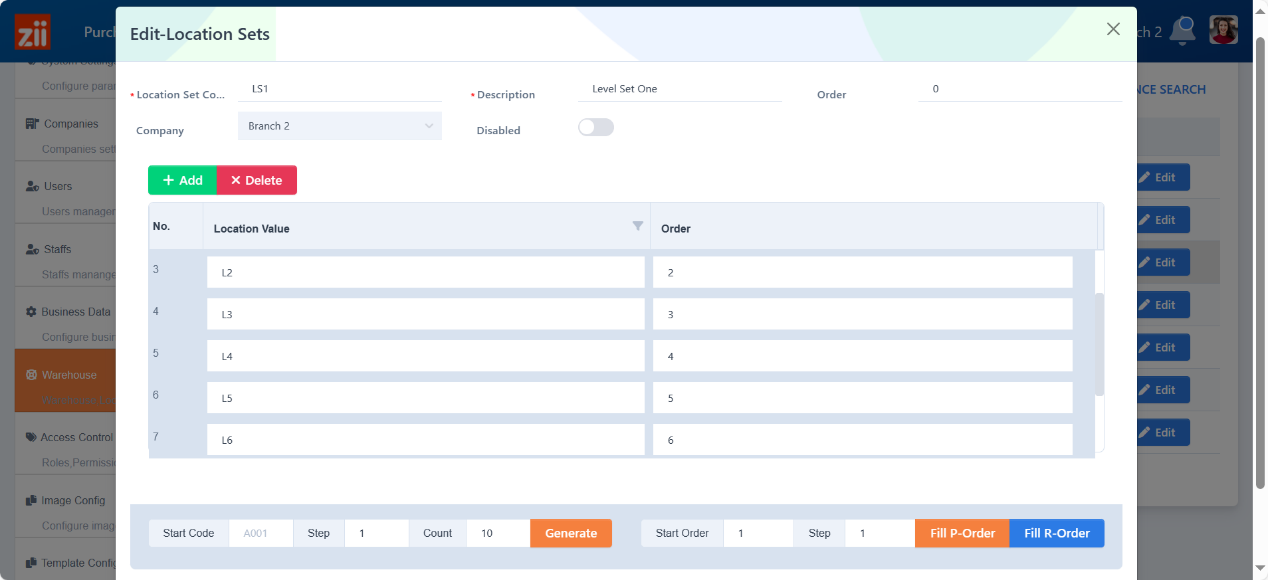
Then you may set up rack, level, and column sets as the steps metioned above. Here are some examples of them.
Assign Locations to a Warehouse
Switch to warehouse setup by clicking on “Warehouse”.
Click on the “Location Setting” of the warehouse that locations are assigned to.
Click on “Batch Add”.
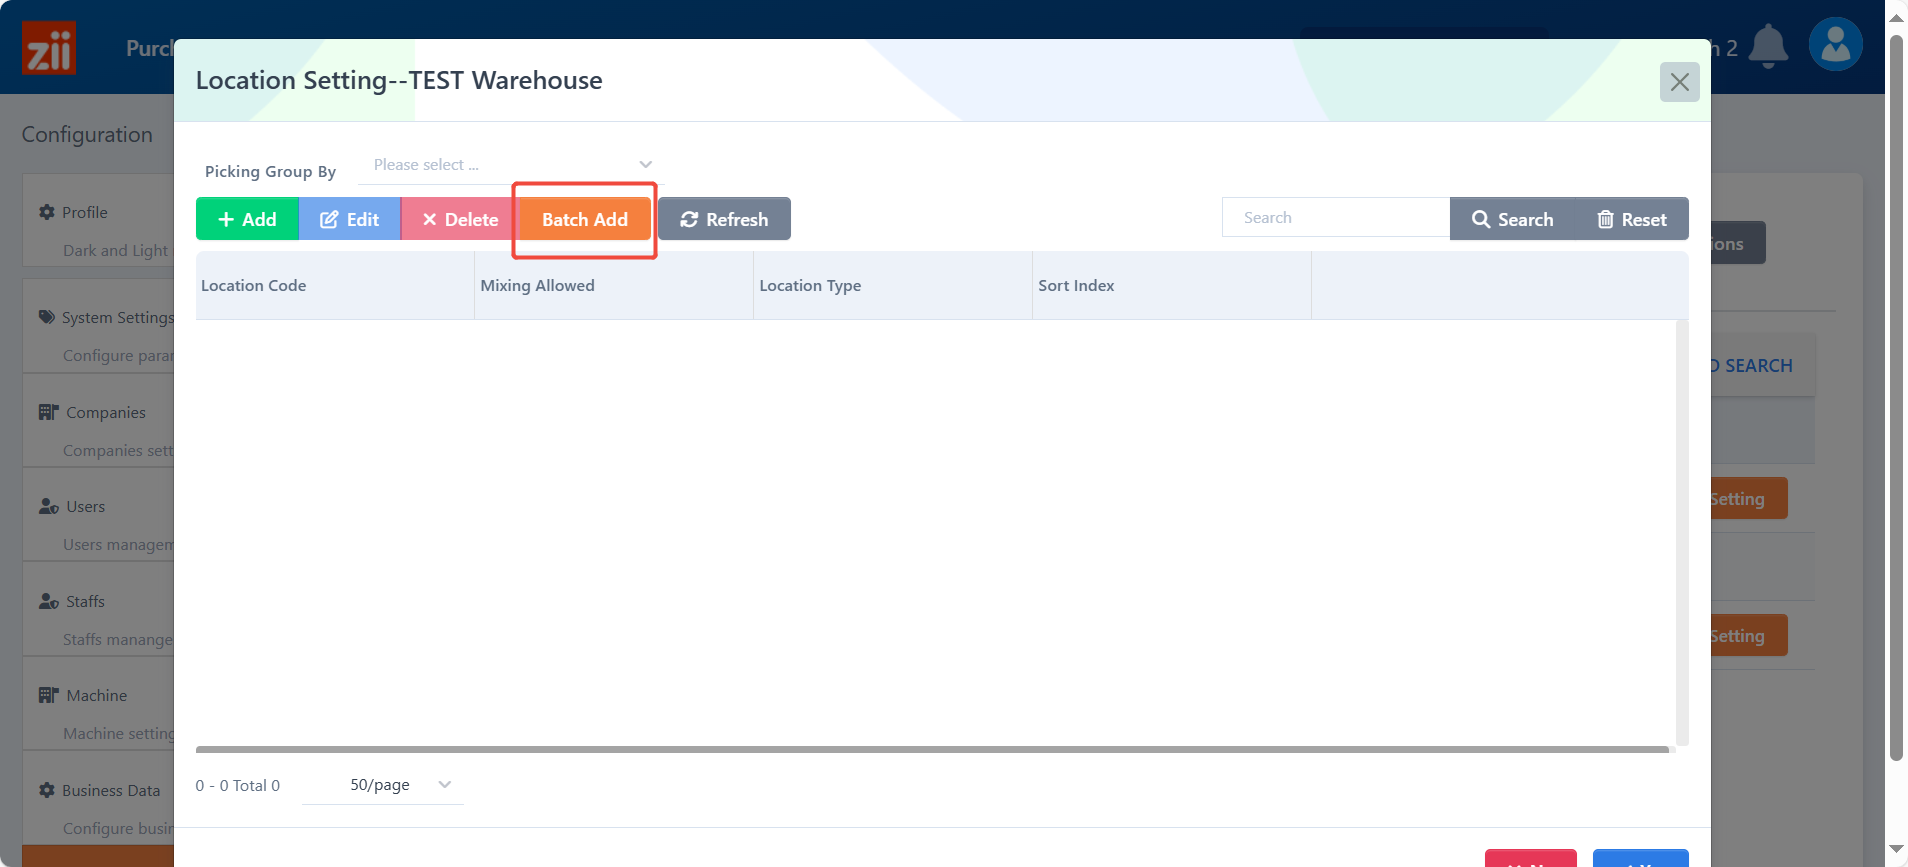
Tick the zone, rack, level and column locations as you need.
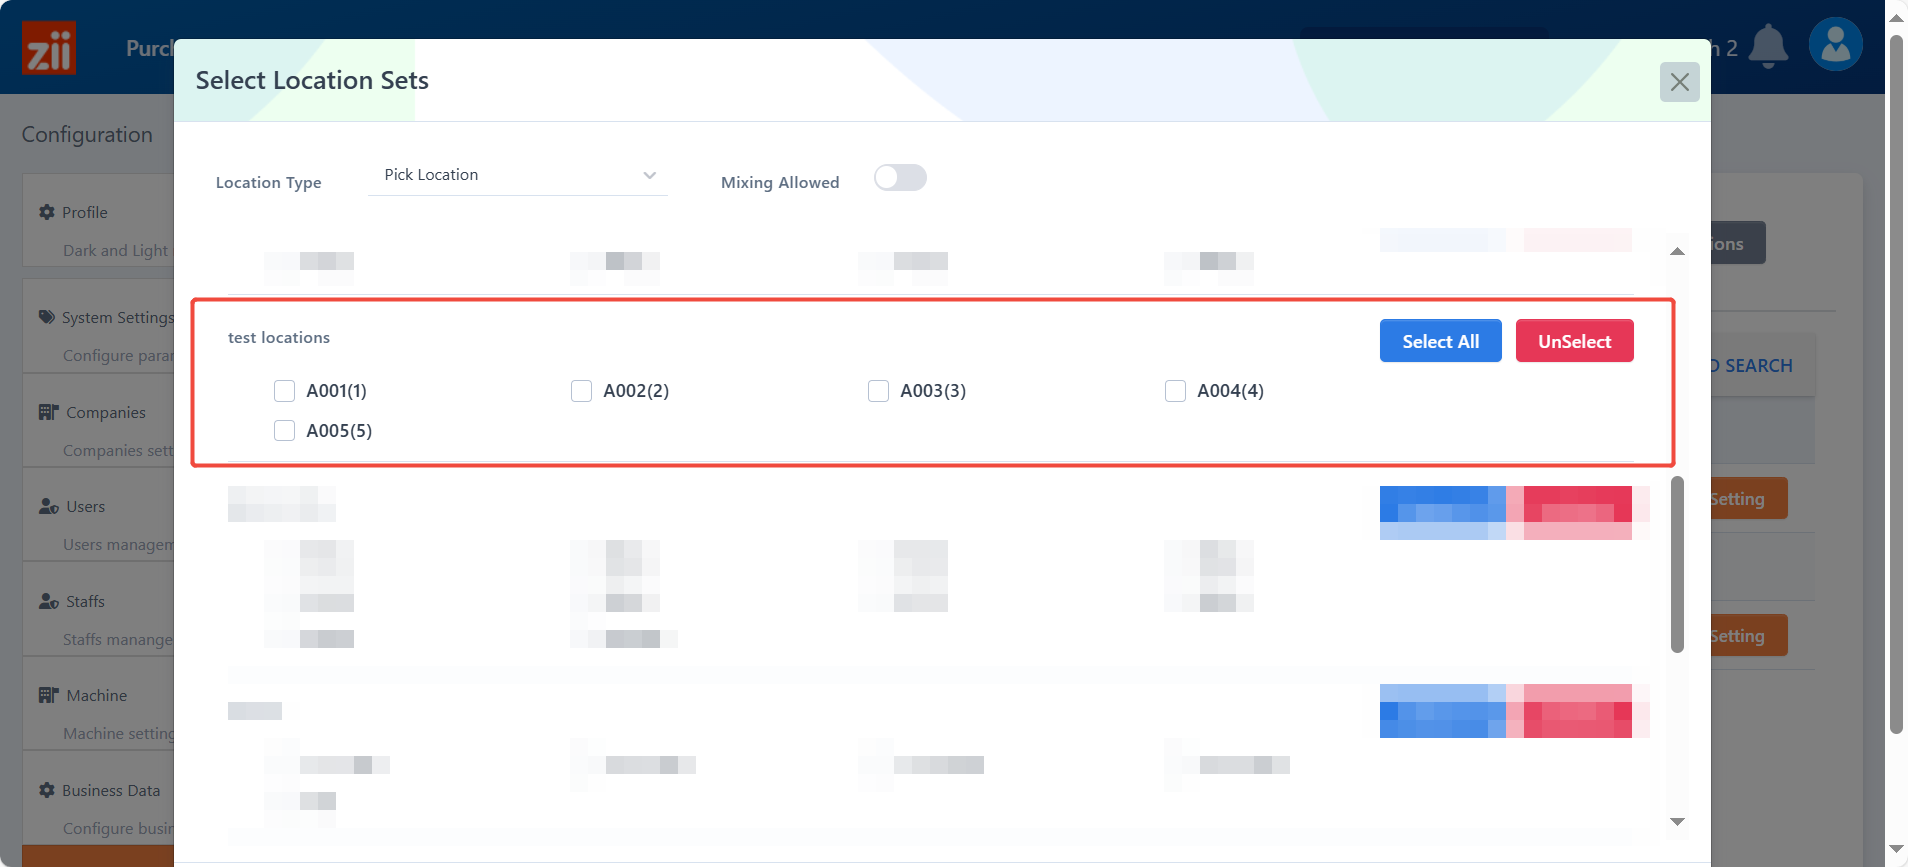
Choose a Location type if you need. (Optional)
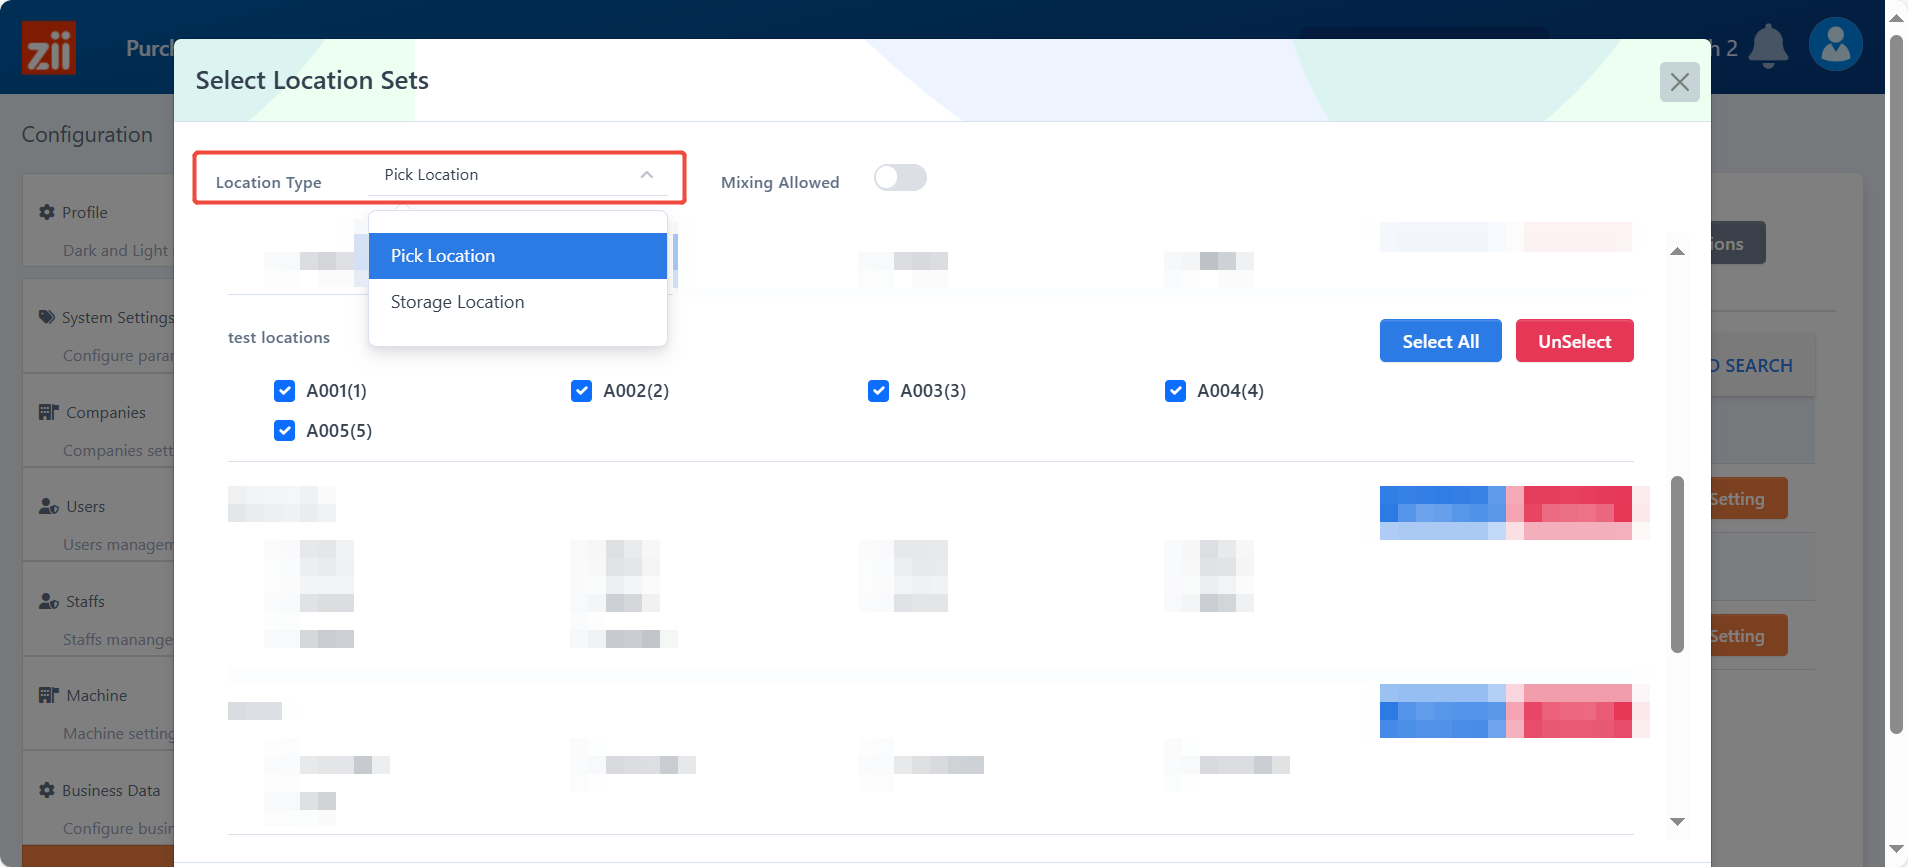
Click on “Yes” to save.

Click on “Yes” to save.
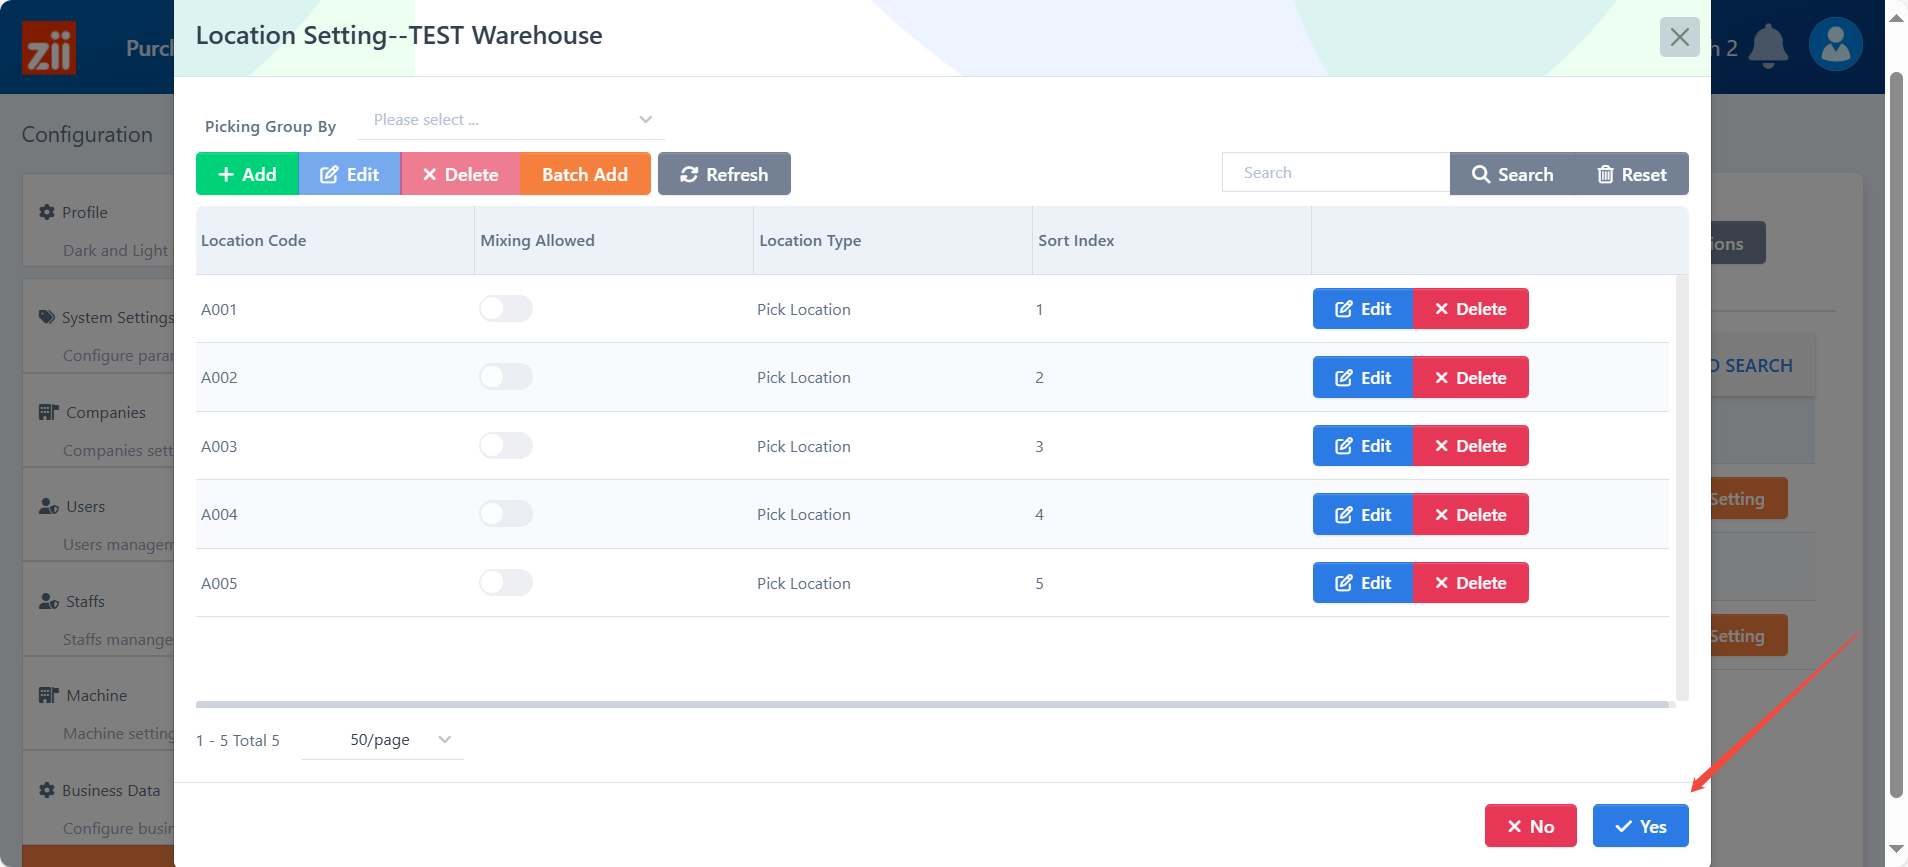
This is how to create locations and assign them to a warehouse.
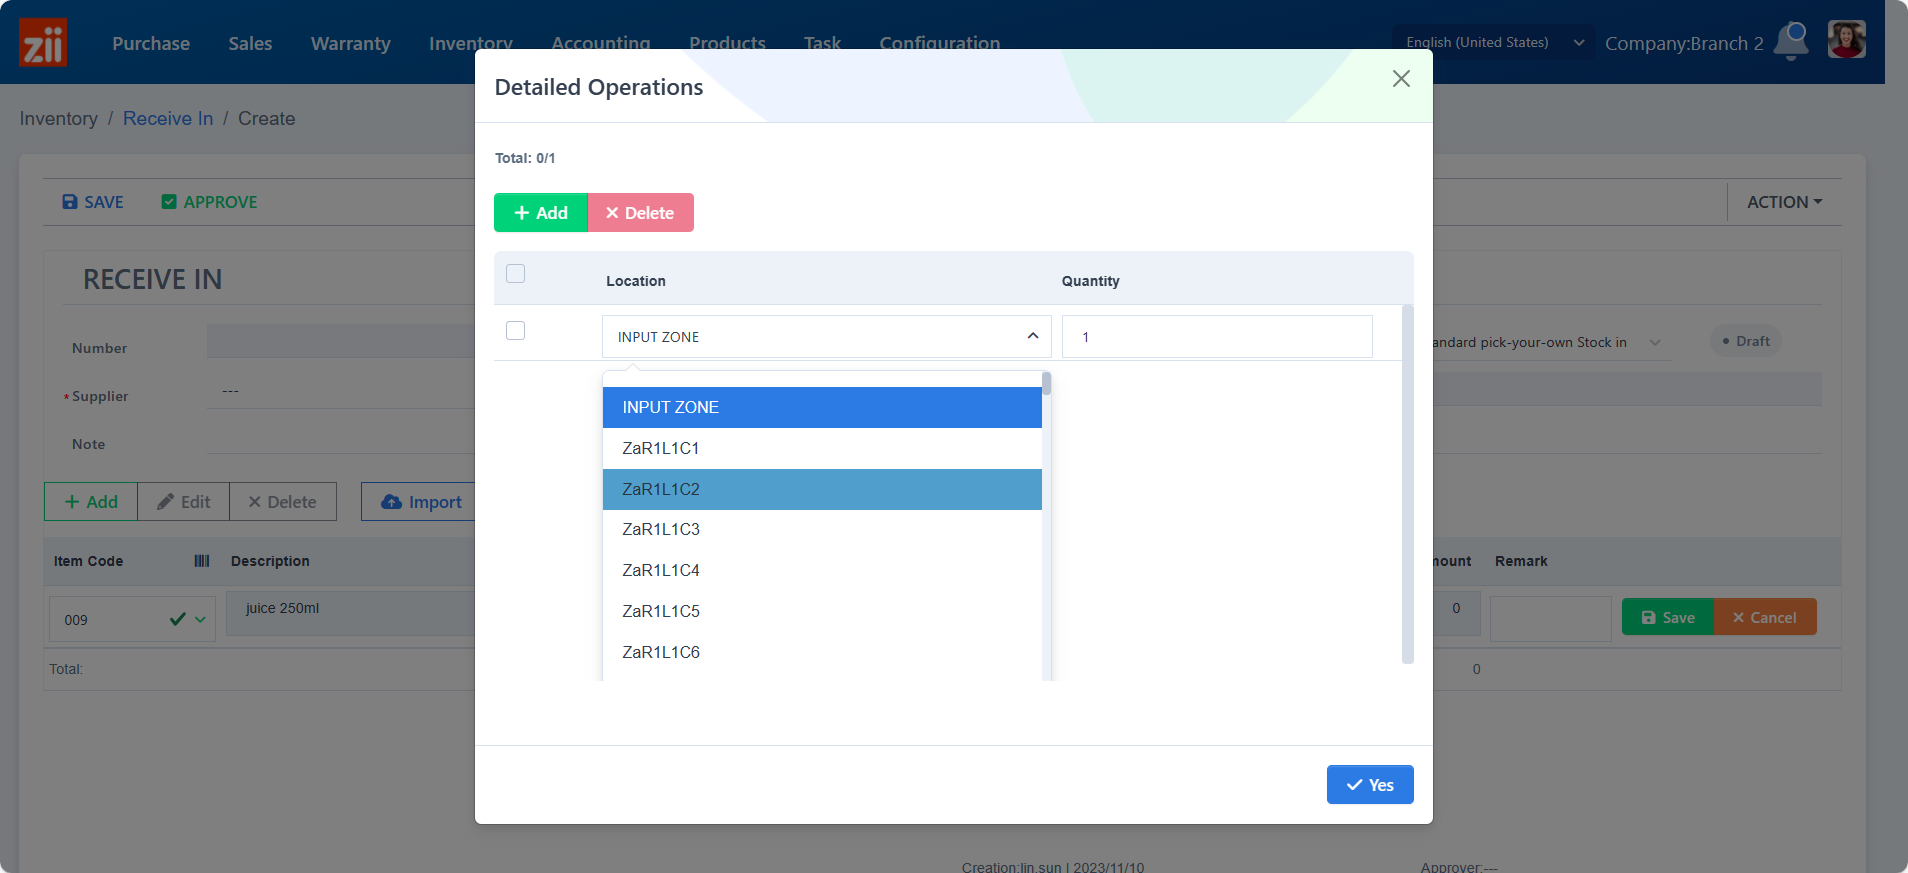
Then, when it comes to stock-related items, you can stock in or out of a warehouse in very detailed locations.