
Step One: Enable Shelf-Life Management in System Settings
Go to “Configuration”.

Go to “System Settings”.

Tick shelf-life management.

Click on “Save”.

Step Two: Enable Shelf-Life Control in Item’s Settings
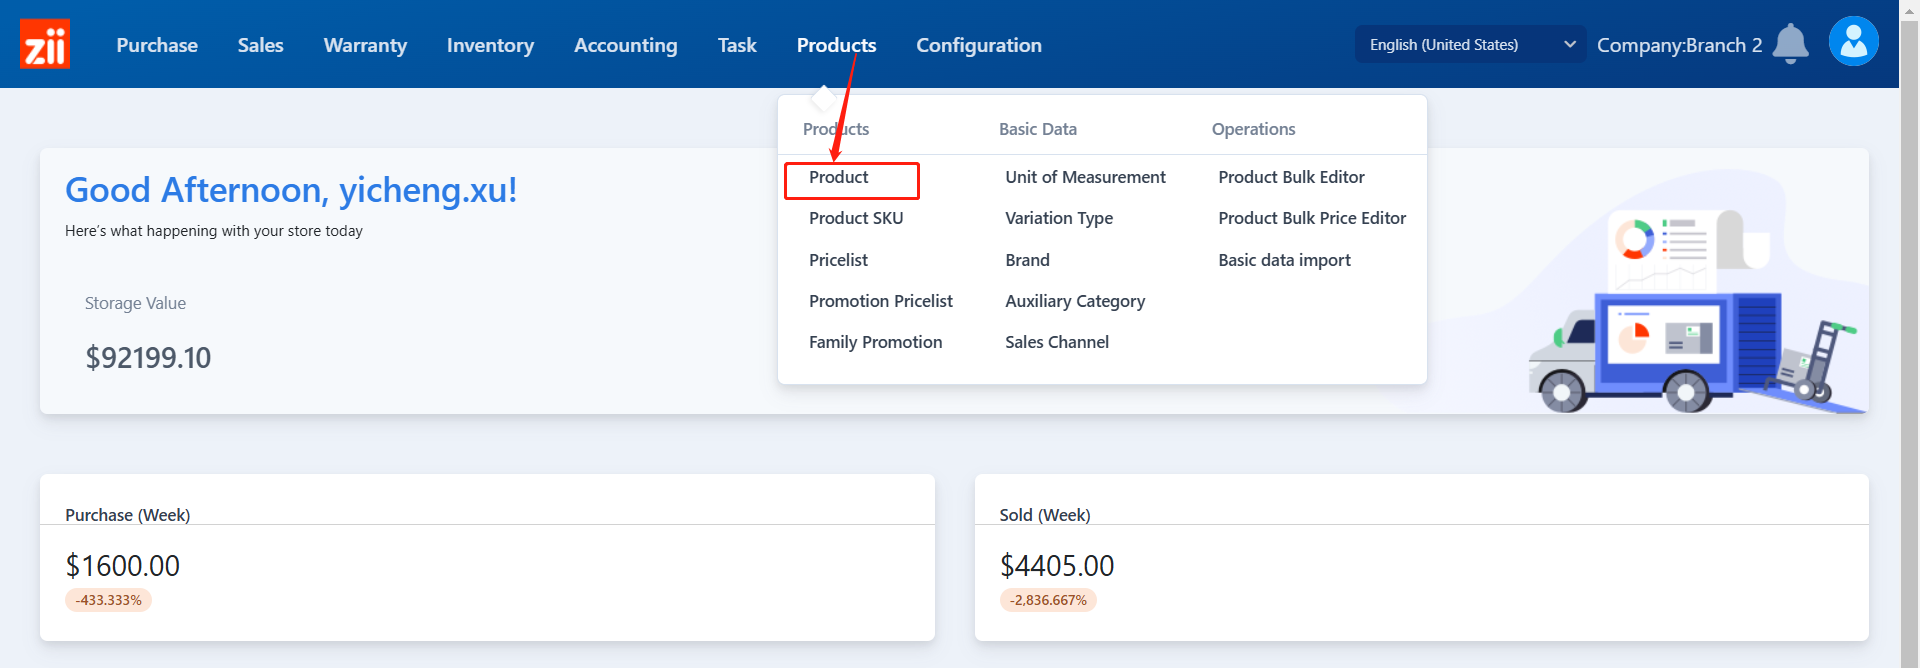
Go to “Product” under “Products”.
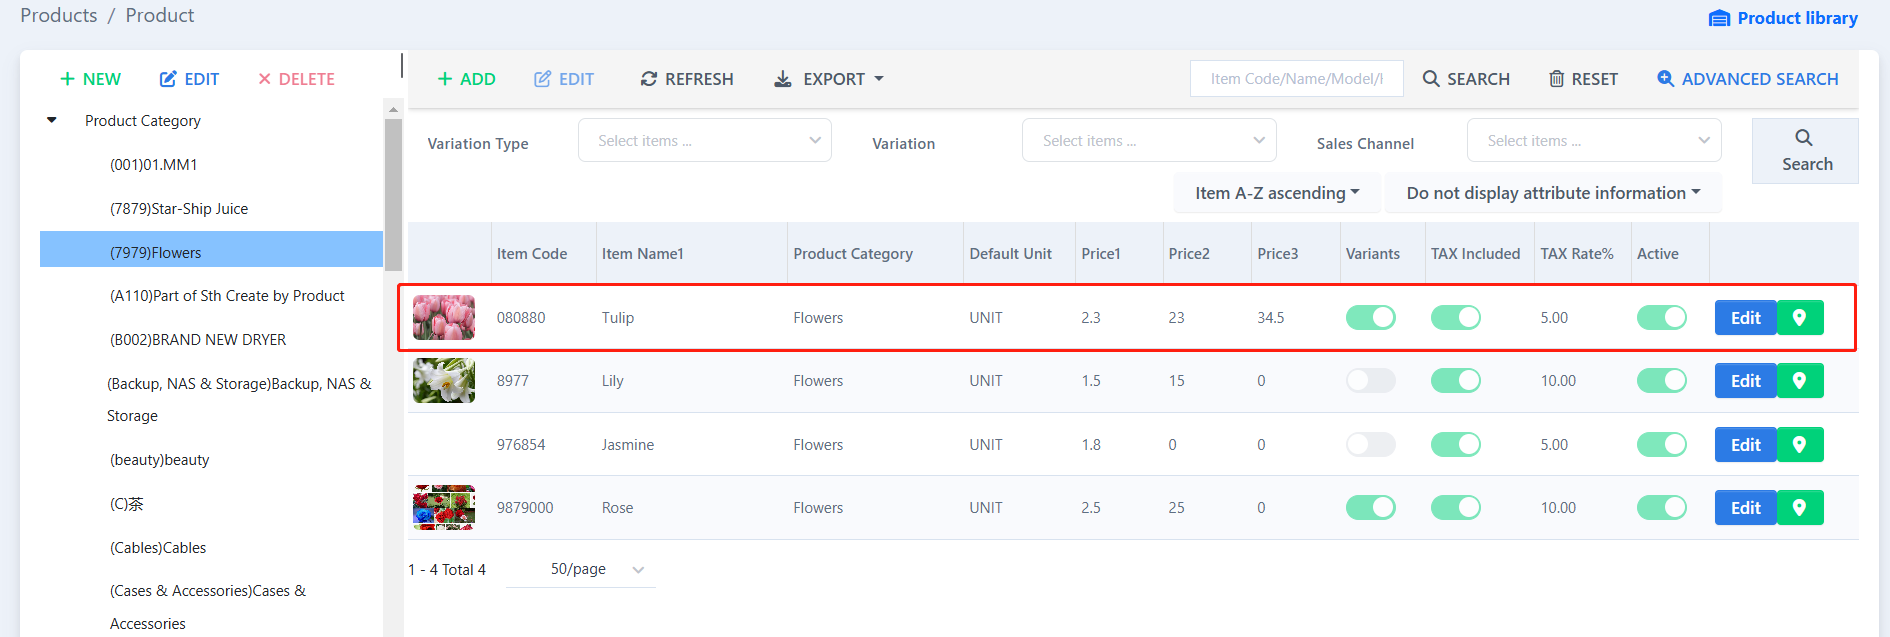
Double click the item that you want to modify.
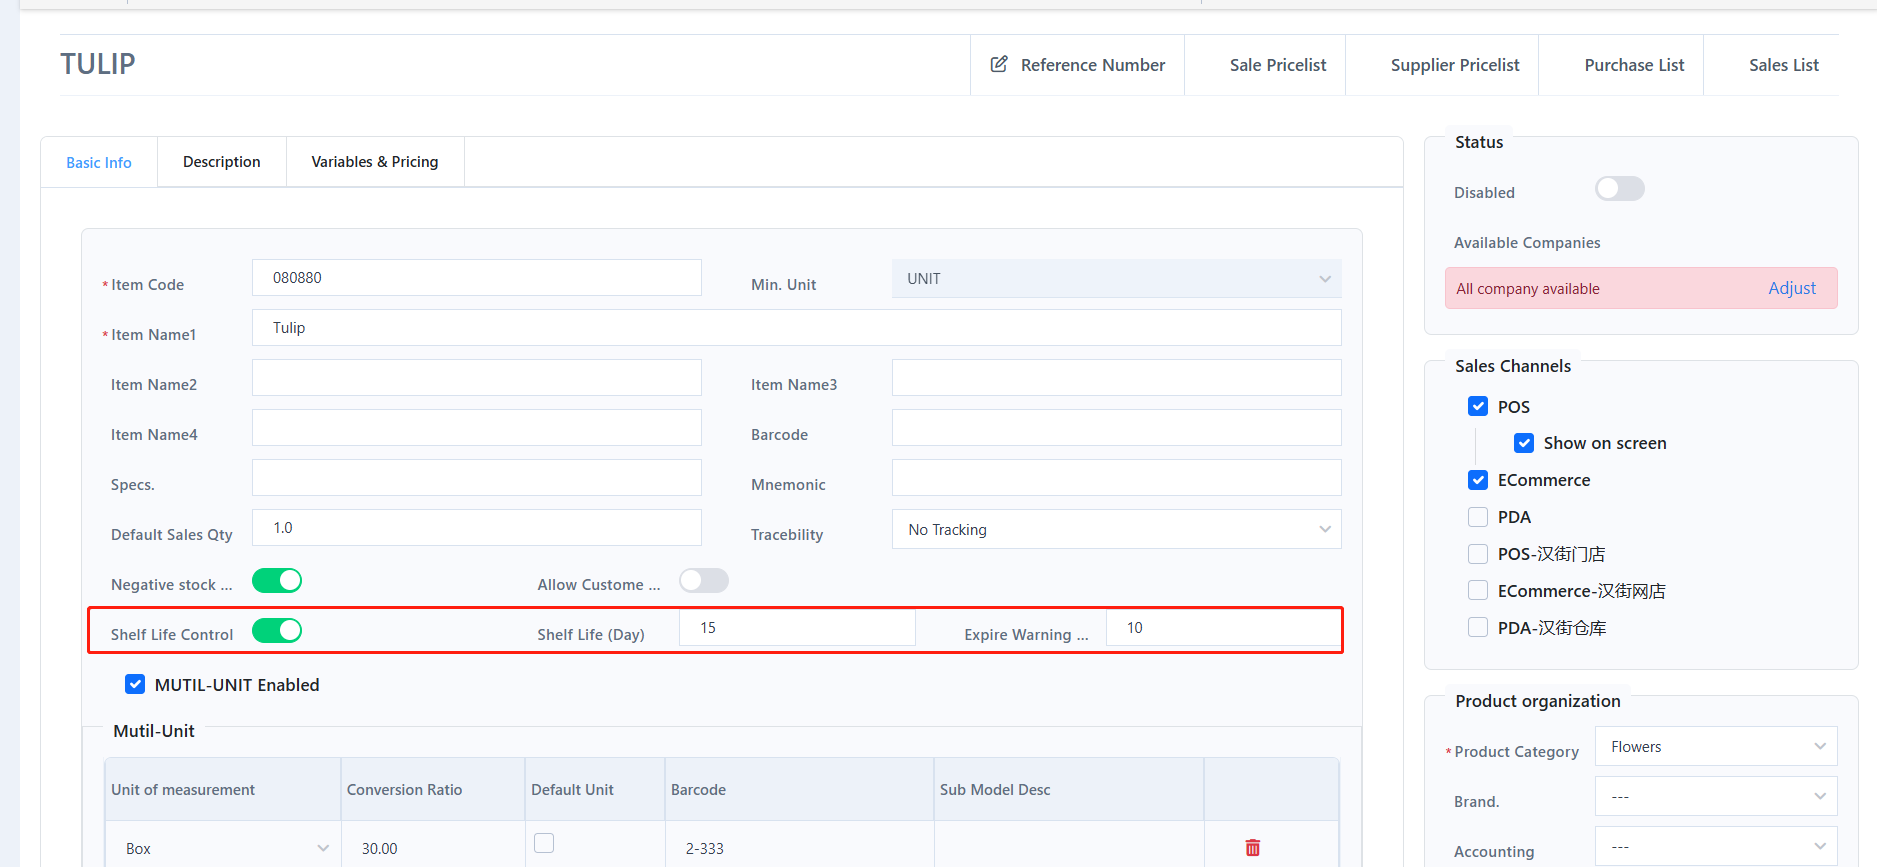
Toggle on “Shelf Life Control”, set the “Shelf Life”, and set an “Expire Warning”.
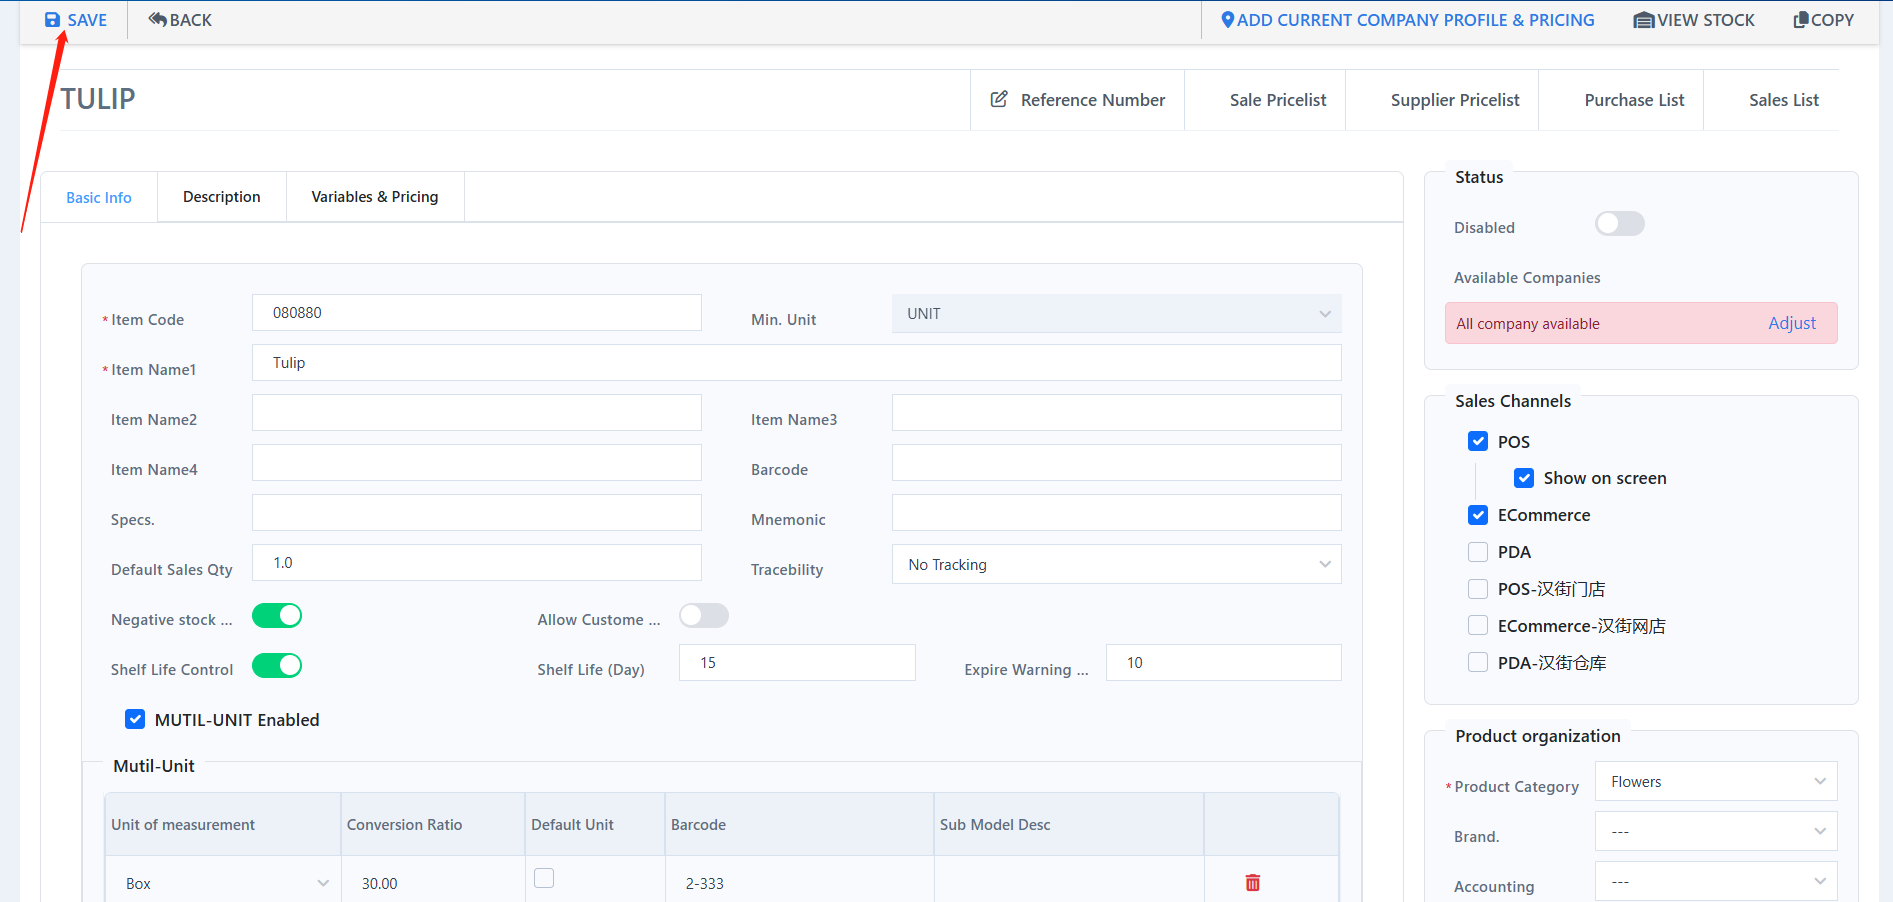
Click on “Save”.
In this way, you can select the item’s production date when stock-in.

And check items that are about to be expired in “Shelf Life Warning” report.
