
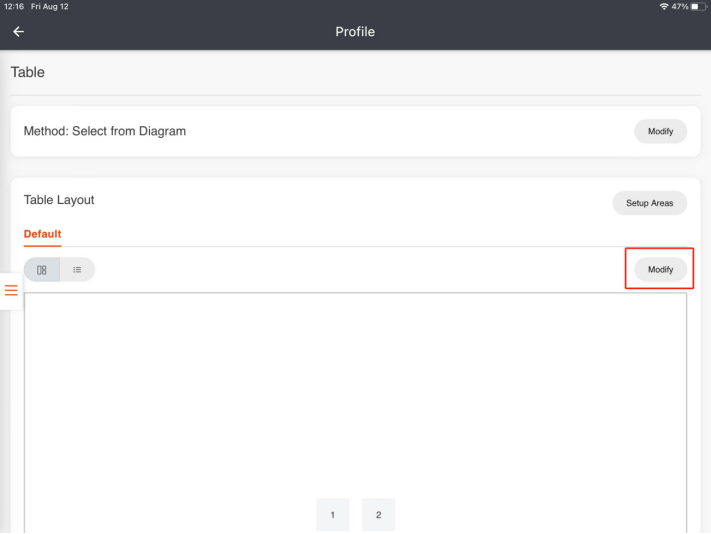
As you can see, we have set up two tables for you. You can set up more tables as you need.
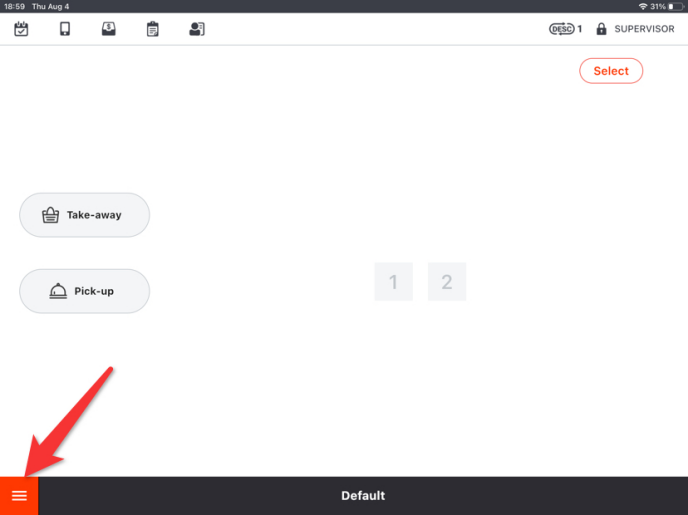
- Click on the “toolbar button” in the lower left corner.
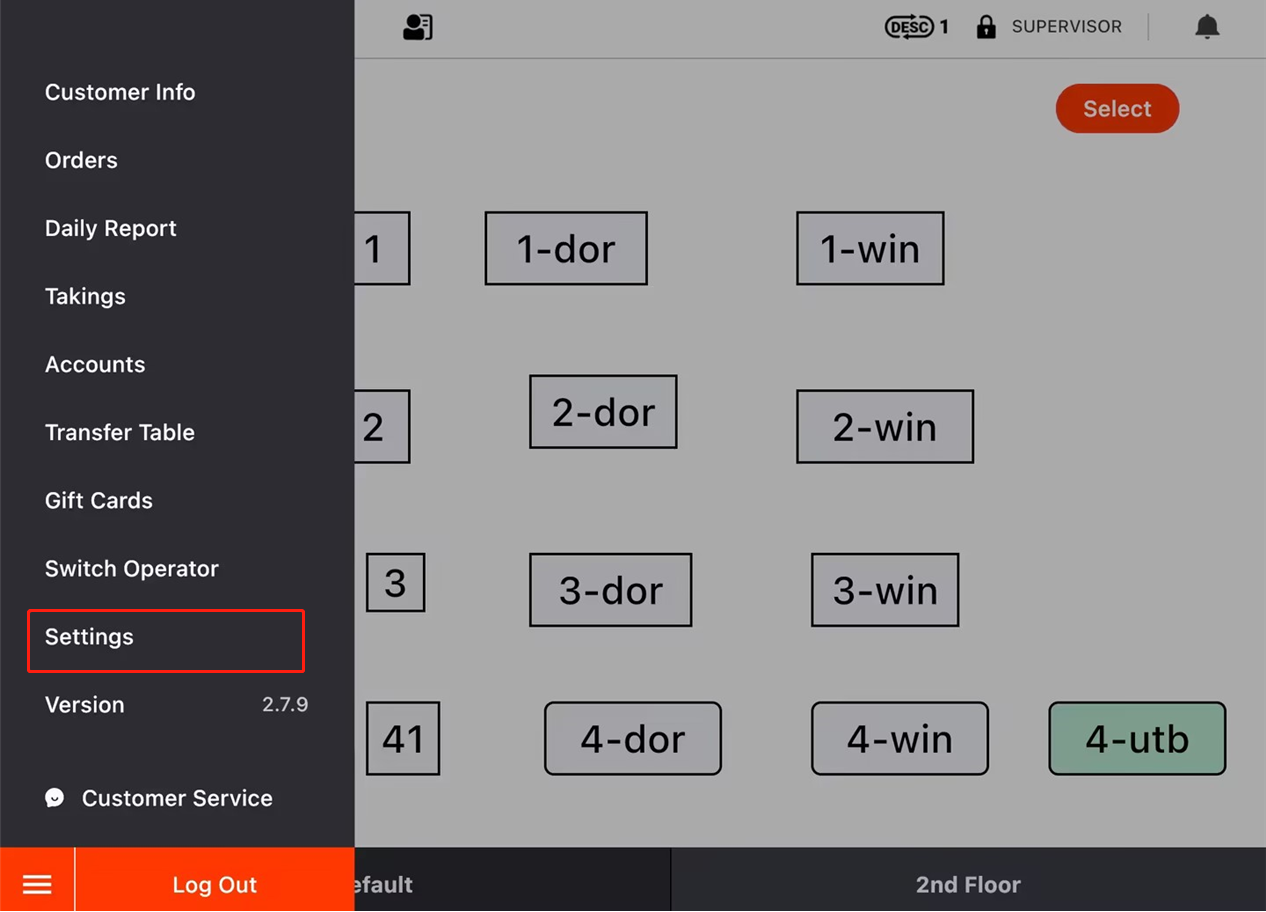
- Click on “Settings” in the toolbar.
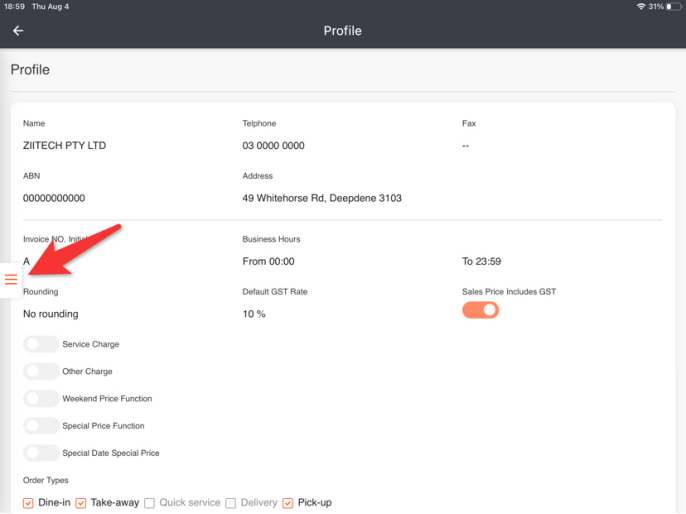
- Click on the button on the left.
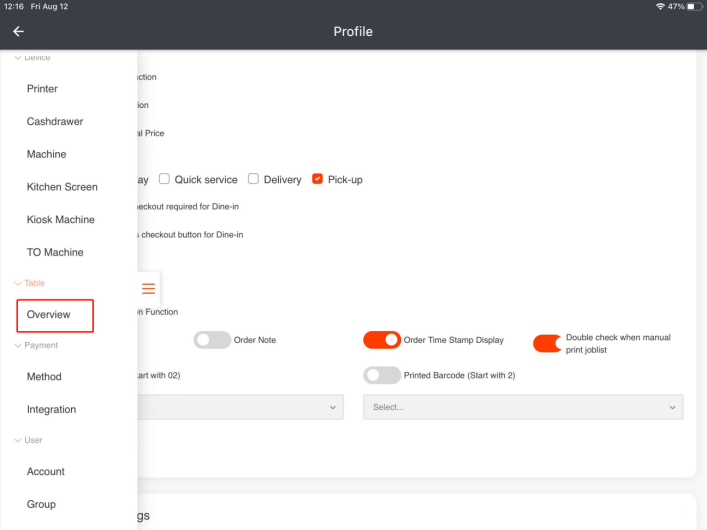
- Scroll down to go to “Overview”.
- Click on “Modify” below “Setup Areas” to edit tables.
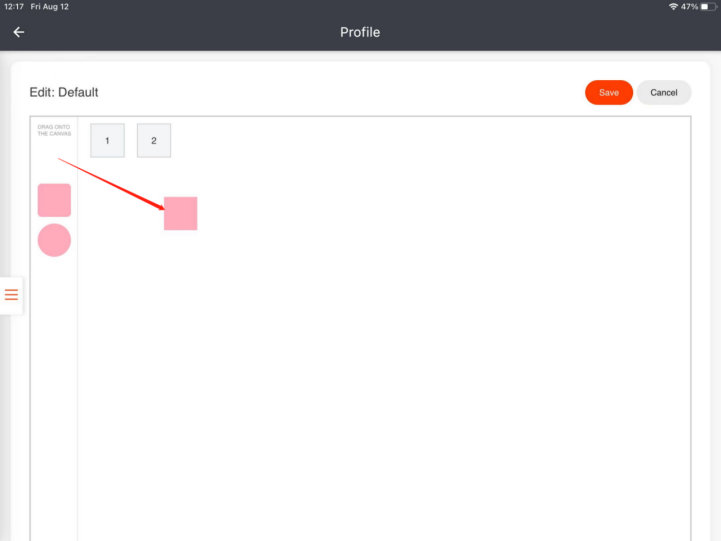
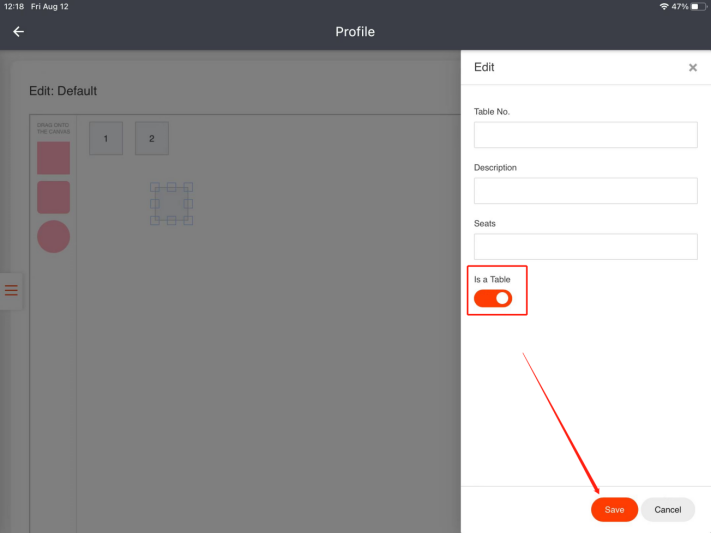
- Drag the shapes on the left onto the canvas on the right.
- Enter the table number, which cannot be duplicated.
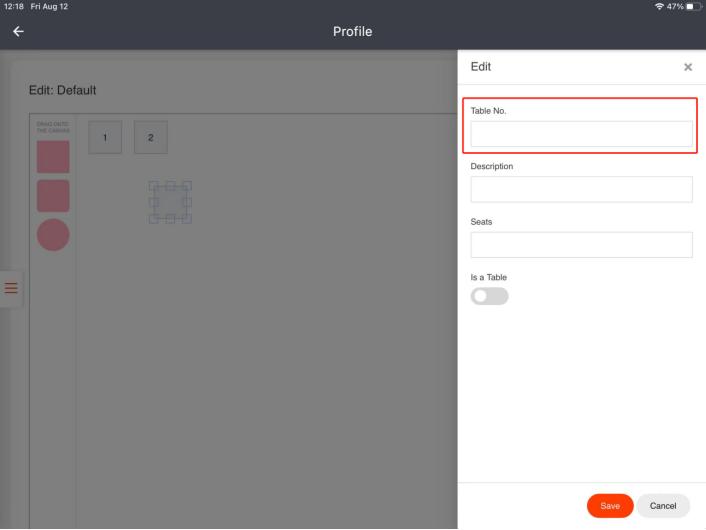
- Enter its description and seats.
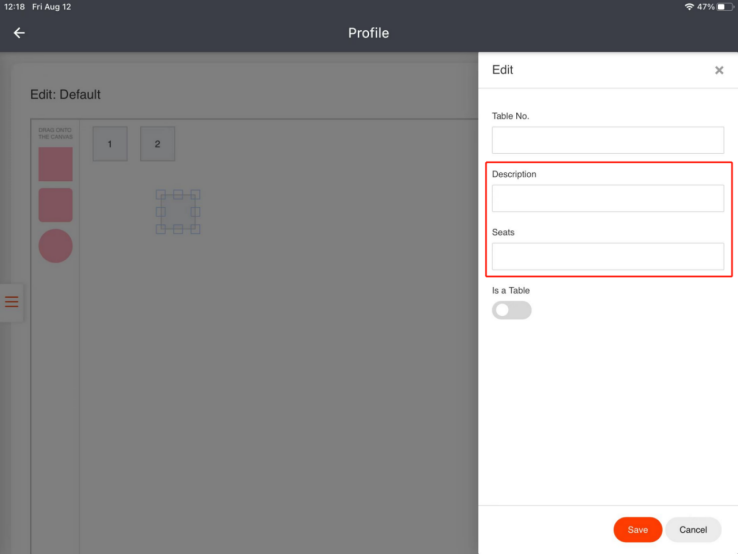
- Turn this button on to activate it as a table and then save it.
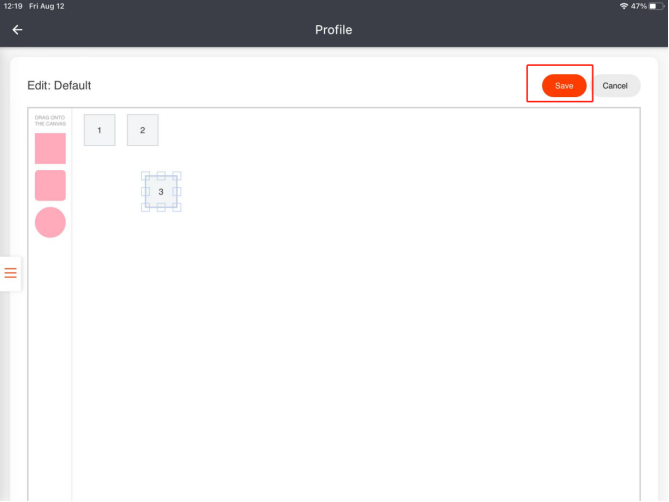
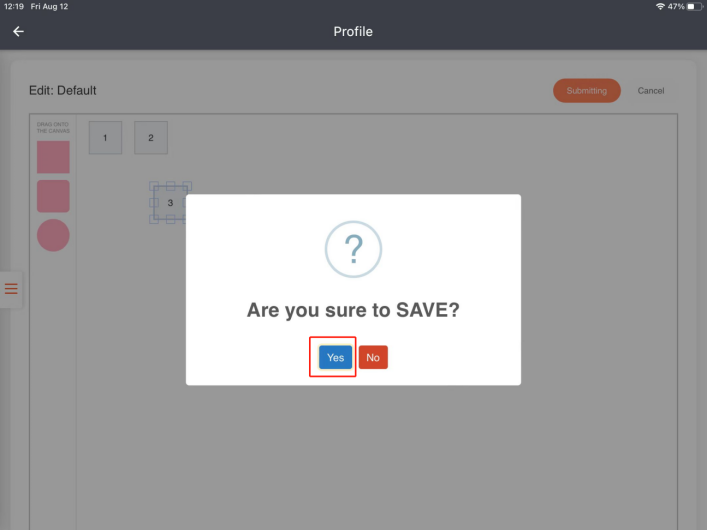
- Click on “Save” and then click on “Yes” to save.
What’s Next: Make Your Menu