
Before we start, please log in with the supervisor account.
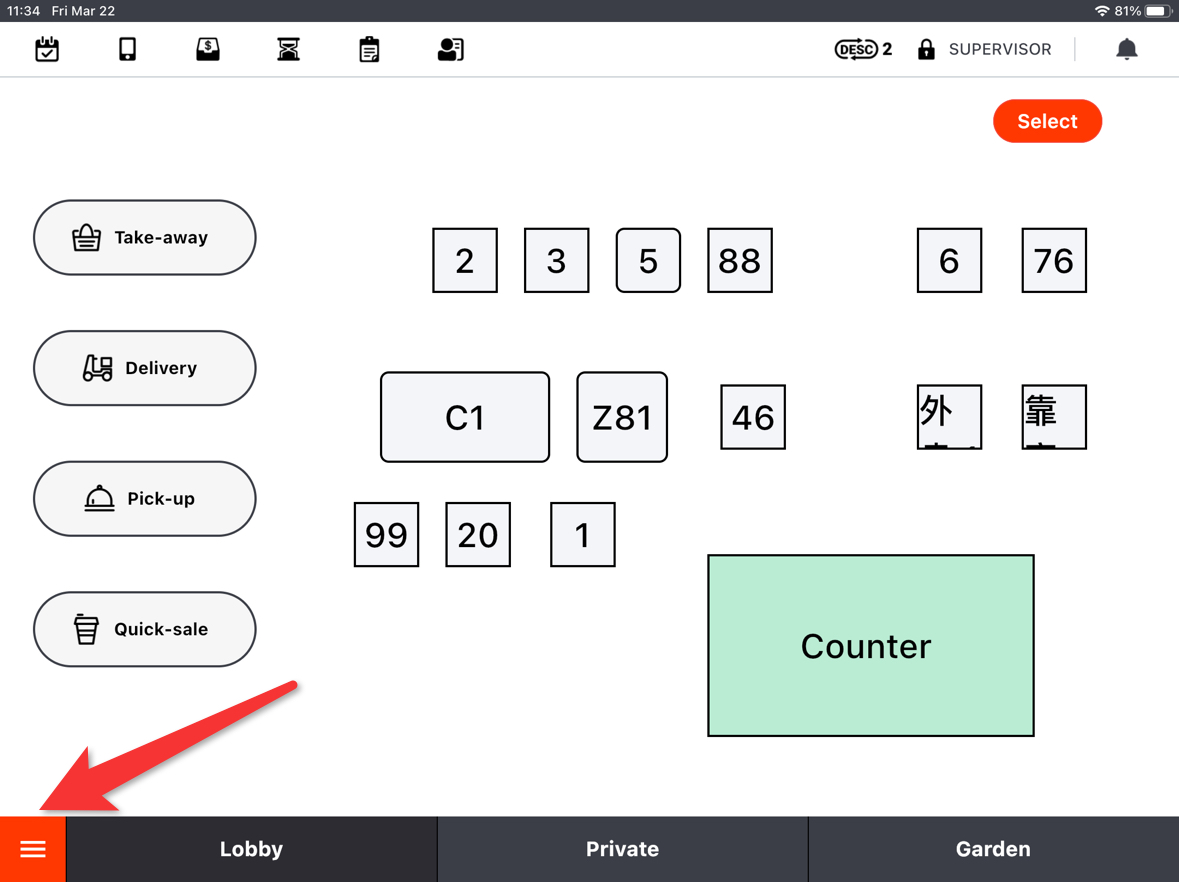
On ZiiPOS homepage, tap the button in the lower left corner.
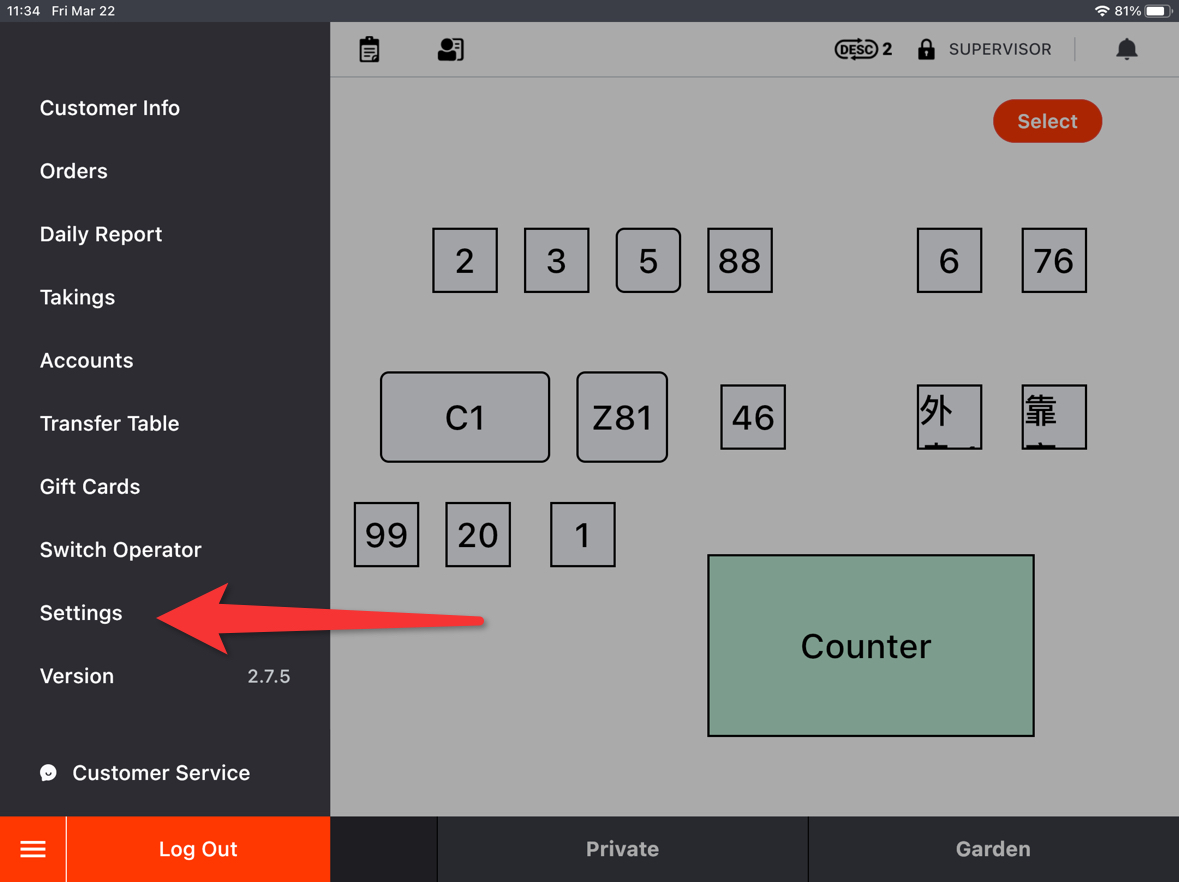
Go to “Settings”.
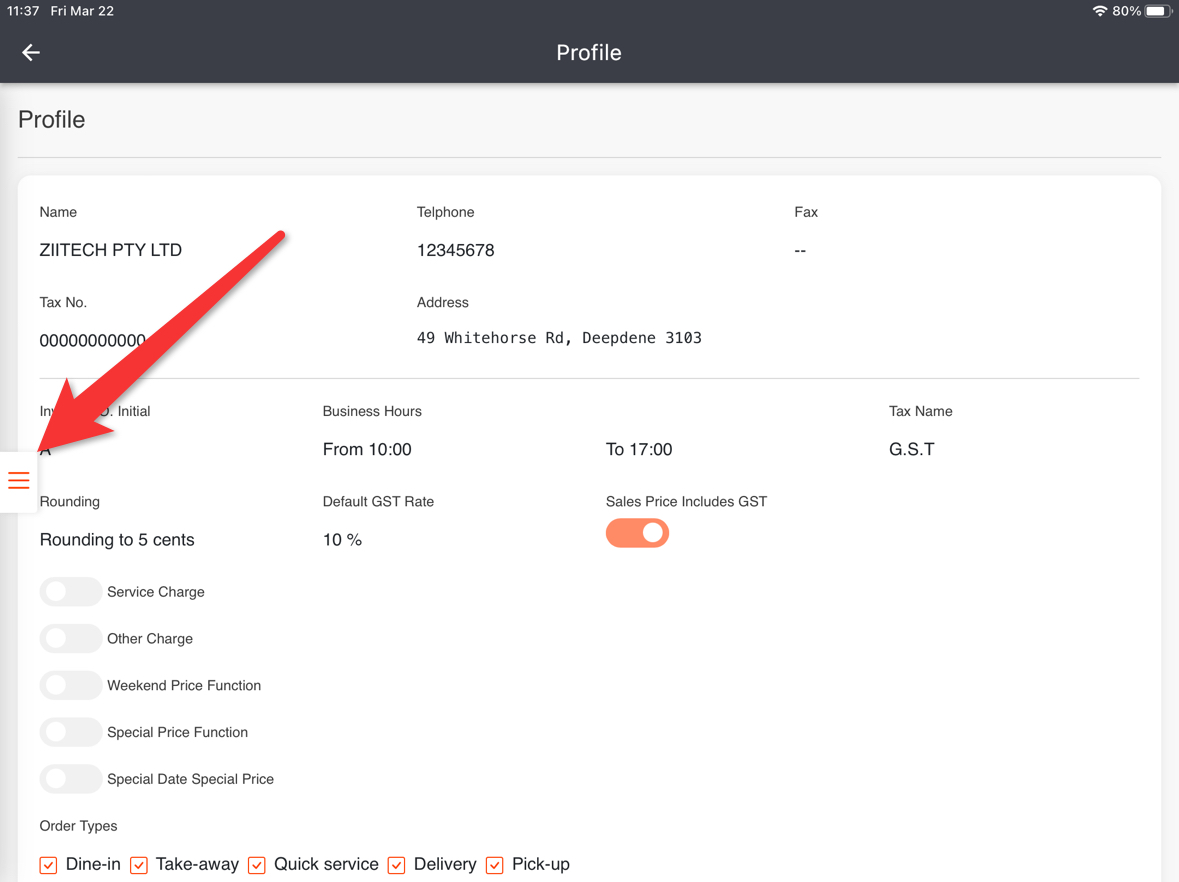
Tap the button on the left.
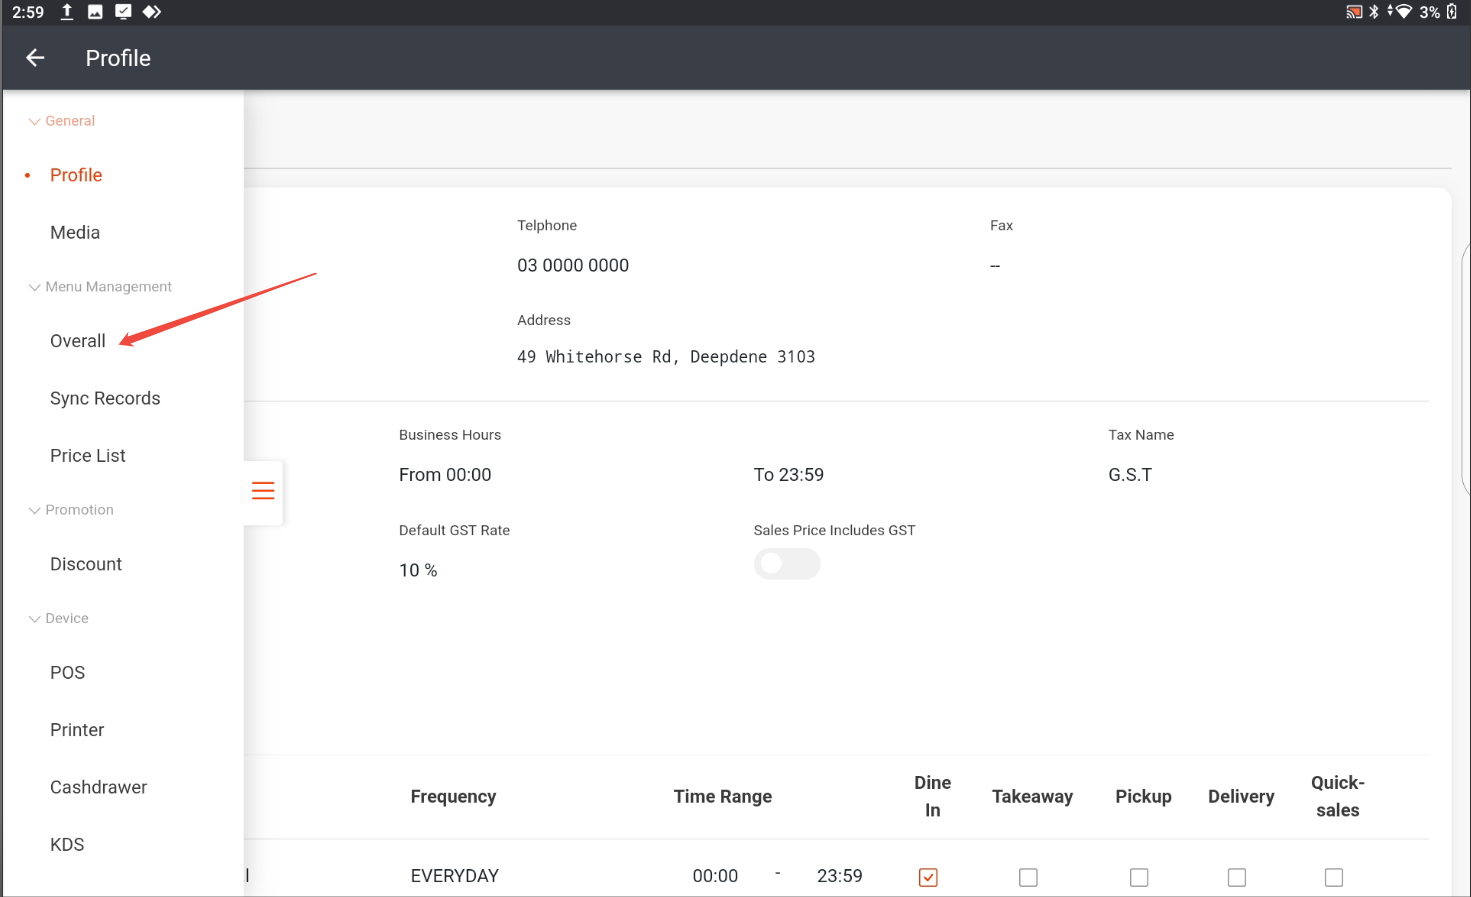
Click “Overall”.
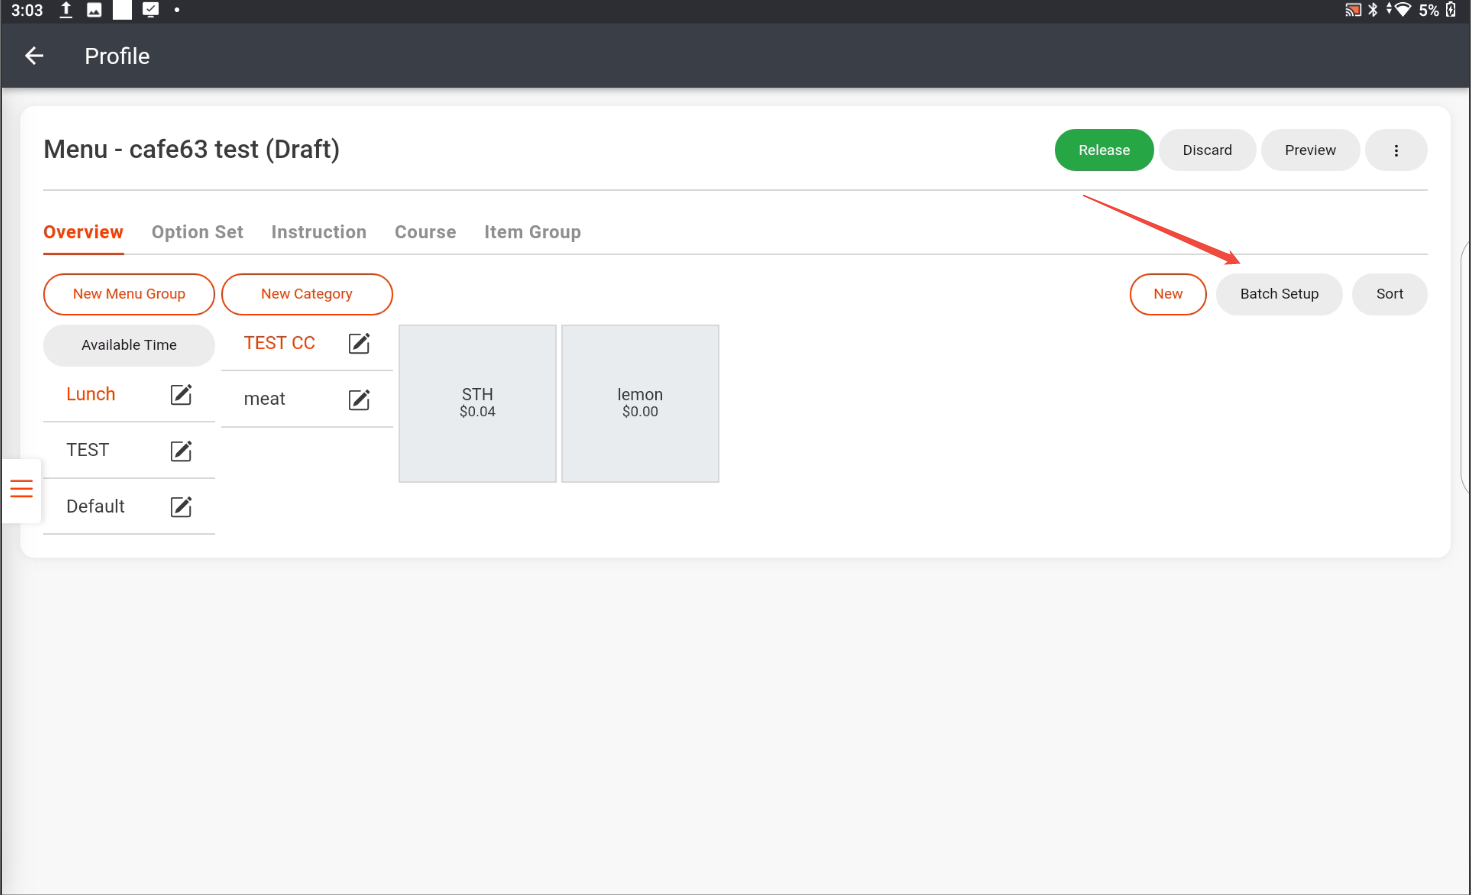
Click “Batch Setup”.
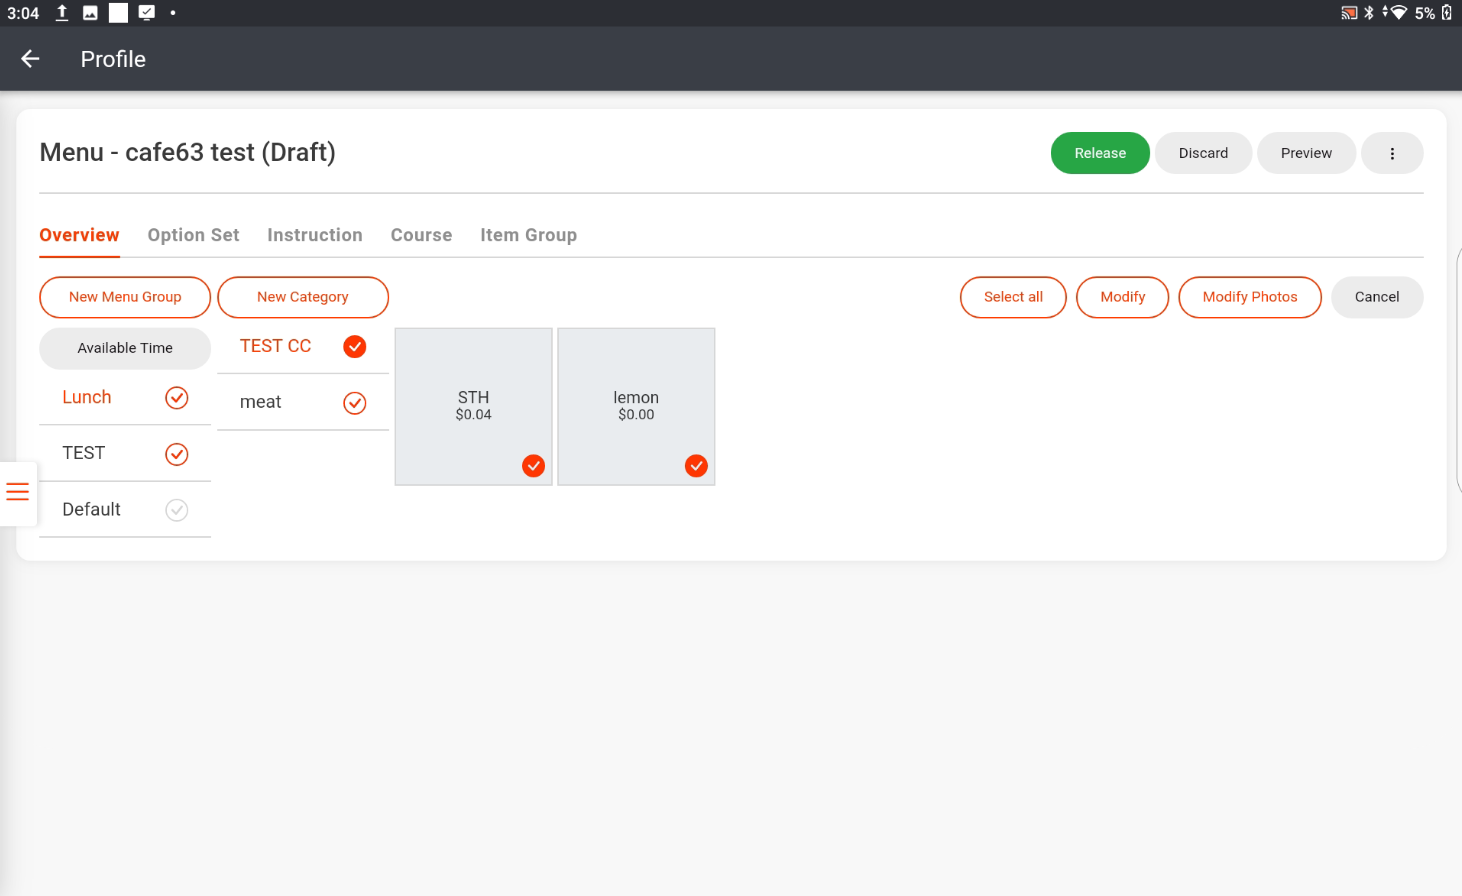
Select the item by ticking the menu groups, categories, or items.
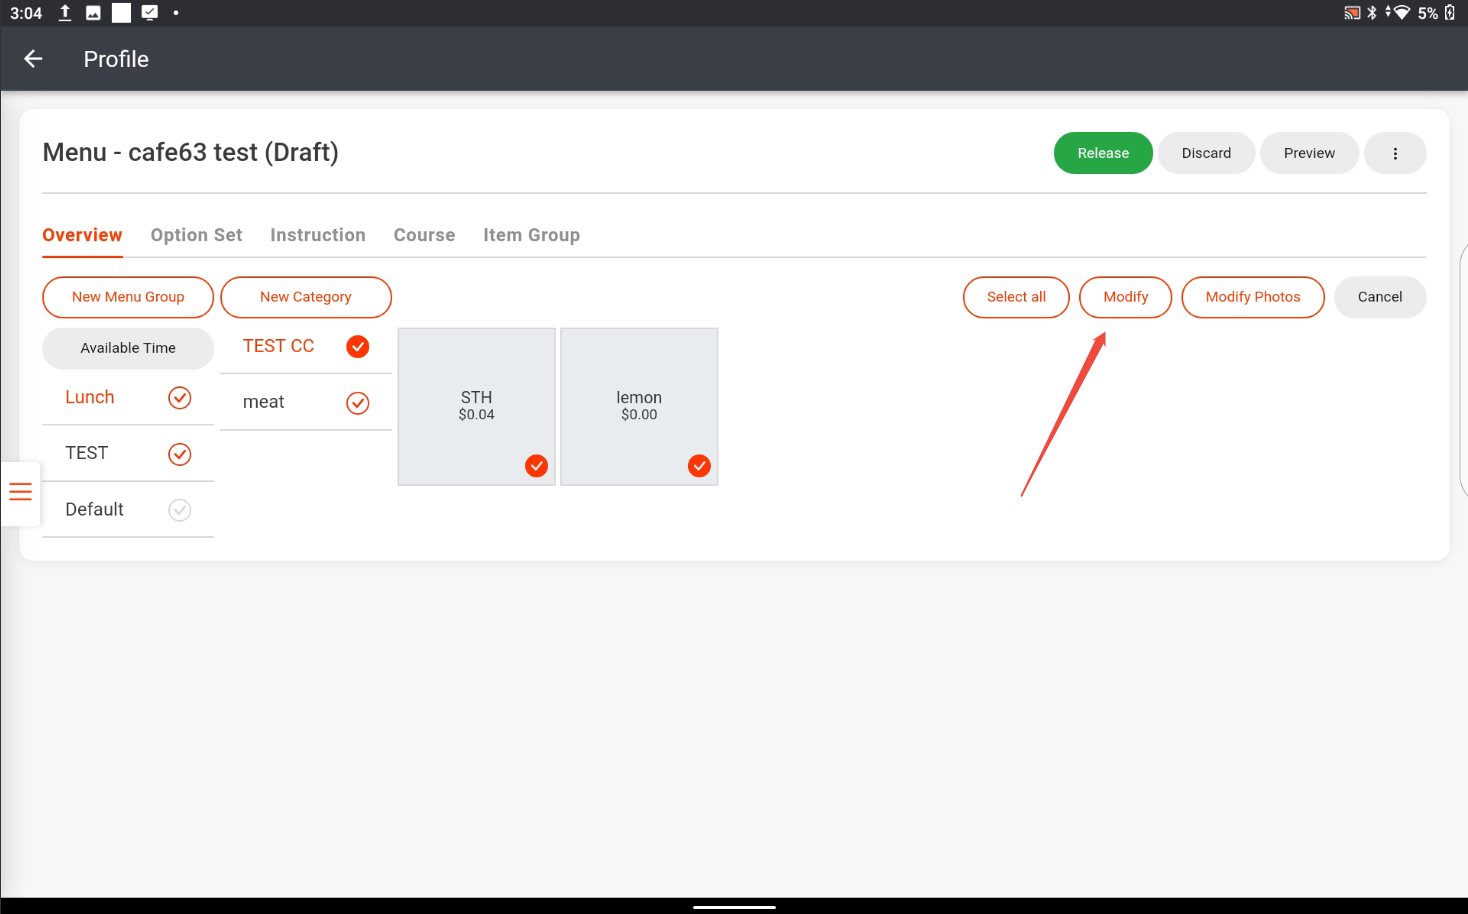
Click “Modify”.
Tick “Change Kitchen Screen” and choose the screen as needed.
Click “Save” and “Yes” to save.
After being saved, it won’t take effective on ZiiPOS directly. Please finish all modifications first, then release the menu. You can refer to Cloud Menu–How to Release a Menu – Zii Help Center (ziicloud.com) to check the process of releasing a menu.