
With the help of “Option Set”, you can make your menu more flexible.
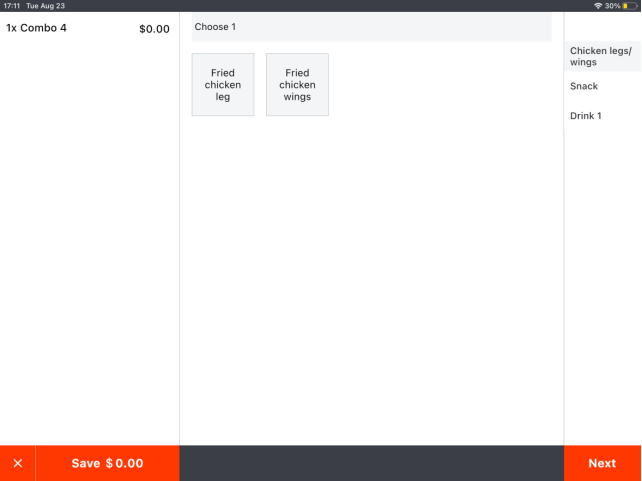
There is the example of the item with option set on POS.
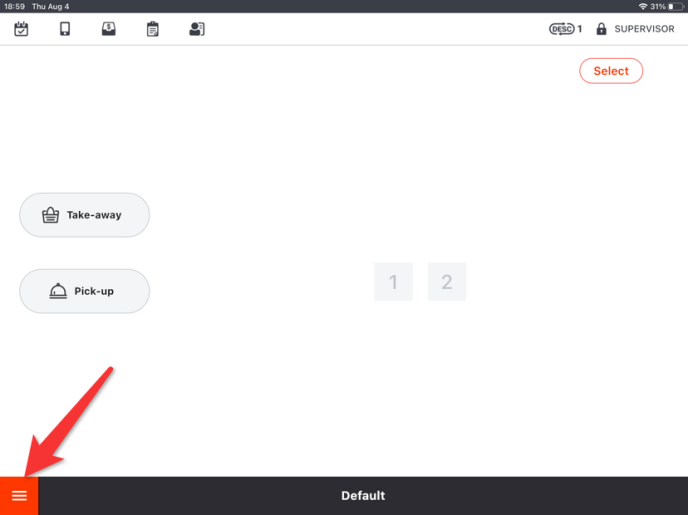
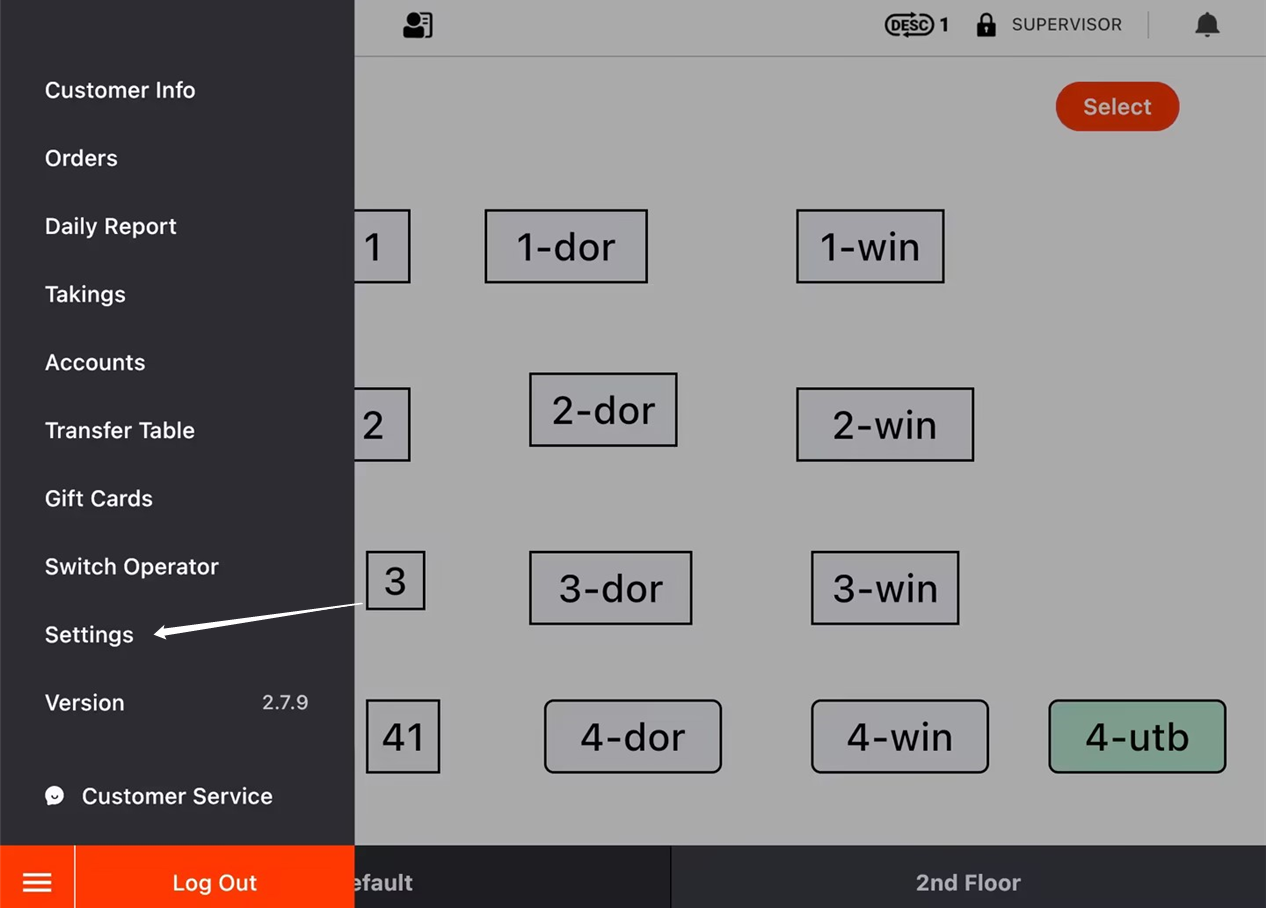
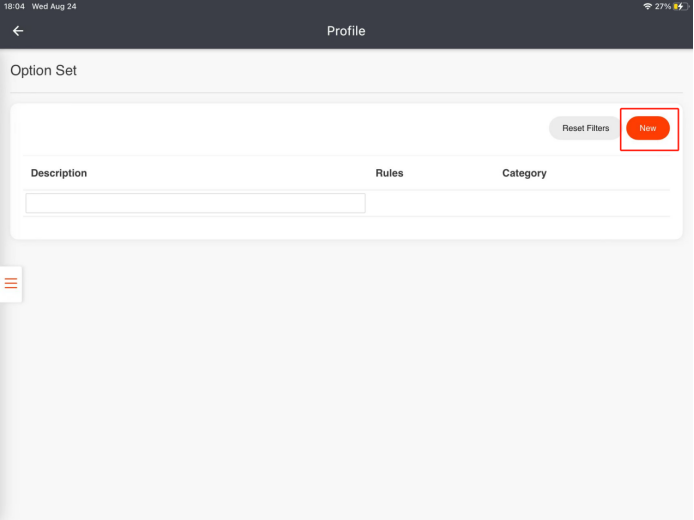
Go to “Settings” to modify option sets.
- Click on the “toolbar button” in the lower left corner.
- Go to “Settings”.
How to Create an Option Set
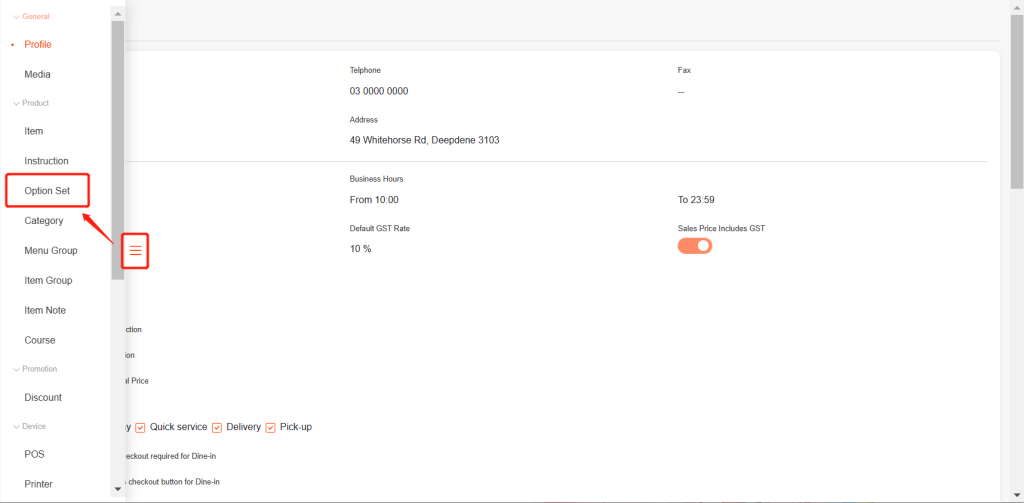
- Click on “Option Set”.
- Click on “New” in the top left corner.
- Set a description.
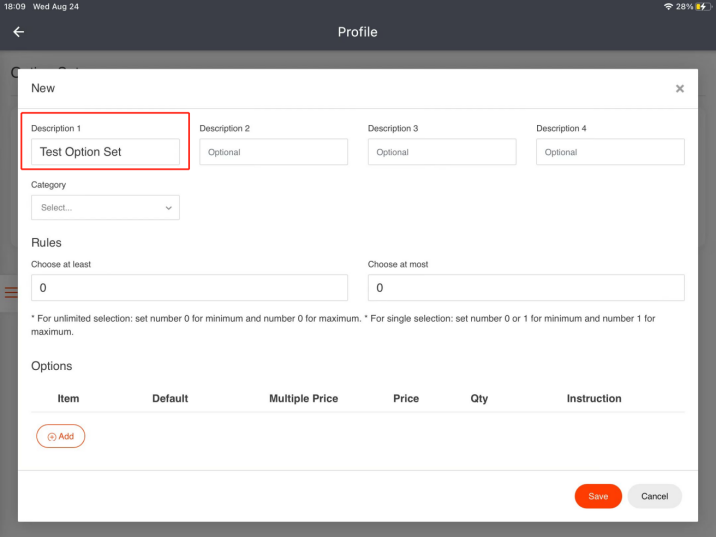
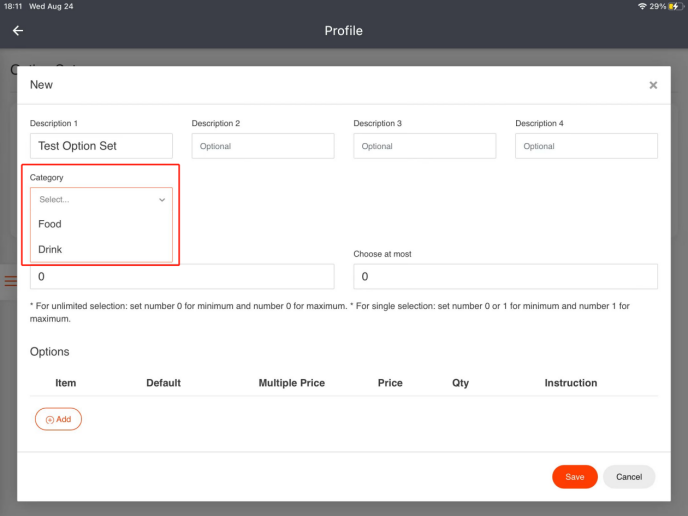
- Select a category to enable items belonging to it to use this option set.
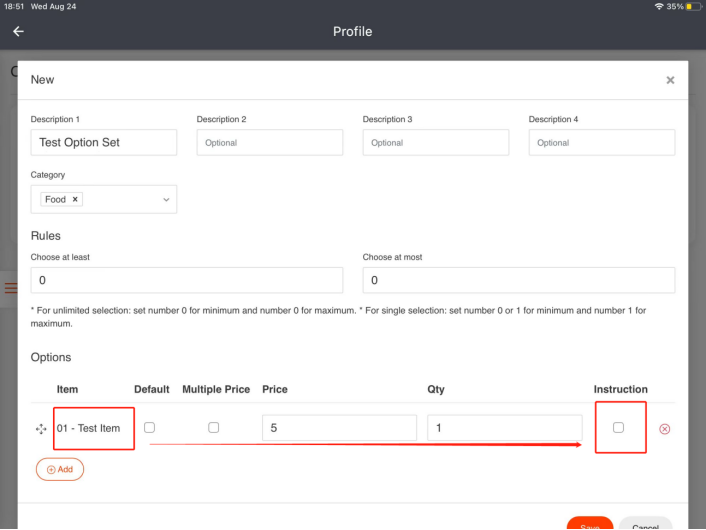
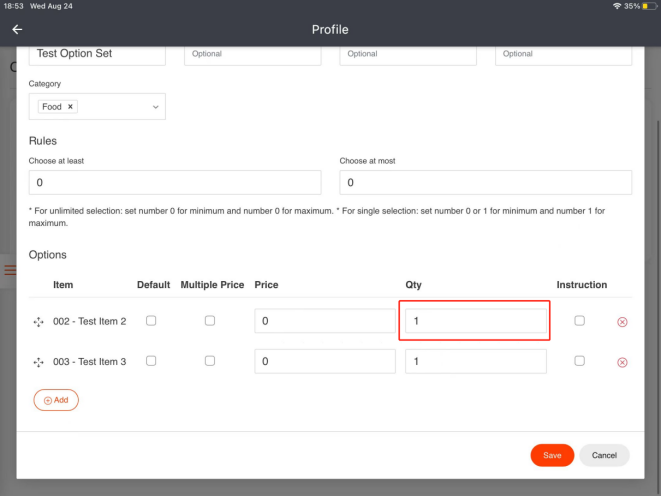
- Click on “Add” to select items or instructions into the option set.
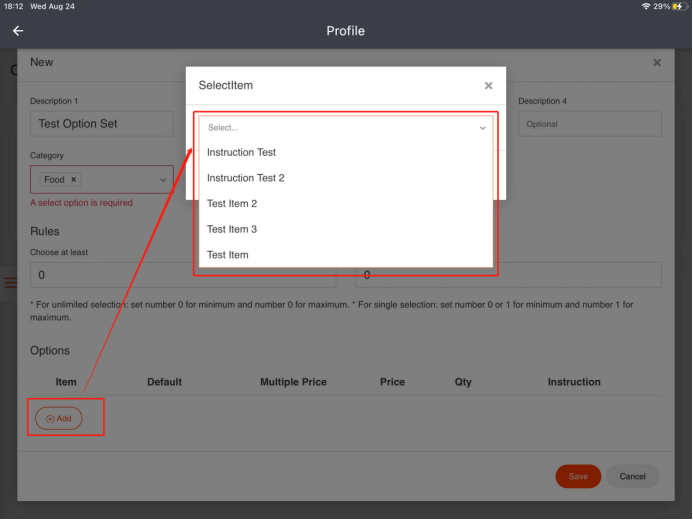
If an instruction is selected, the box of “Instruction” will be default checked, and it will be printed with a smaller font.
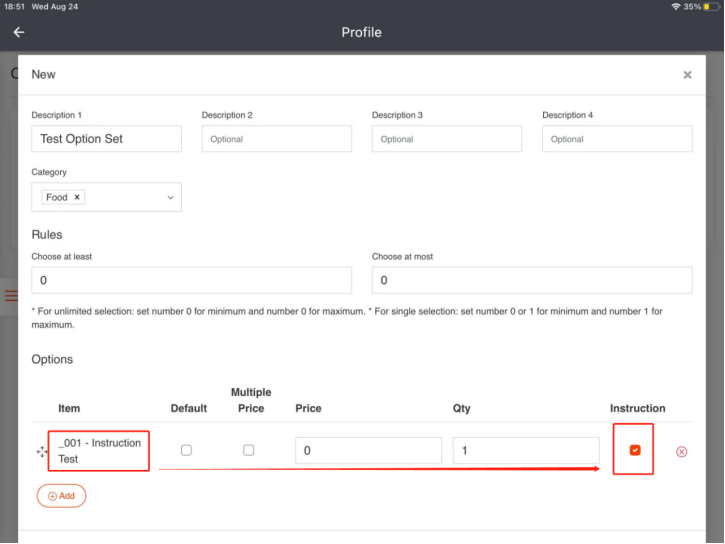
If an item is selected, it will be unchecked. You could decide to check the “Instruction” box or not.
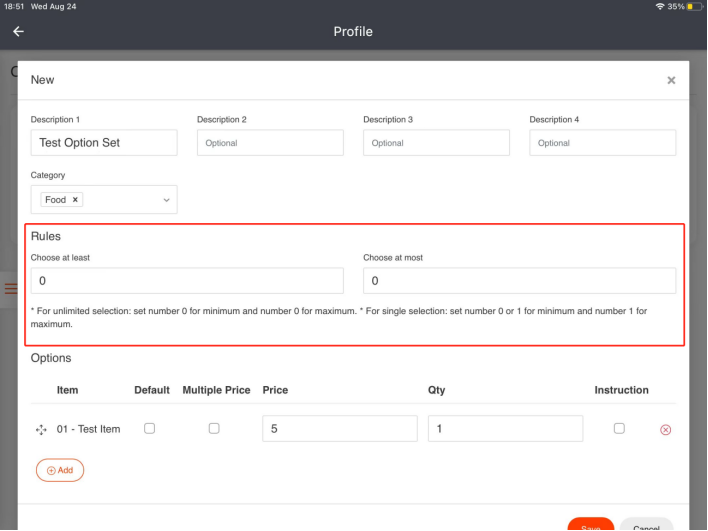
- You could set a rule for choosing if you want.
- By checking the box of “default”, you can set the item or instruction as the default selection once this option set is chosen. (Optional)
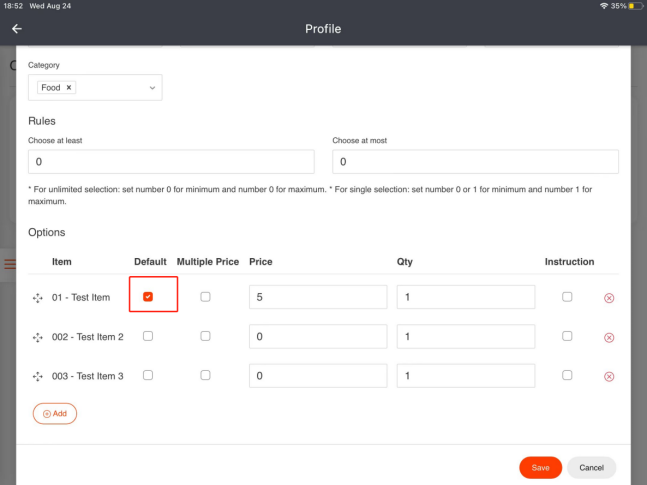
- You can enter a number as the default quantity when the it is selected. (Optional)
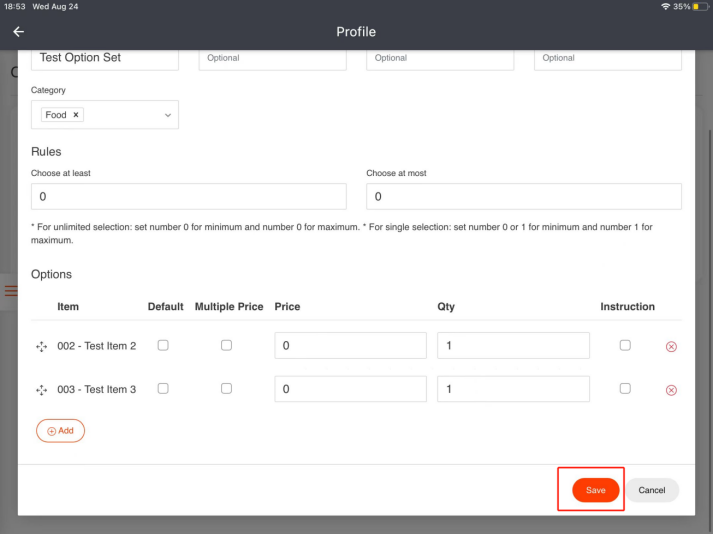
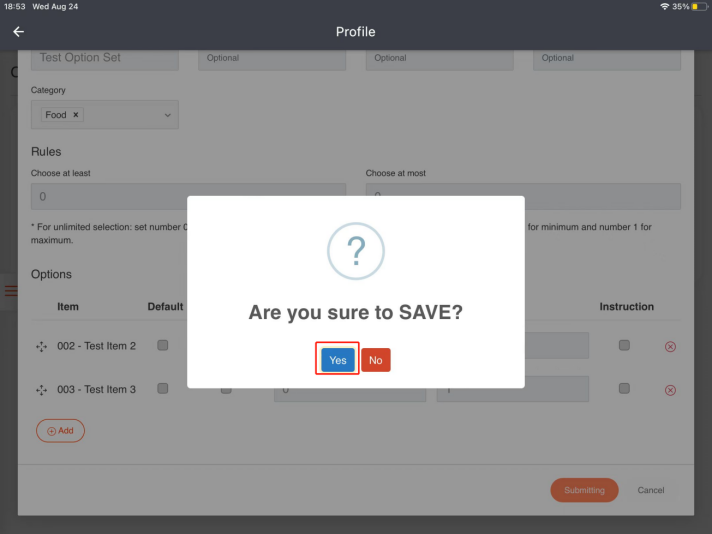
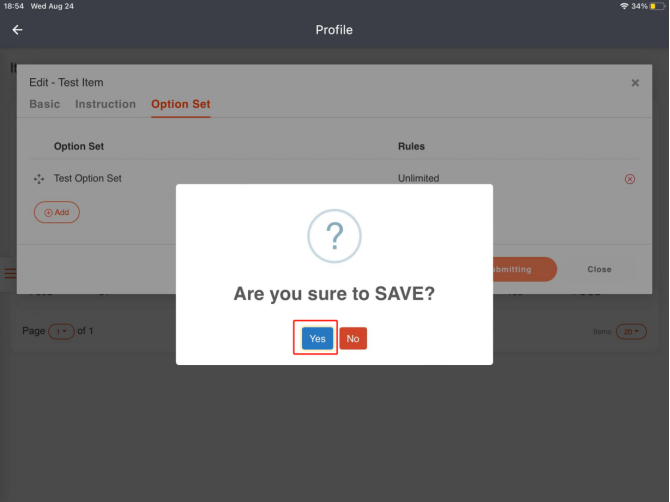
- Click on “Save” and click on “Yes” to save.
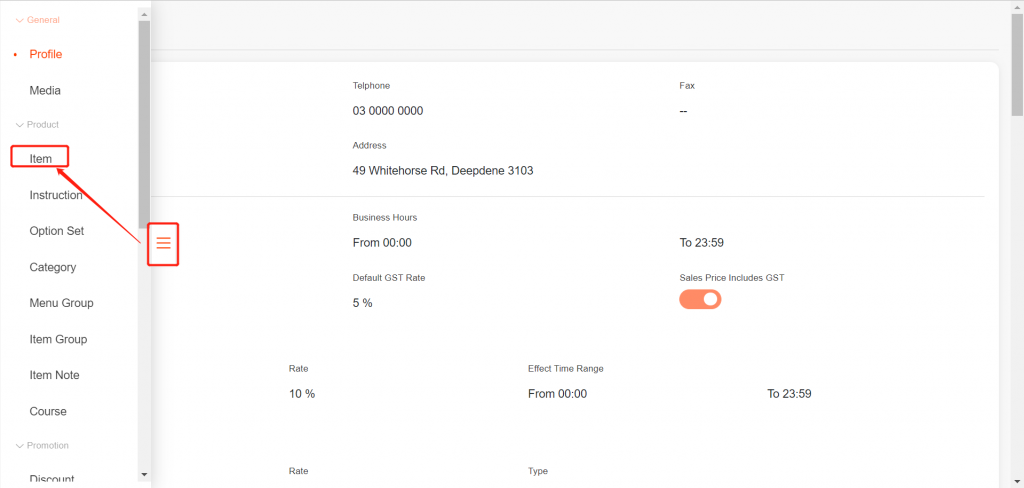
Then you could go to the item to apply this option set. An option set can be applied to an item only if the “Basic” part of the item is done and saved.
How to Assign Option Sets to an Item
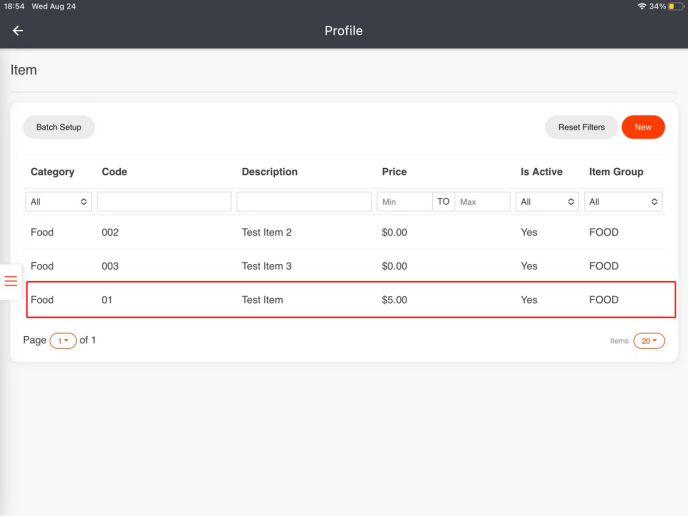
- Click on “Item”.
- Select the item you need by clicking on it.
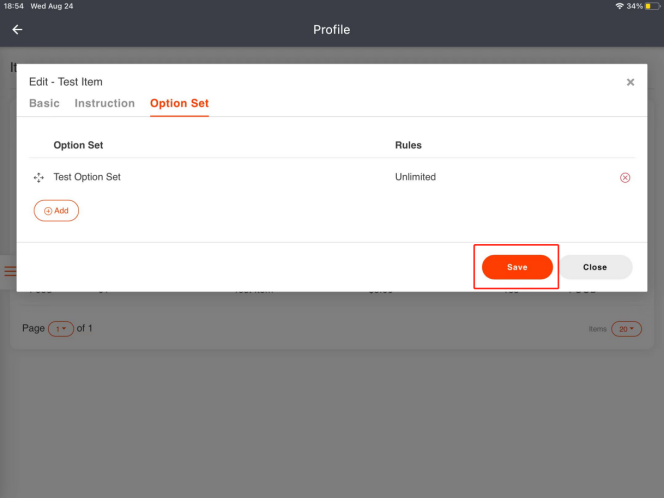
- Select “Option Set”.
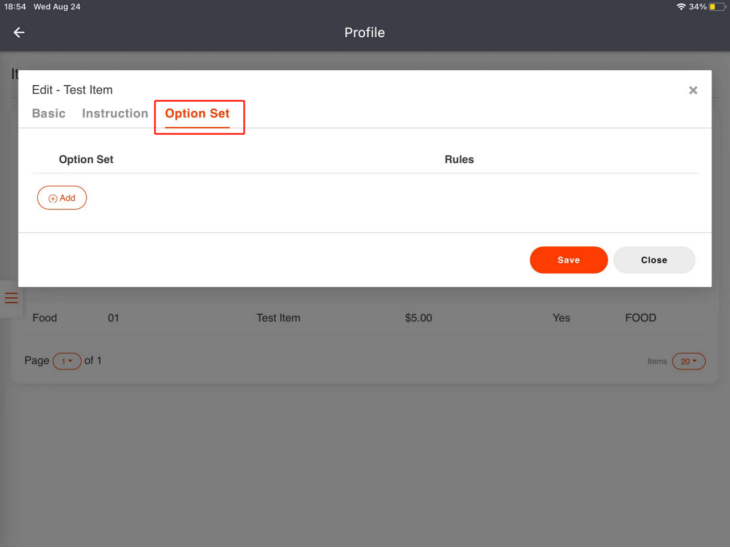
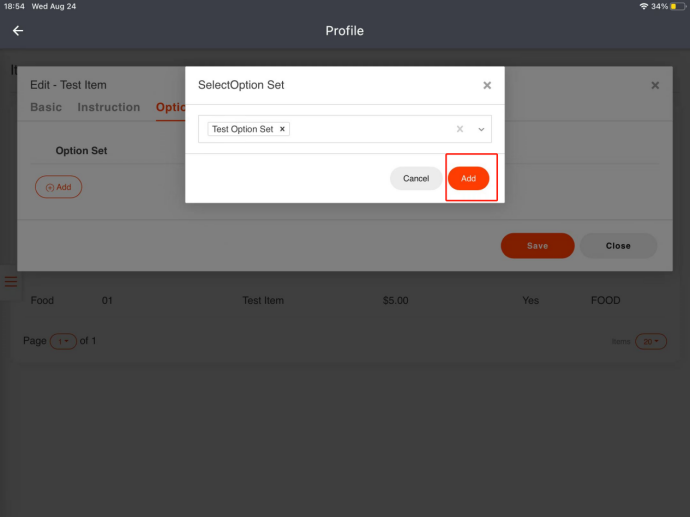
- Click on “Add” to select the option set you created before.
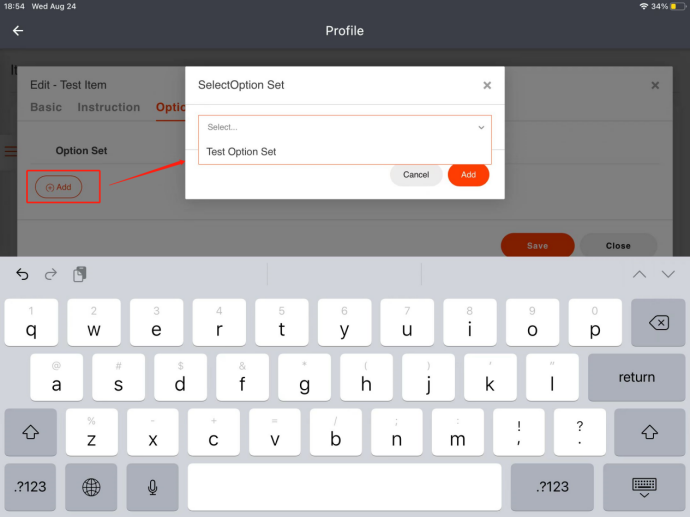
- Click on “Add”.
- Click on “Save” and click on “Yes” to save.
This is how you set an option set and how to apply it to items.