
We have set a printer on ZiiPOS in advance, and it is normally connected via network, so you need to change its IP address. And you can add more printers if you need. The rest steps in this chapter are based on Printer TP 809.
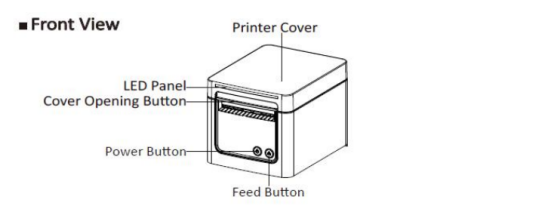
Here is a brief view of TP 809.
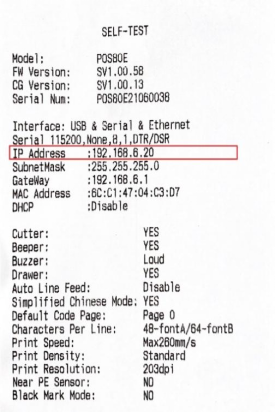
- Go to your TP809 printer and then press on the “Power Button” to power it off.
- Press the “Power Button” and the “Feed Button” at the same time for 5 seconds to get a “SELF-TEST” page.
- On the “SELF-TEST” page you will see an “IP Address”.
Please go to ZiiPOS to process.
How to Change Printer Settings
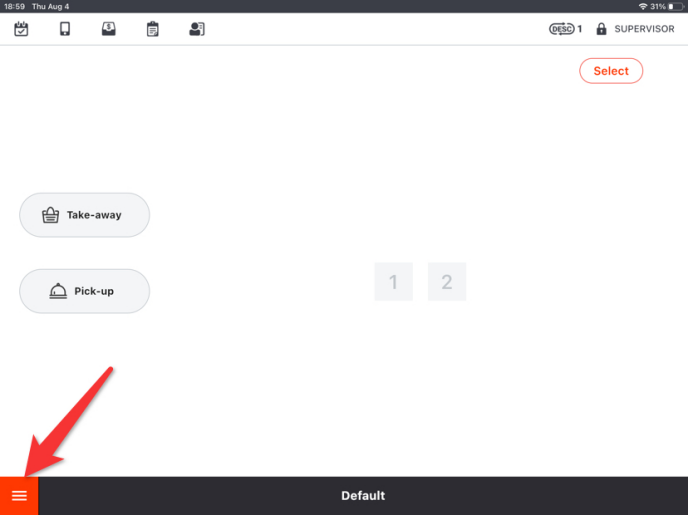
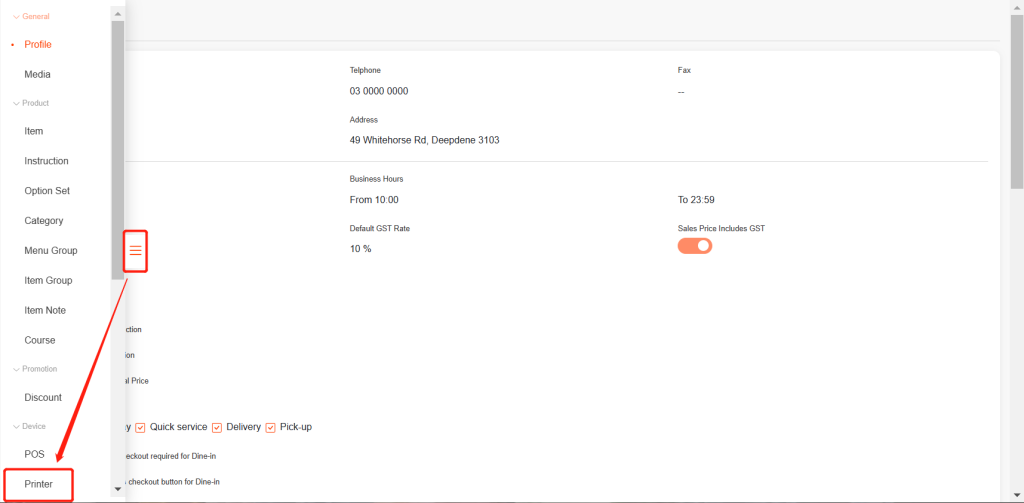
- Click on the “toolbar button” in the lower left corner.
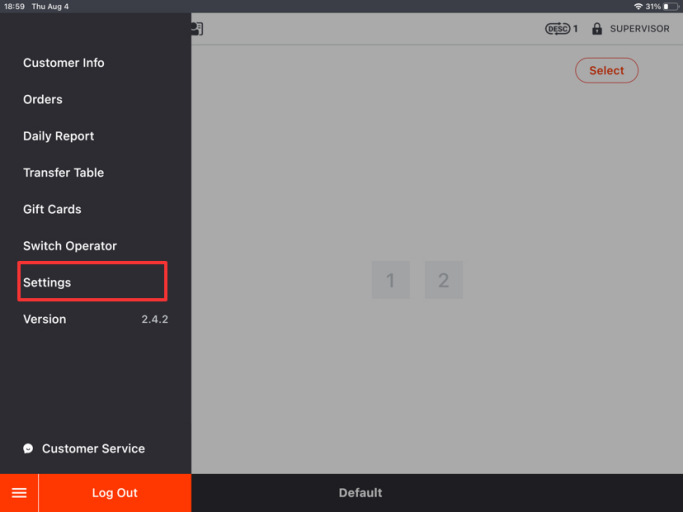
- Click on “Settings” in the toolbar.
- Click on the button on the left and go to “Printer”.
- You can see a printer named TP809 displayed in “Printer Devices”.
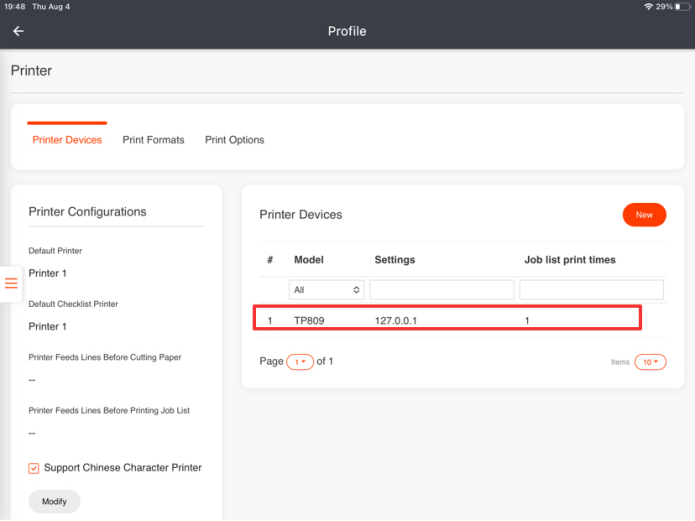
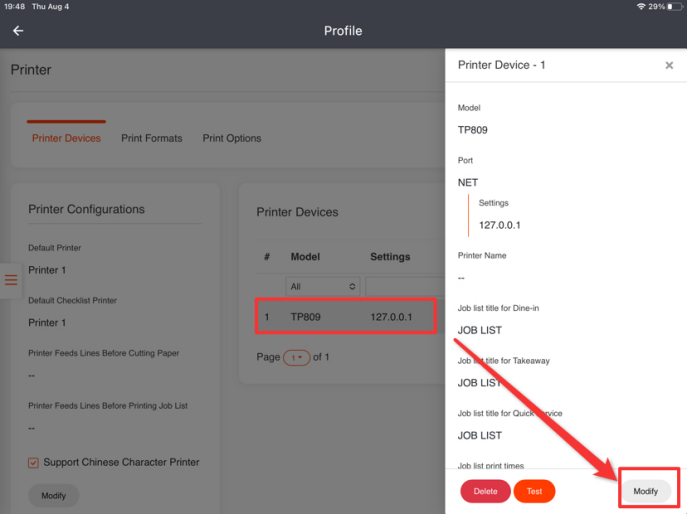
- Click on this printer and then click on “Modify”.
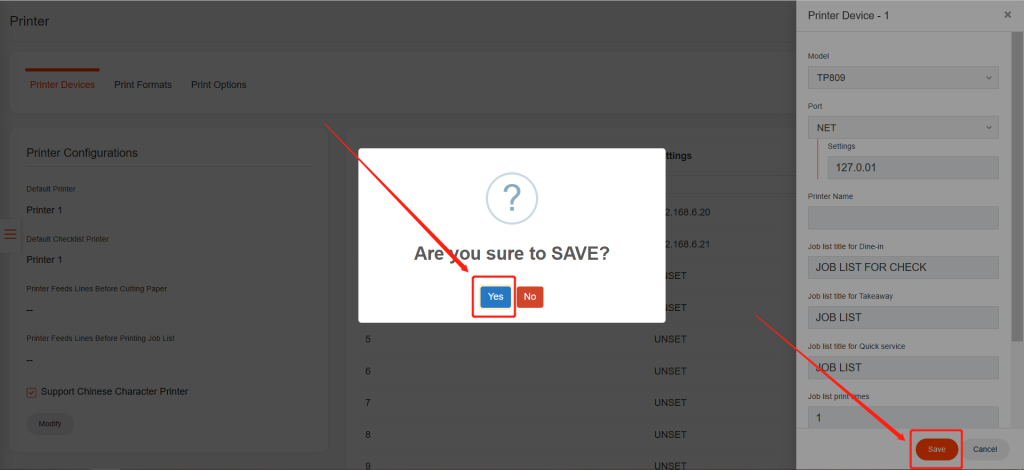
- Click in the blank under “Settings” and enter the IP address that you found on the “SLEF-TEST” page.
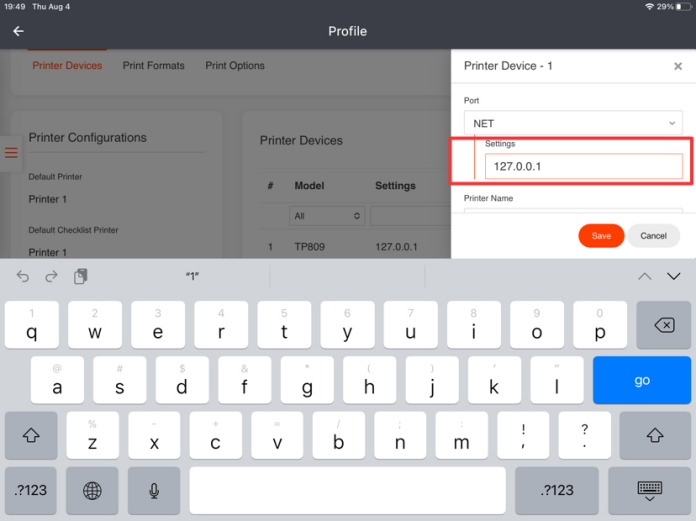
- Click on “Save” and then click on “Yes” to save.
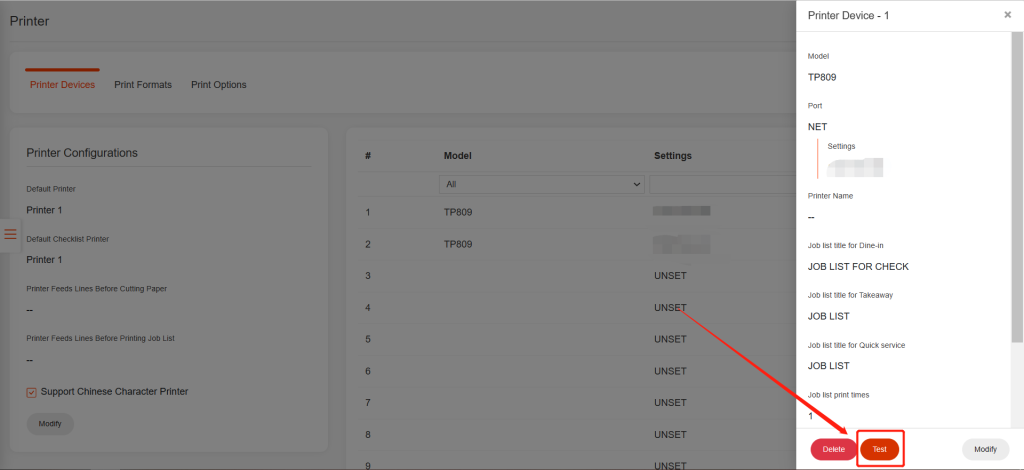
- Click on “Test” to see if your printer is connected well. A self-test page should come out if it is connected well.
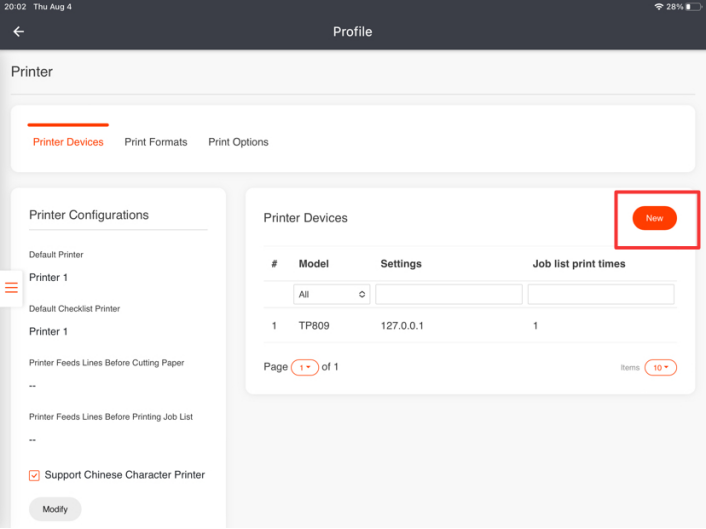
How to Add New Printers
You can add more printers if you need. You can skip this step if you don’t need to add other printers now.
- Click on “New” in the upper right corner at the “Printer Devices” page.
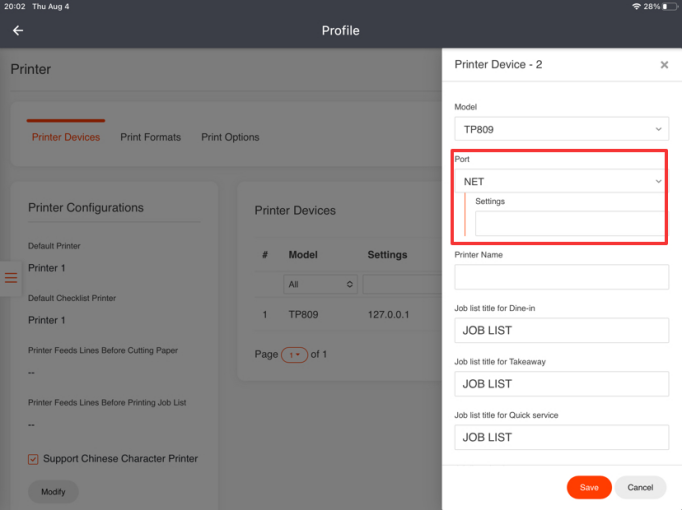
- Select a printer model, which usually is TP809 or Built-in.
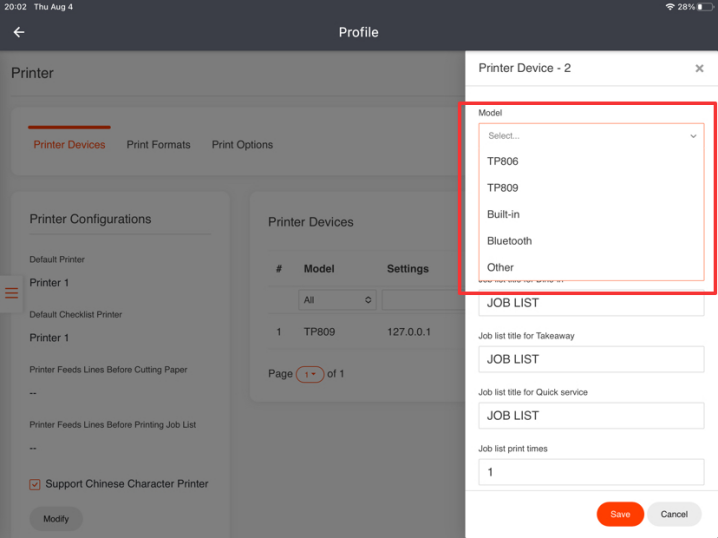
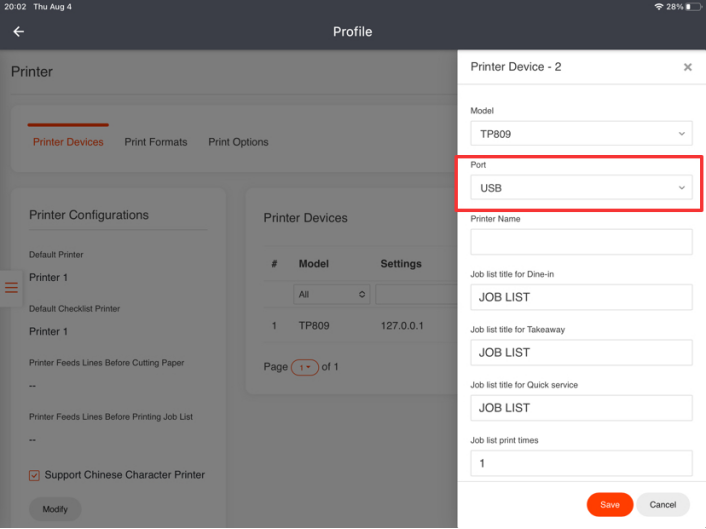
- Select a port. There are two kinds of port: USB and NET. If “NET” is chosen, then an IP address is necessary. You can go to the printer and then print a “SELF-TEST” page as the steps mentioned before.
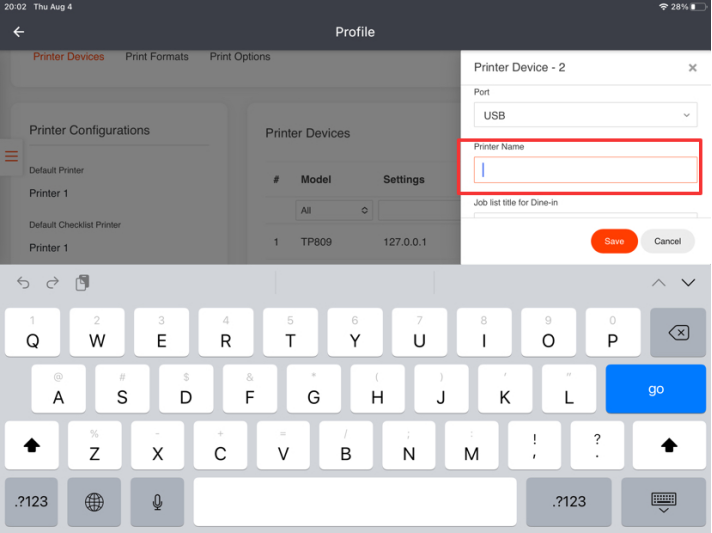
- Set a name for the printer to distinguish it from other printers.
- Click on “Save” and then click on “Yes” to save.

What’s Next: Set up Dining Modes